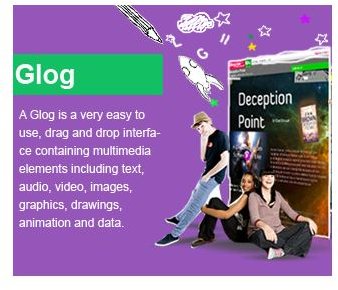
Glogster EDU is one the best, free, education technology websites for teachers to use with their students. It allows you to create interactive posters that include text, video, hyperlinks, and images. This article will explain how to get started using Glogster EDU in the classroom.
Registering
There are two versions of Glogster: the standard version and the EDU version. Teachers should register for the EDU version, and here’s why. You can protect the privacy of your students’ work, have control over the content being used, and get student logins to see what is being created and edited by students.
To register for Glogster EDU, click here , and fill in the details requested. After you do this, Glogster will send you a confirmation email that contains a link to activate your account. After you have activated it, you will be taken to the teacher dashboard where you can add up to 200 student accounts. Glogster will send you another email that has a list of your student accounts and passwords. Keep this safe, or print it out. You will need it for the first time that the students login.
Creating your first Glog
Login to the Glogster EDU site with your teacher account to create a sample glog. There is a large pink button in the dashboard area that says “create a new glog”, so click on that to get started.
Step 1: Prepare your workspace. Your first Glog will have some sample elements already on the page. Delete the ones you do not want by clicking on the image and clicking on the pink trash can. This deletes any element on your glog. If there is something here you do want, drag it around to where you would like it on your page, and resize it by clicking and dragging the corners.
Step 2: The Magnet Tool. On the left hand side of your page you will see a magnet tool. You can slide this up and down the left hand side of your page by clicking and dragging, or hide it by clicking the pink arrow. The magnet tool is what you need to edit your glog. It allows you to choose the images, text and videos to include in your glog.
Step 3: Create your glog. Each of the buttons on the magnetic tool allow you to customize elements within your poster. For instance, if you click ‘wall’, you can pick your background image from a gallery of preloaded images, add a picture of your own, or link to a background image on the web. If you click ‘image’, ‘video’, or ‘sound’, you have the similar options, but for images, videos and sound. Choosing ’text’ lets you select from a huge number of decorative text boxes, and selecting the ‘graphics’ button will give you access to a choice of graphical elements to include. Just click on the element you want and it will appear on your page.
Step 4: Editing your glog. Whether it is a picture, text, graphic, sound or video, all you need do to edit it is click on the item. You will see a small menu appear above the object. Your options here are to edit, (change colors, fonts, and add hyperlinks), bring forward, set behind, clone, undo changes, and delete. If you hover over a button, you get a popup explanation of what it does.
Step 5: Save and publish. Preview your work by clicking the preview button. Once you are happy with that you are ready to save and publish, so click the save and publish button! From here you name your glog and assign it a category. Choose either finished or unfinished. If it is unfinished, only the teacher and that student can view it. If it is finished, all students in your class can view it. Once you click save you get some sharing options and an embed code for a website or blog. Only teachers can make glogs public for all to view. You do this by clicking on the student account, clicking on the glog you want to make public, and selecting ‘public for all’ option at the bottom of the page. By default, all Glogster EDU glogs are private.
Use in the Classroom
Glogster is a great technology tool to use in the classroom because it is so flexible. You can use it for biographies, time lines, math formulas, instructional writing, experiment results, spelling plural verbs, country or state profiles, and much more. Many EFL teachers love it for its visual impact, and teachers from elementary all the way up to high school can find a use for this classroom technology. Basically, any poster you can do on paper, can be done better as a glog. You can share them on interactive whiteboards , on LCD projectors, or embed them in class websites or student blogs. Glogs can be worked on in school and out of school. Best of all, students love to create glogs. When you integrate technology into an area of education where it is not traditionally used, it instantly becomes a great motivator for students. So, why not sign up today and see what everyone else is talking about! Glogster EDU is free, so you have nothing to lose.
This post is part of the series: Technology Tools for Teachers
The articles in this series reveal some of the best technology tools for teachers that are used in the classroom today.