This easy watercolor lesson will produce a frosted window of a winter scene using watercolor techniques for a sky, tree branches and window ledge. Grades 4 to 8 will enjoy this easy winter watercolor project.
Materials and Procedures to Create a Winter Wonderland
We start by making a winter background, then learn how to create the trees, a ledge and special effects for frosted glass on the window overlooking the scene. Ideal for grades four through eight, but the lesson can be adapted to the older grades by creating more difficult trees on the cool sky.
Materials:
- Watercolor paints
- Watercolor paper (Strathmore 300 - 140#)
- Watercolor brush (Size #6 or #4)
- Masking tape
- Plastic wrap
- Glitter glue
Procedure:
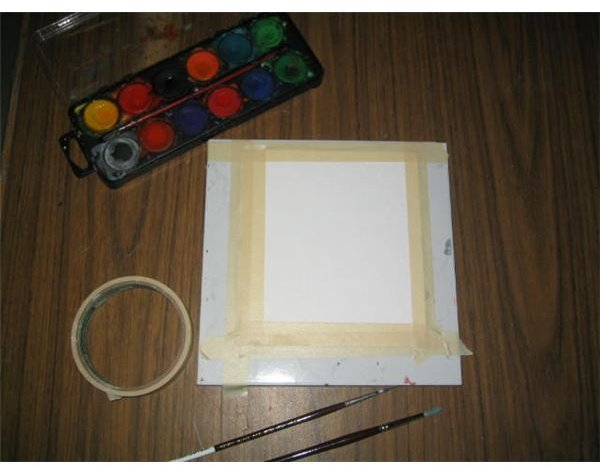
- Tape the watercolor paper (approx. 4 by 6 inches) on all 4 sides to a board or old tile. Then tape the watercolor paper again on the inner 2 sides (left side and bottom), using the masking tape.
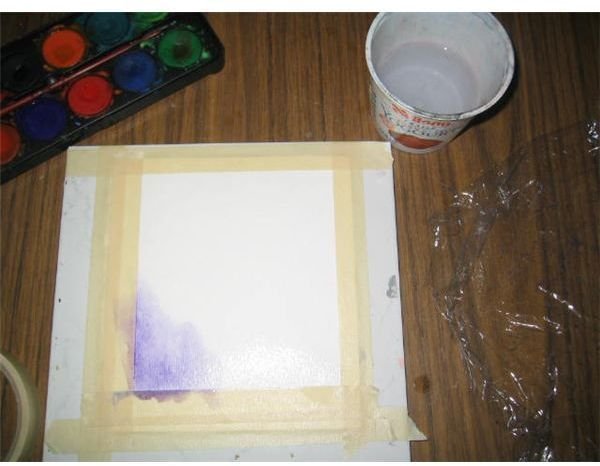
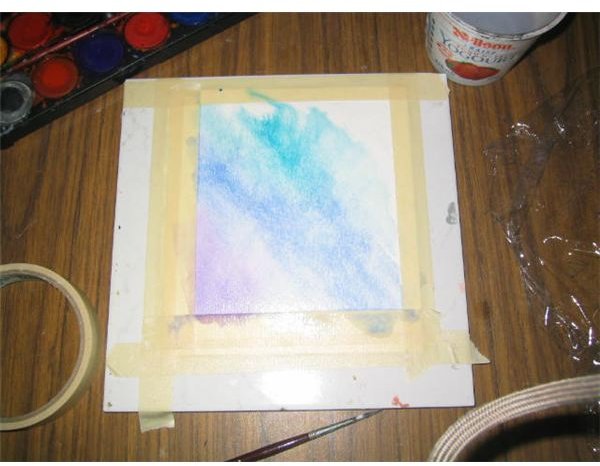
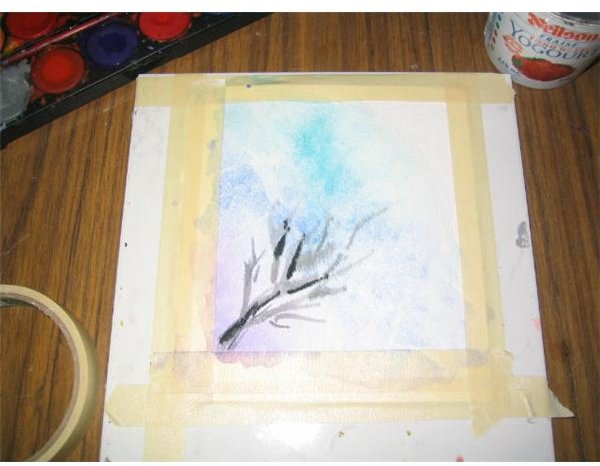
- Wet the entire paper with water. Using a purple, pink, blue or yellow to represent colors of the sky or sunset, paint a color in the lower left color. Paint another color touching the first color. Paint to cover about 2/3 of the paper, moving diagonally to the upper right hand corner.
- Quickly place a piece of plastic wrap over the paint and scrunch it. Place another tile or board over top to let plastic dry in place.
Photos of the Steps

4. When paint is dry, remove plastic wrap. Paint in thin black, grey or brown lines, branches of a tree coming also from the lower left corner of the paper, over the sky background.
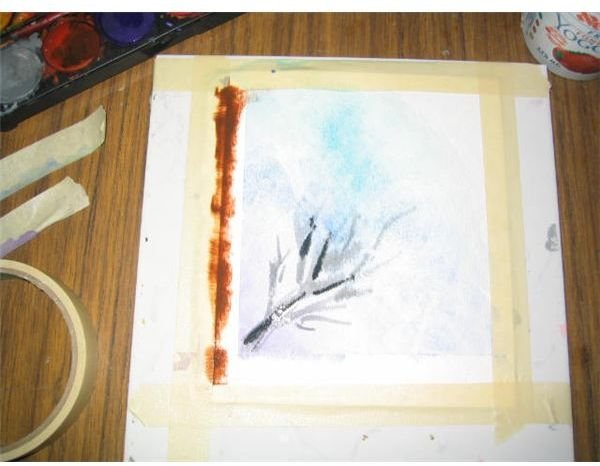
5. Remove the inner layer of masking tape. Wet the left side of the paper where the tape was. Paint a brown color on the left side of the paper. Tip the board so the paint runs. Paint a second color such as black, red or green for a window sill color, touching to the first color. Tip the board to the right so colors mix using the water.
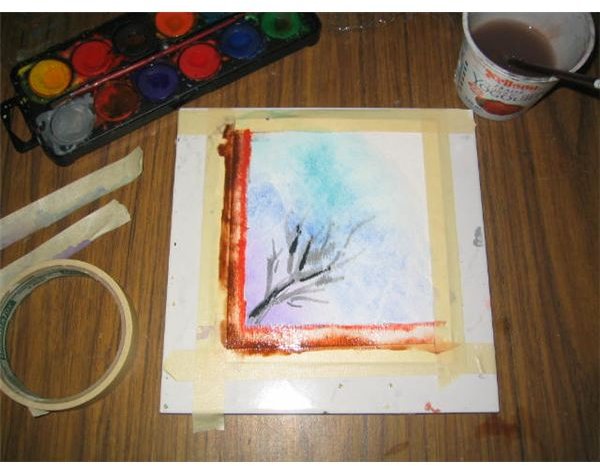
6. Do the same procedure for the bottom of the window sill, using the same 2 colors. Allow the entire paper to dry.
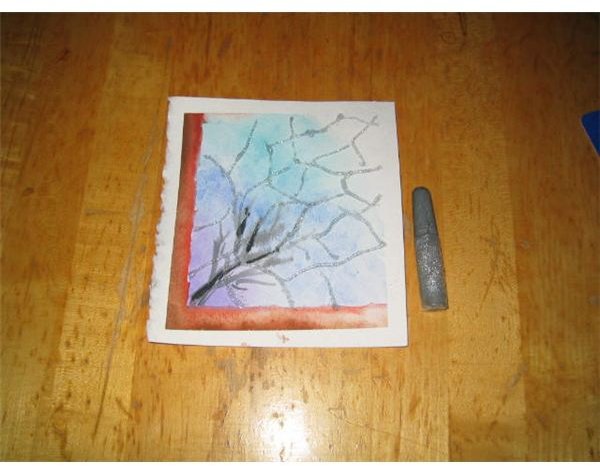
7. When dry, use a small glitter glue bottle or a toothpick to spread silver glitter glue where the plastic wrap has left lines in the window. These lines represent the sparkling frost on the window. You can also smudge white acrylic paint on the bottom window sill to represent snow.
Hints and Tips for the Best Outcome
Students should be reminded to wet all surfaces before painting. If you have a larger brush (#6), use this for the background and a smaller one (#2) for the tree. Wet surfaces quickly as the paper absorbs the water very fast.
Allow one color of blue or purple to touch another so that the water mixes them rather than trying to brush one color overtop of the other. Let the water do the work. Tip the painting so the colors mix. Do not paint the entire background of the window. Only paint about two-thirds of the window.
Do watercolor paintings with the students to demonstrate the steps. Also, show examples of the finished product before beginning so they know what result they are trying to achieve.
Paint the tree branch in a light grey or brown rather than black so it will not draw all the attention in the painting. Have the branches thin out as they are painted to the upper right side of the window. Use a very watery black or add some black to white if there is a white in the paint tray.
Use plastic wrap rather than a plastic bag as it sticks to the painting easier. Remove it quickly and allow surface to dry before painting the tree branch.
Allow the tree to dry before painting the windowsill. Carefully remove the inner tape from the right side and bottom of the paper, but leave on the tape around the 4 edges of the painting. Paint the left side of the windowsill first so the painting can be tipped sideways to let the paint mix together. Then paint the bottom of the windowsill so the painting can be tipped up and down to mix the paint on this ledge.
More Photos of the Steps
A Deeper Understanding of This Technique
Use the watercolor painting lesson to teach about perspective. Objects painted into the foreground such as the tree should be clearer the closer they are to the bottom left side of the window. Objects can be painted on the windowsill but should not be taller than one third or half way up the paper.
Teach about frost forming on windows and the random pattern it creates. You can also teach about the symmetry of snowflakes and crystals which form in nature. You can add glittery snowflakes onto windows for the lower grades. You could stamp white acrylic snowflakes, or paint silvery snowflakes on the window with the upper grades.
Special techniques can be taught for creating effects on watercolor paintings. Sprinkling table salt or placing plastic wrap on the painting, will help create random designs to get the effect of a frosted window. To see the effect of salt on watercolor backgrounds see the article, Watercolor For Easter project . For other watercolor techniques to use in art lesson plans try the Teaching Watercolors article.
Discuss the difference between a transparent and a translucent window glass. Discuss the colors of objects placed on the windowsill. Students can use acrylic paints for colored objects they would like to stand out, and watercolor paints for transparent glass objects on the windowsill. White acrylic can be used to paint snow on the windowsill.
Display the winter watercolor window scenes together in a row so that the windows look like window panes of one large window. You can mount the paintings onto a dark blue or black matt board, or construction paper to help them stand out. Students will enjoy this easy but beautiful watercolor painting lesson of a winter scene.
References
- Classroom experience. Photos are ownership of the author.
This post is part of the series: Watercolor Painting Lessons With Winter Themes
These articles will display watercolor techniques for creating winter landscapes, frosted windows, polar bears, snowflakes and Valentine’s Day paintings. The watercolor painting lessons are easy to follow and can be adapted for elementary art lessons, grades 1 through 8.