Managing the five pieces of writers’ workshop can be a real nightmare, even for the most organized teacher and students. When I was a writing teacher for students in kindergarten through fifth grade, we began teaching the writing process by organizing the five steps with pocket folders.
What You Need to Get Started?
There are many classroom management ideas, especially when you ask colleagues about getting started in writers’ workshop. Using pocket folders for writers’ workshop worked very well for my co-teacher and me when we were teaching the writing process to almost 1,000 students in an elementary school. Students can keep track of all steps of the writing process with three basic pocket folders. Before getting started with writers’ workshop, you need the following materials to make one six-pocket folder for each of your students:
- three basic pocket folders for each student (You can order or look at them here : )
- blank address labels
- basket or bin for storage
- plastic binding spines
- binding machine
Making the 6-Pocket Writers’ Workshop Folders to Teach the Writing Process
Getting started with writers’ workshop may take a little time; but once you have good classroom management ideas, your mini-lessons will go more smoothly.
- Put the three pocket folders together, one on top of the other. You can use the same color or different colors. The color of the folders doesn’t matter to make this classroom management idea work.
- With your binding machine, bind the three folders together with a plastic binding spine. The spine should go at the folded edge of the folders, so that you can open each folder easily. When you have them binded correctly, you should be able to open the three folders, as if you were opening a book.
- On the blank address labels, print or write the five steps when you are teaching the writing process during writers’ workshop. One step goes on each address label. So, if you have 25 students in your writing class, you will have 25 labels of prewriting, 25 labels of rough draft, 25 labels of revising, and so on. The last two steps of writers’ workshop are editing and publication.
- One label goes on each pocket of the six-pocket folder. Each student will have one pocket without a label to keep spelling word sheets, illustrations, or classroom dictionaries. Getting started in writers’ workshop requires a lot of organization!
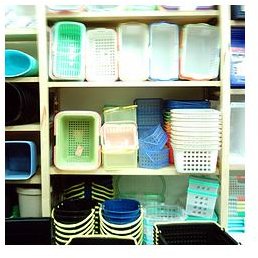
- The folders are stored in a basket or bin in your classroom. This keeps them organized, safe, and able to last longer. Classroom management ideas, such as this one, often help students stay organized.
Using the Pocket Folders
When it is time for getting started with writers’ workshop, your students will get their six-pocket folders from the storage bin and get ready to work. In the prewriting pocket, students may keep brainstorming lists or graphic organizers. In the rough draft pocket, students will keep the current rough draft they are working on. In the revising and editing folders, students will keep tips on how to revise and edit, any notes about things they want to change in their current rough draft, and a list of editing marks or common mistakes to look for. In the publication folder, students keep their final draft as they are working on it. If they are typing their final drafts, they can put a copy in their publication folder and turn a copy into you.
When students take a piece of writing through the whole writing process, they can clean out their folders and either transfer those pieces to a classroom folder or take them home. They will soon learn your classroom management ideas, which makes the whole routine go smoothly.
This post is part of the series: Writers’ Workshop Tips
Writers’ workhshop is a great method for teaching writing, but it can be difficult to implement in the classroom without support and a few tips. This series will give you tips on organization, different steps in the writing process, and help with implementation.