Before you can get started with your SMART Response assessments, you need to set up your class. This article tells you how.
Getting Started
Setting up the SMART Response software to work with your students takes a little bit of time and effort, but once you have the basics
taken care of, you will soon be ready to start quizzing your students and collecting your data.
The following article will give you all the step by step directions you need to ensure that you have the best foundations for success with SMART Response devices in your classroom.
Adding Classes
Teachers can add as many classes as they want. If you are a middle school Science teacher, and you have four 6th Grade Science classes, you can have a SMART Response class for each one. Similarly, elementary school teachers may want a Math class, a Language Arts class, a Science class, and so on. By having multiple classes, you can keep your student assessments separate. This makes them easier to manage in the long term.
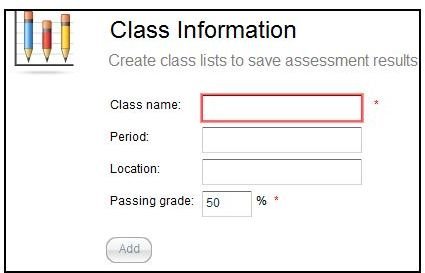
To add a class, open the Notebook software, select Response from the menu, and then Teacher Tools. This opens the class administration screen. If you need to switch to Gradebook view, do so by clicking the blue link at the bottom of the screen. Otherwise, you simply click the ‘add a class’ button, fill in the requested details, and click add. Your new class appears on the left of your screen under the Gradebook section, and is now ready to have students added to it. Repeat this process for all the classes you intend to use the SMART Response system with.
Adding and Importing Students
Students can be added one by one, or as a bulk entry.
-
To manually add them one by one, select the class you want to add your students to, and click the green ‘Add’ button on the toolbar.
-
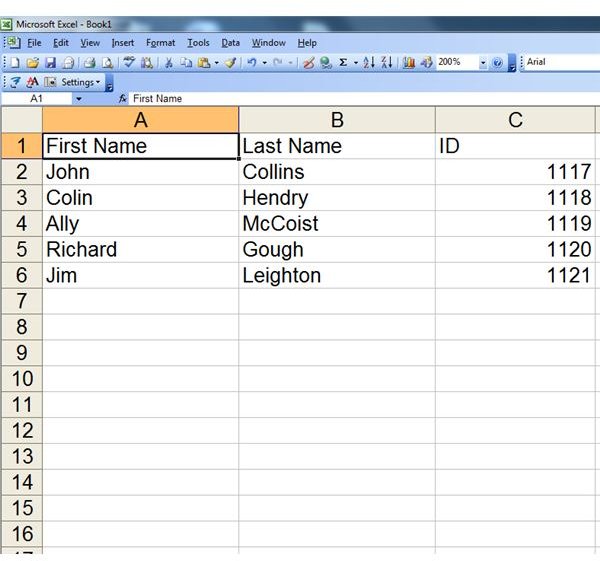
This is a good way to add one or two new students, but if you wish to add a whole class, you may want to consider importing an Excel file. This needs to be in a set format for the SMART Response to recognize your fields, with three columns for each student to identify first name, last name, and a student ID number, (click picture right for an example).
Advertisement -
You can create the list manually, but some school administration programs will export your current class in this format for you, so check with your building administrator or technology adviser to see if you can save yourself even more time.
Editing and Deleting Students
Some students have their names changed half way through the year, or transfer to and from other schools. In cases like this you will need to edit or delete your current student date. However, once you have added students to your SMART Response classes, editing student details, or deleting students, is very straightforward.
-
First, highlight the chosen class in the Teacher Tools menu to reveal the students in that class, and click on the student you want to edit.
-
If you want to change a student’s name, tags, or ID number, you will find that these details are displayed in the box underneath their name. Simply change the field you want to edit.
-
If you cannot see all this information, make sure you have privacy set to ‘off’. The privacy button is in the top right hand corner of the screen.
-
To delete a student from your class, simply click on the student and press the red delete button on the toolbar at the top of the page. The student will no longer appear in your class list.
Tagging Students
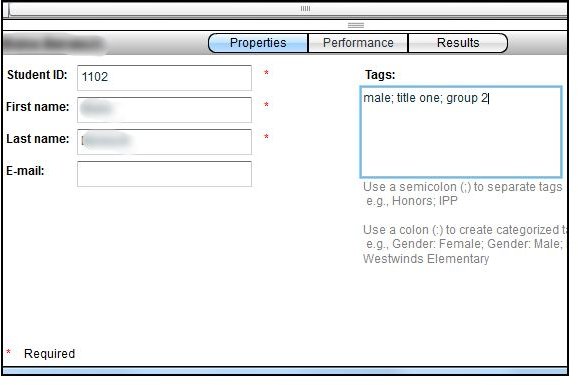
Once you start tagging students, you have the ability to quickly filter through assessment results according to any specific identifiers you give a particular student. Many teachers use tags such as male, female, gifted, title one, IEP, and so forth. The tags you enter will not be seen by the students as they can only be seen in the Teacher Tools area.
-
To add tags to students, simply click on their name. This reveals the initial information you already added for each student - first name, second name and ID number - but also reveals a box for tagging students.
-
You can add as many tags for each student as you deem appropriate, and separate each one with a semicolon.
-
When you have finished administering your SMART Response assessment , and run a class performance report, you will see graphs that compare tagged students.
At this point, the hard work is over, and you are now ready to assign your first assessment to students. Your classroom assessment is about to change for the better, and you will soon have more up to date data on your students than you ever thought possible.
This post is part of the series: SMART Response Systems
An overview of SMART’s Interactive Student Response Systems, and an explanation of how to best use them in your classroom