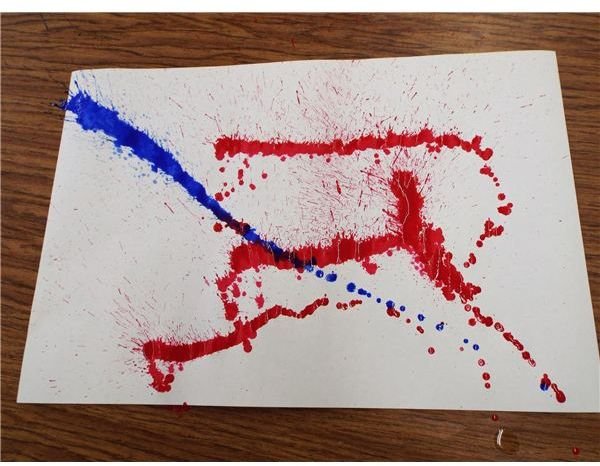
Students of all ability levels can be successful in this fun art activity that explores a somewhat controlled splatter paint art project.
Students will disabilities will find this art lesson readily accessible due to the unique manner in which they apply paint to paper. Jackson Pollock was an American abstract expressionist painter who was known for his large scale drip paintings. Using his works as an inspiration students of all ability levels can study color mixing, use movement in art, and learn about art history all while having fun.
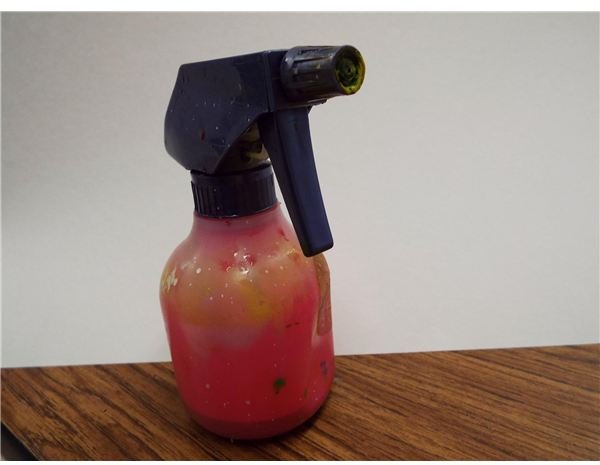
Typically students and teachers associate painting with a paint brush in art. However, mixing it up with a new tool such as spray bottles opens this lesson up to all. This approach has worked very well for me in the past with a student who had very little to no upper body muscle control. The teacher can work hand over hand to help the individual squeeze the spray bottle trigger against the paper so both participants can be part of the fun.
Lesson Objectives:
CCSS.ELA-Literacy.CCRA.SL.1 Prepare for and participate effectively in a range of conversations and collaborations with diverse partners, building on others’ ideas and expressing their own clearly and persuasively.
CCSS.ELA-Literacy.CCRA.SL.2 Integrate and evaluate information presented in diverse media and formats, including visually, quantitatively, and orally.
CCSS.ELA-Literacy.CCRA.SL.6 Adapt speech to a variety of contexts and communicative tasks, demonstrating command of formal English when indicated or appropriate.
**
Materials Required:
- Spray Bottle
- Water
- Liquid paint
- Paper
- Jackson Pollock Print
Lesson Procedure
1. The teacher should preface the lesson by introducing the art of Jackson Pollock and point out the fact that while his actions were purposeful the marks that were made were not always in control. These understandings are a great thing to pass on to our students who can often get frustrated when their work doesn’t look exactly like the example.
2. The teacher should briefly point out a color wheel and note the primary colors: red, yellow, and blue.
Ask:
- Why are these colors important?
- What happens when they mix?
- Can you make a prediction of what might happen if we mix all three?
3. Start by preparing the surface, the table and paper will get very messy. A large cardboard box can act as a means to contain the extra spray. Tape the piece of paper to the bottom and lay the box on the side to catch all the extra spray mist.
4. Pick any color to spray first, and start by adding about two tablespoons of liquid based paint. Add enough water to make the paint thin and shake the mixture in the bottle.
5. Have fun and spray away!
Assessment:
The teacher can keep the assessment very informal by asking the students questions about what happened with the color mixing.
For example: What happened when our red paint started to mix with the blue paint? What happened when our red paint mixed with our yellow paint? When we sprayed slower what happened to the marks?
This is a wonderful project for students of all ages as it allows everyone to feel like a practicing artist. There is no specific outcome that is ‘right’ or ‘wrong’. It also gives our students a chance to lose a little bit of control in their artwork, which is often a hard concept for some young artists to understand.
I have found great success with this approach with a young student who had cerebral palsy. This student blossomed with the hand over hand approach as we created the piece together. This approach has also worked well with students who have cognitive disabilities as the steps can be modeled by the teacher first, then replicated by the student.
This post is part of the series: Art Projects for Inclusive Classrooms
These accessible art projects work for students of varying abilities. They are excellent choices for the inclusive classroom.