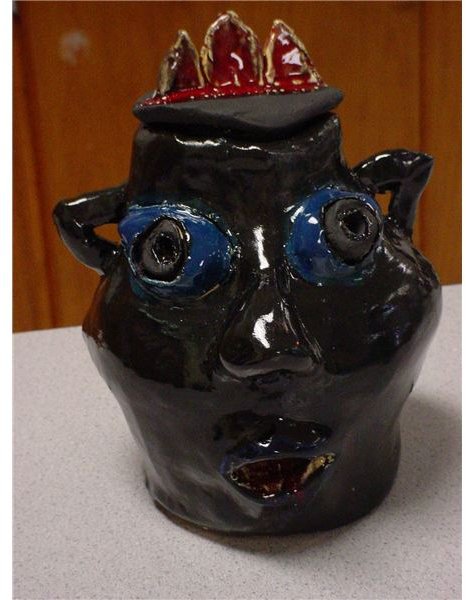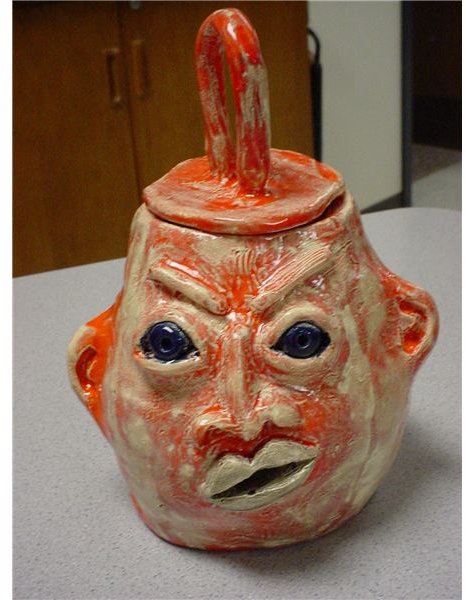
Face jugs have been called “ugly jugs, memory jugs, and whimsy jugs”. The jugs were functional, but made interesting by the features used to decorate them. Students will use basic clay coil-building techniques, art history, & vocabulary to create a coil face jug.
Requirements:
Students will be required to turn in a face jug that has survived a bisque firing, and a glaze firing.
The jug should:
- Have a handle or ears.
- Have facial features either built up or developed into clay.
- Have a lid with a rim so that it doesn’t fall off.
- Must be a minimum of seven inches tall.
Process:
1. Prior to working with clay, students are given a history about face jugs. This includes:
- alternate names (ugly jugs, memory jugs, and whimsy jugs)
- where the tradition began and how it came to the US from Africa
- the use of jugs to preserve memory
- how the purpose & functionality of the jugs changed from serious to whimsy and became a craft (hobby of Victorian women)
It is beneficial to show students a variety of different images including the various types of ugly jugs (serious vs. whimsical).
2. The teacher will also demonstrate various clay techniques essential to creating a finished piece.
Vocabulary & Techniques:
- Coil-building: Creating a piece of pottery by rolling a coil or “snake” out of clay, and molding a solid piece of pottery by layering and/or blending coils together.
- Glaze: A compound of minerals that is applied to the surface of greenware or bisqued ware that forms a glassy coating when fired.
- Slip: A mixture of clay and water; Works as glue to fuse two clay pieces together.
- Score: Making small marks into the surface of the clay before adding slip or water to help fuse clay.
- Also: wedging, kneading, joining two clay pieces, smoothing & “cleaning” of clay surface, clay paddle, glaze types & proper application
3. After students have learned the background of the lesson & clay techniques, they will create two sketches of ideas for their ugly jugs with attention to the requirements. The final product may not resemble their sketches but it’s good to work out ideas on paper and possible issues they might have.
4. Students create their face jugs. They begin with a chunk of clay and should utilize the techniques they were taught to build from clay. This includes wedging and kneading their clay (if necessary), and utilizing the coil technique to build a form. Students should work on rolling out coils of uniform thickness, using the slip/score technique if they plan on leaving their coils showing, and trying the clay paddle if they plan on smoothing the coils for a smooth/flat surface. Students should also make sure their jugs contain the required elements of the lesson including facial features and creating a lid for their vessel that has a rim so it doesn’t fall off.
Coil-building tips:
- Coils can be cut flat or rolled out by hand.
- To make a wall, place coils on top of each other. To widen the form, place the coils slightly to the outside of the previous coil layer and in order for the wall to come inwards, place them slightly inside.
- Smear coils downwards onto the coils below to join. This can be done immediately after each layer is attached, or after many coils are in position.
- The pot will probably have to dry a little in between sessions of coiling to enable it to hold its own weight.
- The coiled pot can be beaten into shape with a wooden spoon or paddle when it is finished.
- You can actually coil the pot upside down thereby finishing with the base.
5. Once clay pieces are completed, dried, and bisque fired, students will glaze their work and have it fired again.
*Students could also paint their jugs with acrylic paint instead of glazing after the second firing. For a more natural look, brown shoe polish can be rubbed onto the coil face jug.
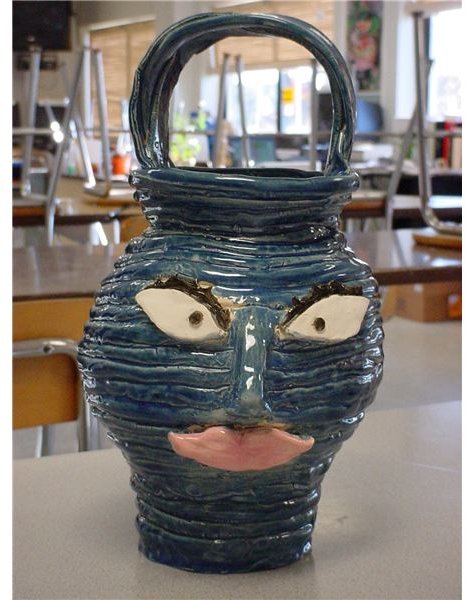
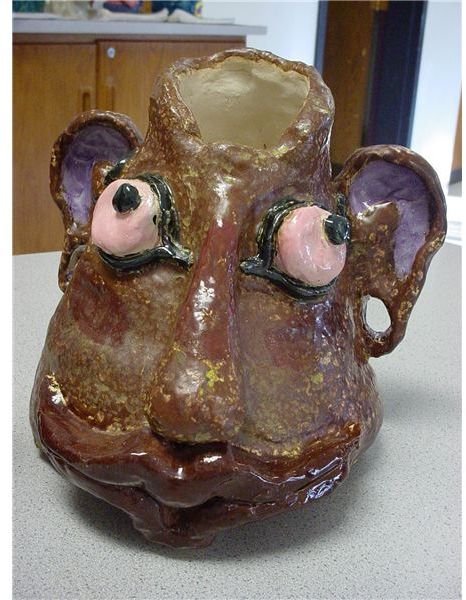
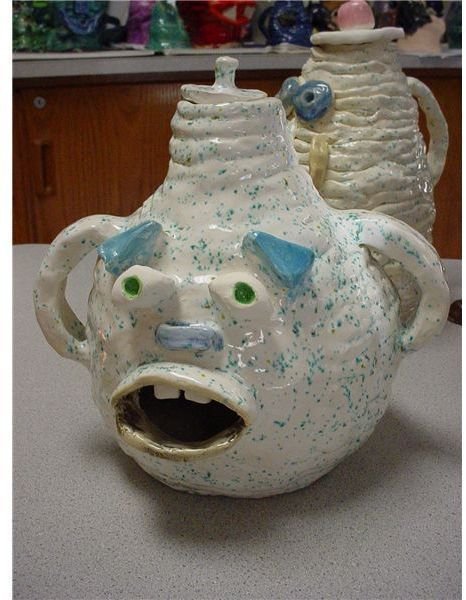
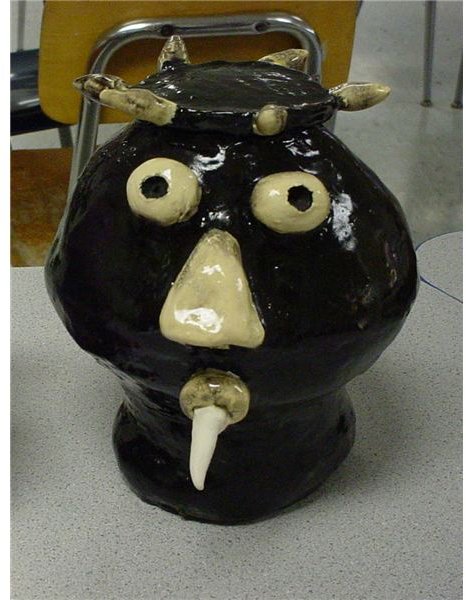
Sample Work