The word gargoyle comes from the Latin word ‘gurgulio’, not only meaning “throat” but also describing the “gurgling” sound made by water as it ran through the figure. This lesson plan will teach students basic clay hand-building techniques, art history, & vocabulary when making a gargoyle figure.
This is an art lesson plan for high school or middle school students and is a fun way to learn a basic hand-building technique when making gargoyle sculptures.
Requirements:
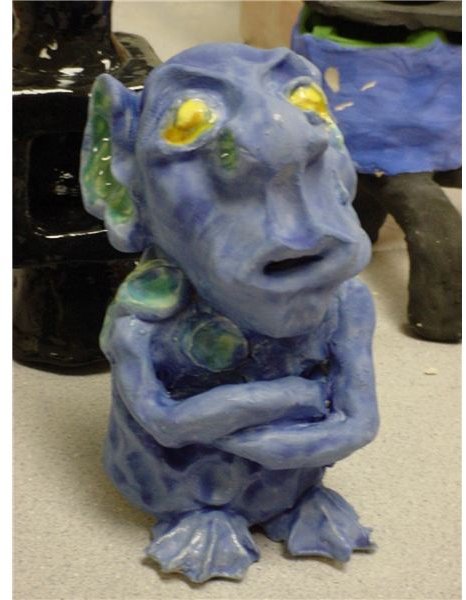
Students will be required to turn in a gargoyle that has survived a bisque firing, and a glaze firing*.
The creature should:
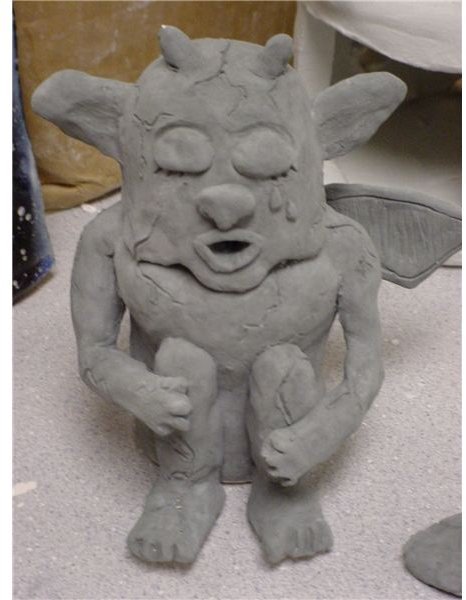
- be created from a basic, hollow form (pinch pot method)
- exhibit evidence of proper use of clay hand-building techniques (proper attaching of clay parts, smoothing of rough edges, etc.)
- have features which are built up or developed into the clay (no drawing)
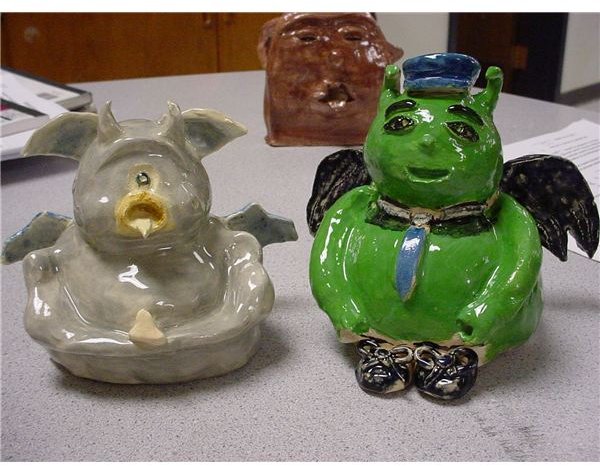
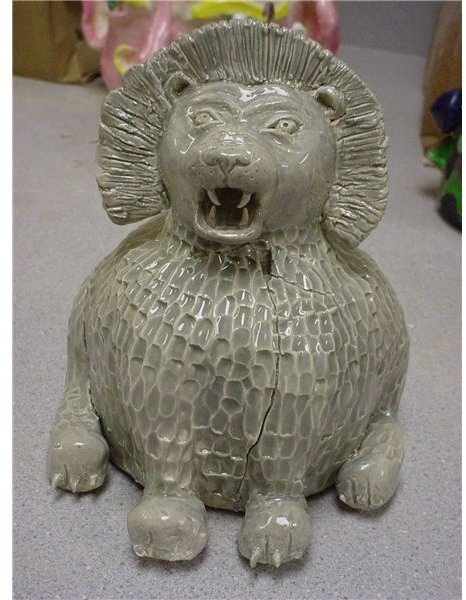
- have some texture somewhere (scales, resemble stone, have “hair”)
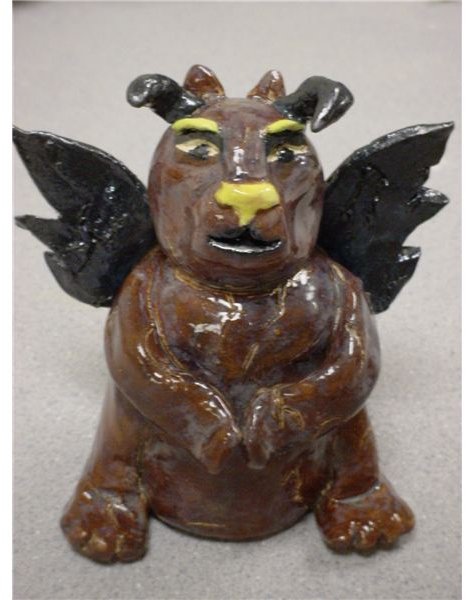
- have some type of unusual feature (wings, horns, protruding tongue, teeth, etc.)
Process:
1. Prior to working with clay, students are given a history about gargoyles. This includes:
- purposes of gargoyles as rain spouts and medieval church/cathedrals architecture
- purposes of gargoyles in superstition & religion (warding off evil, protecting church, etc.)
- different types of gargoyles (grotesques, chimeras, human or animal/like)
It is beneficial to show students a variety of images including the various types of gargoyles.
2. The teacher will also demonstrate various clay techniques essential to creating their finished piece.
Vocabulary & Techniques discussed/shown:
- Bisque Firing: The first firing of unglazed ware at a low temperature. Removes all moisture from the clay and makes it easier to handle.
- Glaze: A compound of minerals that is applied to the surface of greenware or bisqued ware that forms a glassy coating when fired.
- Glaze Firing: A kiln firing that reaches temperatures at which glaze will melt. A glaze firing typically brings the clay body to its maturation point.
- Leather Hard: The condition of a clay body that has dried somewhat but can still be carved or joined.
- Slip: A mixture of clay and water; Works as glue to fuse two clay pieces together.
- Score: Making small marks into the surface of the clay before adding slip or water to help fuse clay.
- Pinch Pot: Creating a piece of pottery by pinching and molding a solid piece of clay with your fingers/hands.
Also: wedging, kneading, hollow, clay thickness, joining two clay pieces, smoothing & “cleaning” of clay surface, glaze types & proper application
3. After students have learned the background of the lesson & clay techniques, they will create two sketches of ideas for their creature-with attention to the requirements. The final product may not resemble their sketches but this is a good way to get students’ creative juices flowing.
4. Students create their gargoyle. They begin with a chunk of clay and should utilize the techniques they were taught to build from clay. This includes wedging and kneading their clay (if necessary), creating a hollow form using the pinch pot technique, and building onto their gargoyle in order to meet the requirments.
5. Once clay pieces are completed, dried, and bisque fired, students will glaze their work and have it fired again. To create a more authentic stone-like creature, teachers may choose to have students use under-glaze only (which is not shiny) rather than glaze.
*Teachers may have students make their gargoyle out of clay but use paint instead of glaze to complete the project.
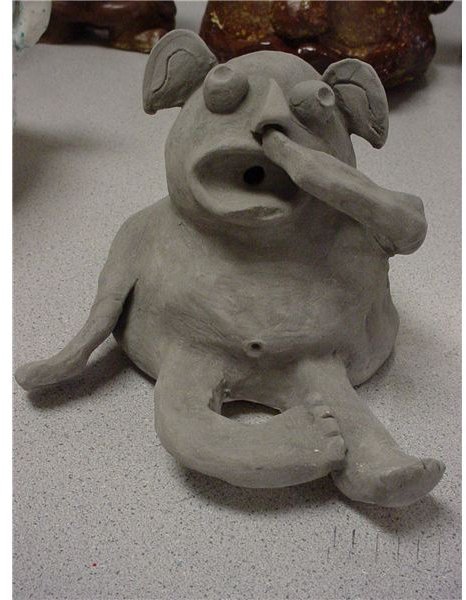
Sample Work