Want to teach simple and easy anime lessons? These short art lessons will show how to teach this style of drawing to students who want to learn how to create their own anime characters.
Introducing Anime
Anime drawing is a fascinating subject that many professional animators have captured online, on TV and in video games. Anime, a word for Japanese animation, includes comics called manga with fictional characters that exaggerate the human form.
The characters are very expressive and therefore have large wide eyes, hair that stands out and either tiny mouths or mouths that are wide open to express feelings. Showing several images of anime characters from books and photos is a great way to introduce the topic and begin your anime lesson.
Rationale and Teacher Notes
Several practice lessons on anime sketching will give the students the idea of what anime is. To teach drawing faces, first try lessons on drawing human faces. Then begin anime lessons by drawing the anime face before trying to teach drawing the proportions of the full body.
Overall Student Objectives
Students will be able to:
- Demonstrate anime drawing techniques
- Demonstrate technique of drawing anime faces and hairstyles
- Draw different styles of facial parts
- Create expression using anime eyes
- Draw correct body proportions for anime characters
- Design or copy an anime character
Materials
- 9 X 12 cartridge drawing paper
- 4B pencils
- erasers
- rulers
- examples of anime characters
Anime Drawing Lessons
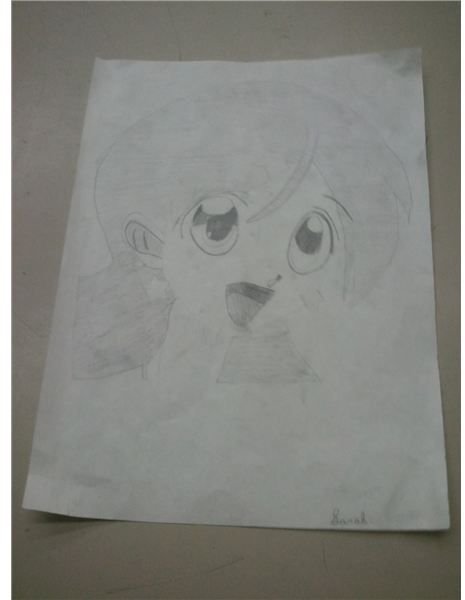
Lesson 1 - Drawing the Head
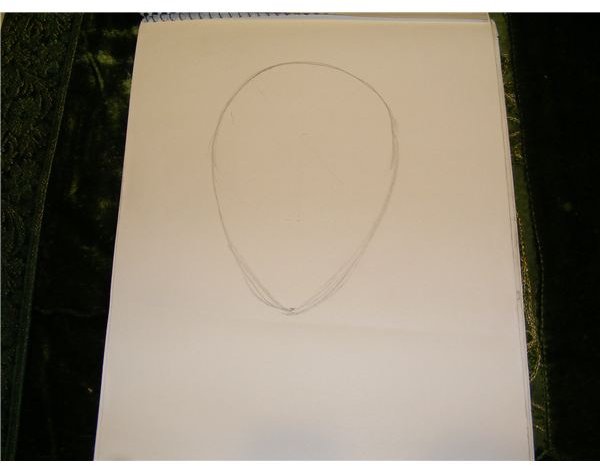
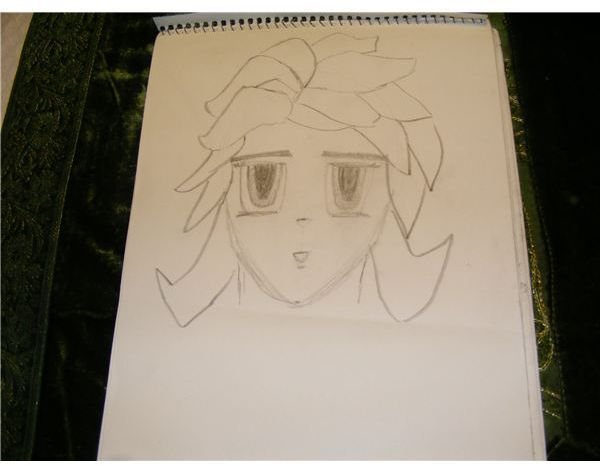
Pass out one sheet of drawing paper to each student. Using basic shapes to begin with, have students start with a circle for the head, then make it into an oval to create a pointed chin. (The chin should be about the length of the radius of the circle away from the edge of the circle.)
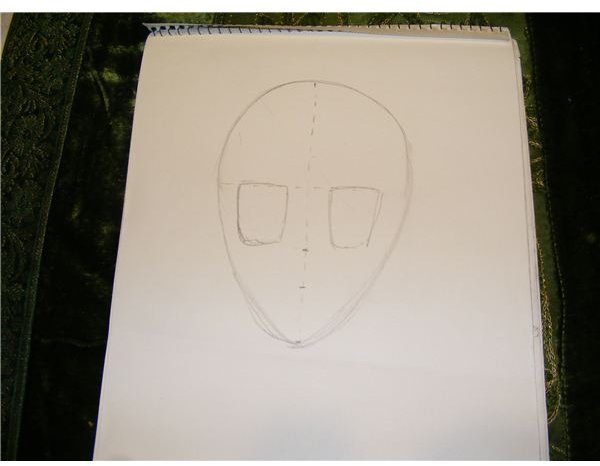
Tell them to mark a line halfway down the head and halfway verically through the circle to help center the eyes.
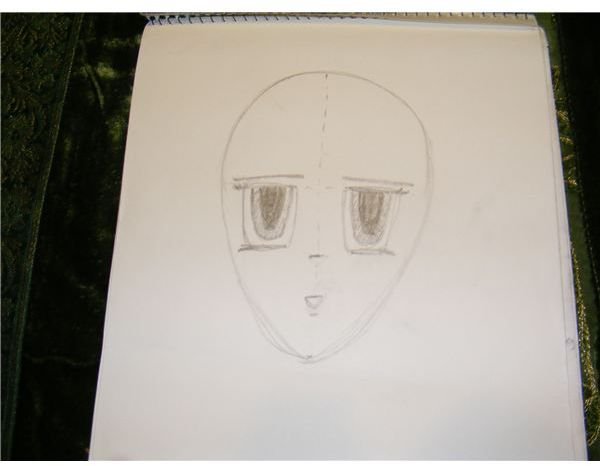
Have them draw the eyes as large, almost rectangular shapes beginning at the halfway point on the circle and drawn downwards. Within the large rectangle, have them draw a large black oval representing the pupil. They can add a large oval iris and 2 light spots (both on the same side of each eye) on the eyes later. Lines for eyebrows, and 2 upward curving eyelashes can be added also.
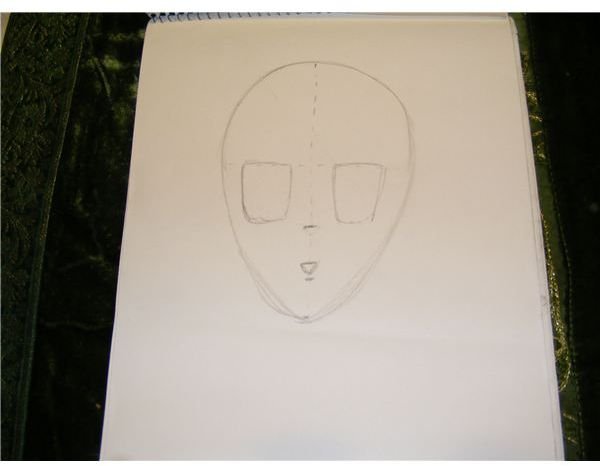
Have them draw a tiny nose as a dash mark, halfway between the eyes and the mouth.
The mouth is halfway between the eyes and chin. It can be a tiny triangle pointing downwards. They can add a small line under it.
Next, have them create the hair by drawing blocks of hair locks which move up and out from the head.
Assessment of these drawings can include observations of how well the students place the eyes, nose and mouth; not how expressive the face is.
Drawing an Anime Head
Drawing Anime Faces by Parts
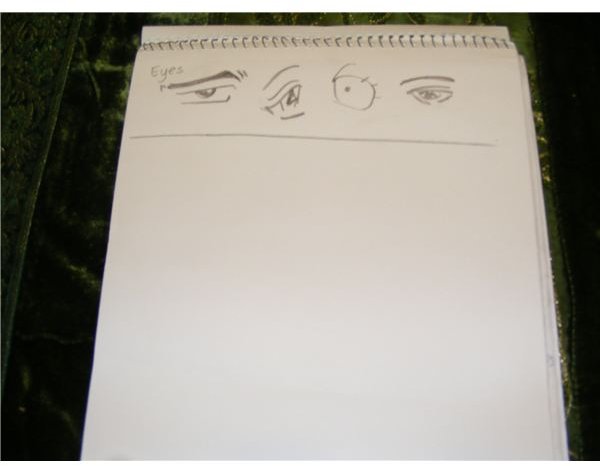
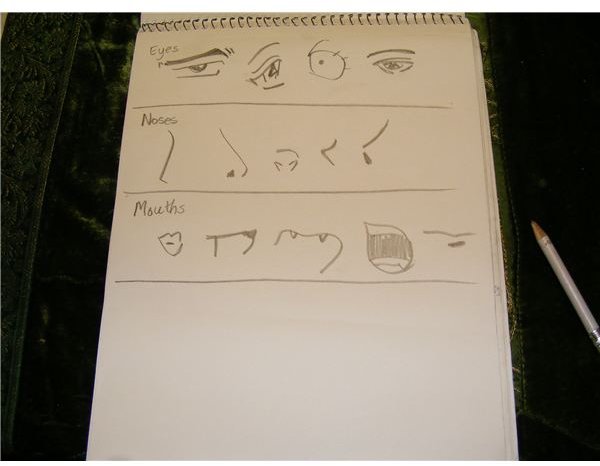
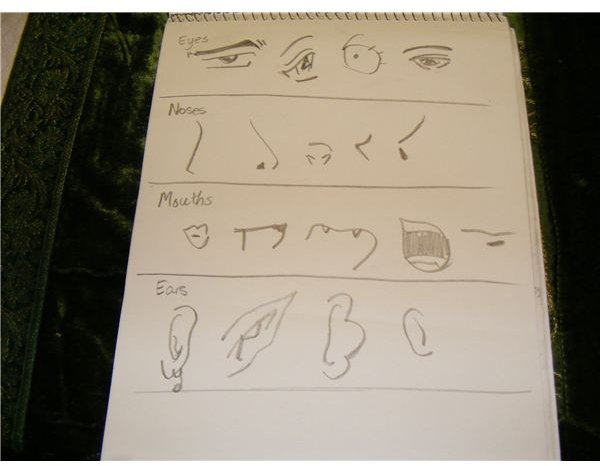
Lesson 2 – Facial Parts
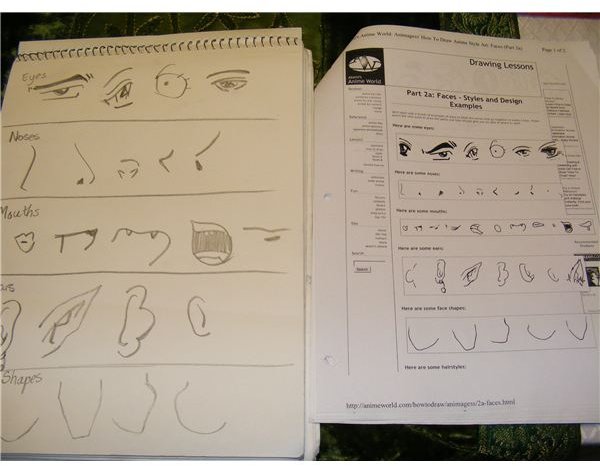
To practice drawing different sets of eyes, ears, noses, mouths and jaw lines, have the students divide another piece of paper into 5 sections across the page. Practice different kinds of eyes by drawing the example on the board or providing a handout. Then have the students practice drawing them. Go on to the next set of parts.
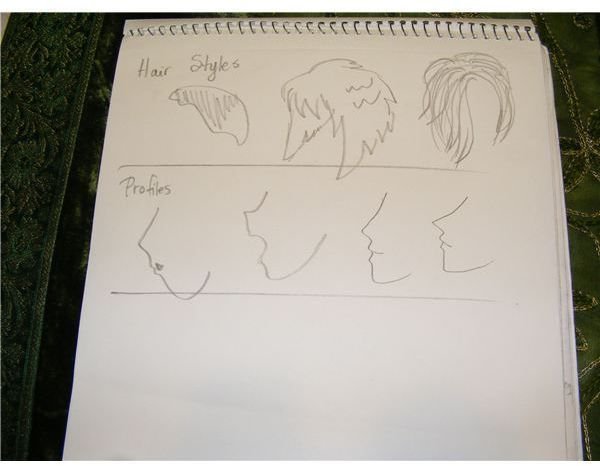
You can also have them practice different hairstyles and profiles in the same way. Draw only 5 or 6 across the page and remind them it is practice.
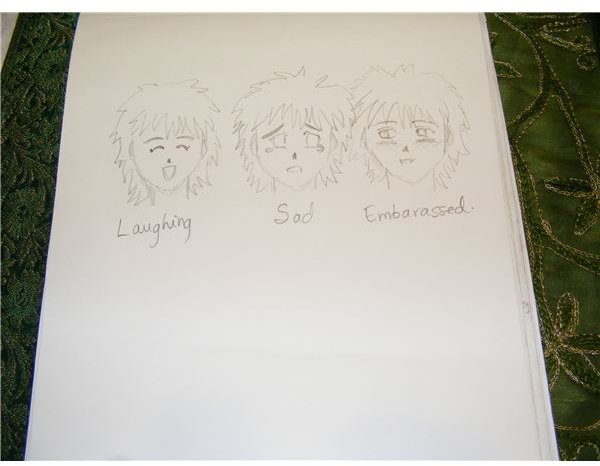
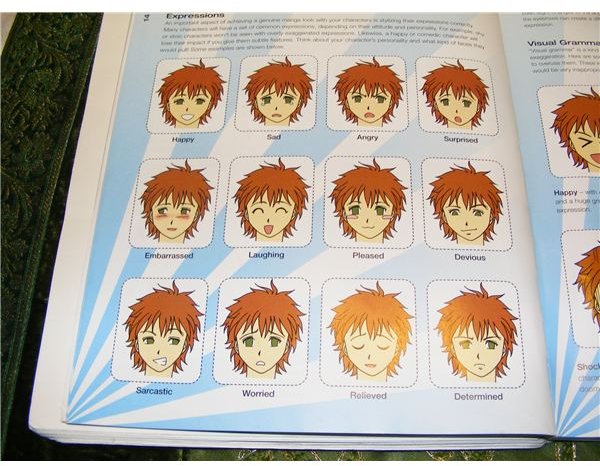
On the back of the paper, or on a new sheet, practice different sets of facial expressions such as happy, sad, excitement, worry and other facial features. It is helpful to have a book or handout for students to choose which expression they want to try.
Remind students that these practice drawings will not have a formal assessment.
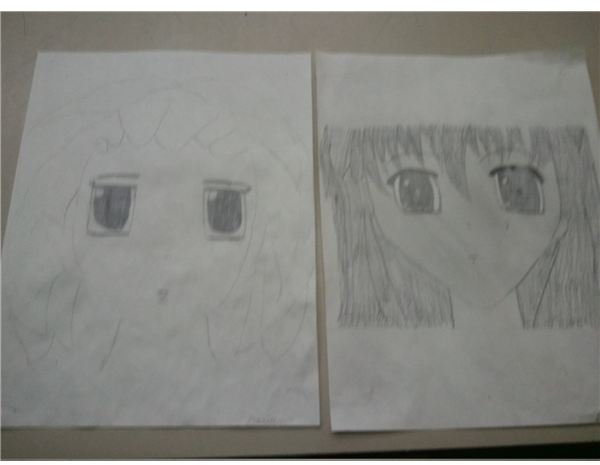
Drawing Facial Parts

Anime Eyes
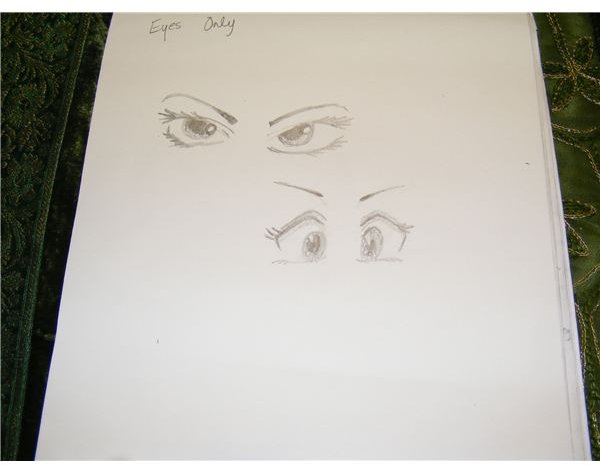
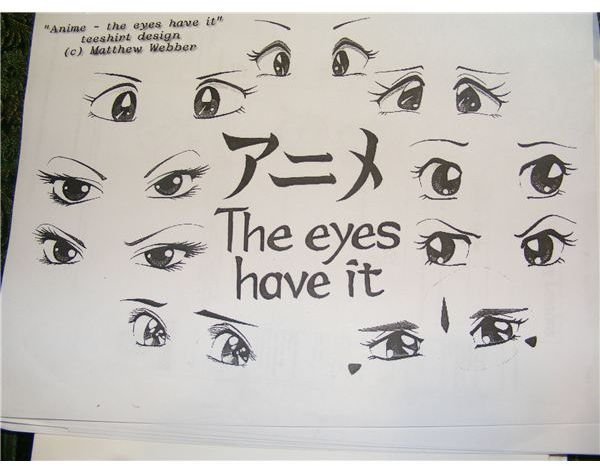
Lesson 3 – The Eyes
Since the eyes show the most expression, students should spend one lesson on this facial part alone. The objective is to show the students that many shapes are used in anime. Eyebrow placement also creates expression. The student objective is to draw as accurately as possible the eye shape with correct shading techniques.
Students should try to copy different sets of eyes which show a variety of different expressions. Use this as practice. Have them choose the eyes they want to draw from a handout. Point out the sections of the eye where the light spots are.
Students should demonstrate that they shade from the center of the eye outwards to fill in eye color. Both the left and right eye should be drawn. Provide as much time for this lesson as for the other facial parts altogether. This anime lesson should also have no formal assessment as observation should suffice.
Anime Eyes and Faces
Anime Body Drawing
Lesson 4 – Body Proportions
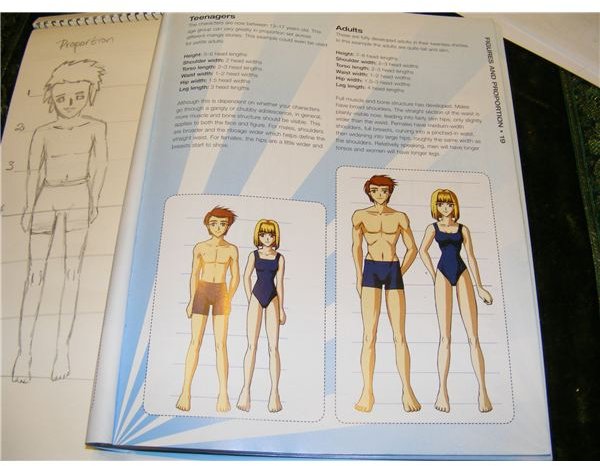
The objective of this anime lesson is to show the students that children, teenagers and adults in anime are drawn in different proportions. The student objective is to use the correct proportions and lean shapes for the body. Emphasize that most anime are young teens therefore do not need beards, mustaches etc. Since they are exaggerations, the bodies are long and lean. Chibi is one form of anime where the bodies are small and rounded.
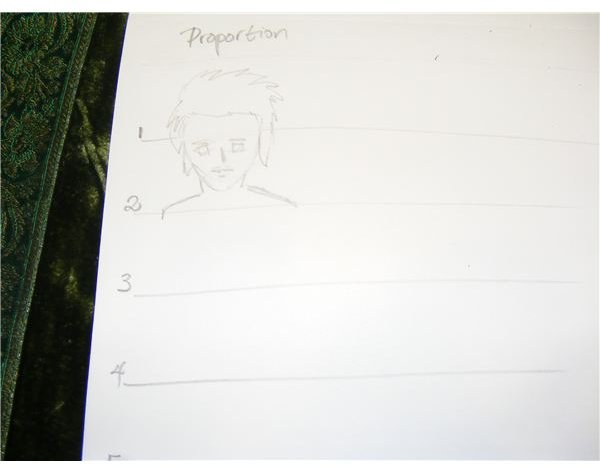
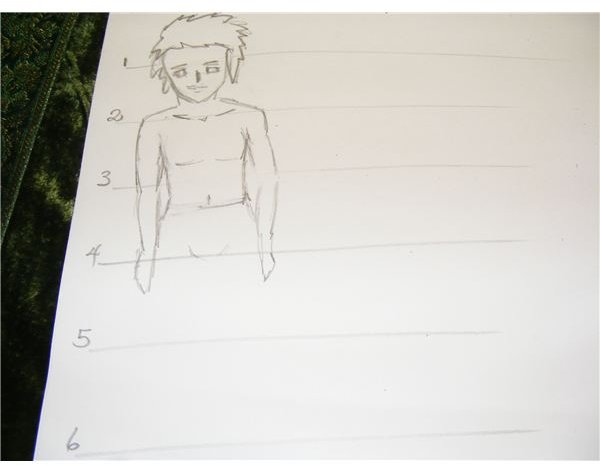
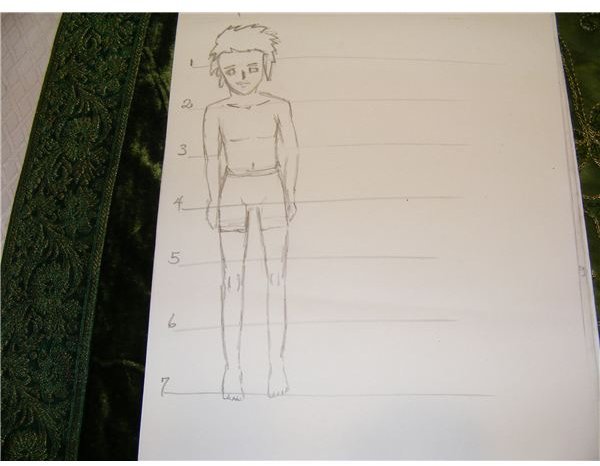
Have students divide a clean sheet of 9 x 12 piece of paper into 8 approximately equal parts by drawing 7 marks down the page. Students can draw small 1 inch marks on the side of the page using their ruler. They can number the lines for easy reference.
Have them begin by drawing the oval head in the first eighth of the page. Then they can add the neck and wide sloping shoulders in the next eighth (line 2).
The arms extend to the 4th line down and are large oval shapes. They narrow at the elbows and wrists.
Next, have the students draw in a narrow waist with a triangular body. Then have them make long legs with long ovals that narrow at the knees and ankles.
The feet should touch the last eighth of the page. Students should use a front view of the feet.
You can also use handouts to show body proportions as students generally draw their anime characters larger than needed. To assess this lesson, observe how close the students followed instructions for the length of each body part. They may have divided their paper into 8 parts, but still used only half of the page.
Anime Body Proportions
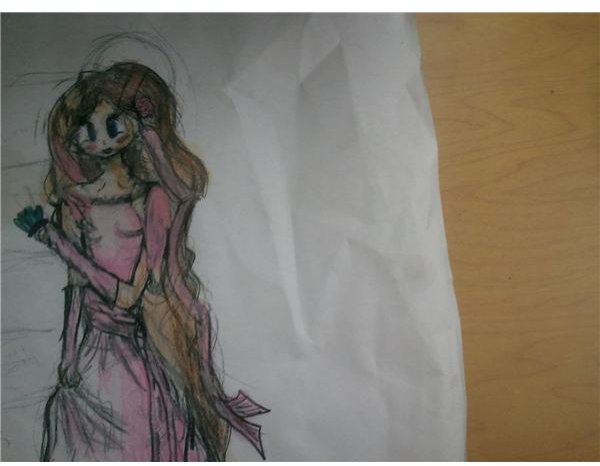
Anime Character Drawing Lesson
Lesson 5 – Anime Characters
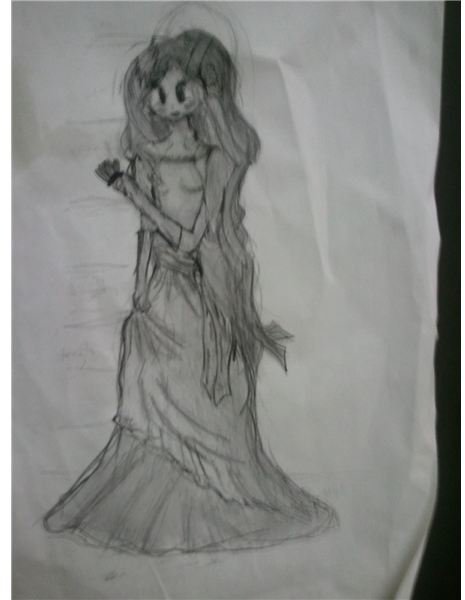
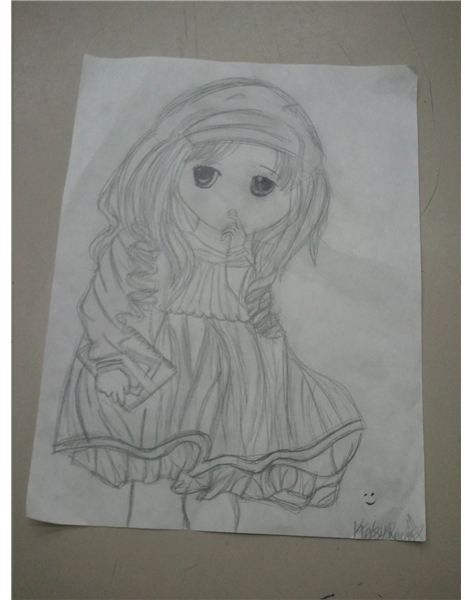
On a new 9 X 12 piece of drawing paper, the students can practice drawing an entire character by copying anime characters the teacher has provided for the students to use.
Try to provide frontal views that have good, clear drawings of the eyes or expressions the students have practiced.
Try to focus on the face and eyes of the character rather than the clothing style, unless you have done lessons on color and clothing and accessories found in anime.
You can use chibi characters with the Frankenstein look around Halloween, or the soldier look around Remembrance or Veterans Day as special examples. Many school characters in school uniform (such as students, teachers, janitors, etc.) can be drawn.
If students are excelling at drawing anime, you may give them the choice to create their own character. This can be done on a larger 12 x 18 or 18 x 24 piece of paper.
Once the anime drawing is complete, students may then want to add color or paint them. If painting, use bright acrylic paints and be sure to emphasize how the lights affect the shadows and highlights in the hair and eyes.
This final character can be assessed on how well the student created the facial shape, eyes, noses, mouths and body proportions practiced. This project should be done on large paper (18 x 24) and will take several periods to complete.
Displaying Anime Characters
Displaying Anime Drawings - Extension Ideas
These anime art lessons can be extended to more advanced lessons in a unit on anime drawing. Lessons on how to show movement, expression and different styles of anime could be added. You could teach how to use pencil crayons, ink, markers and paint to create the proper color and shading.
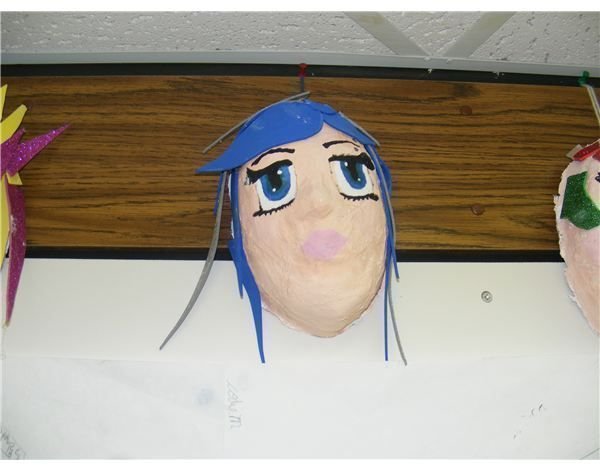
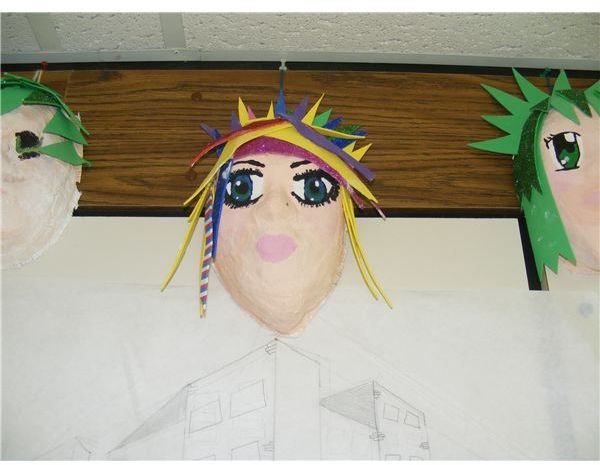
A lesson on How to Create An Anime Character Mask Using Plaster Mask Making art is a fun way to use and assess what they have learned. The drawing and painting techniques emphasizing the eyes can be applied to the mask.
Since many of these anime lessons are practice lessons for creating anime characters, a display of a student’s first attempt at drawing a face beside a picture of a character that they have copied on large paper makes an interesting comparison of what the student has learned regarding anime drawing techniques.
Anime lessons are both fun and unique. Students will be surprised at how well they can master the drawing concepts in these specialized art lessons.
Anime Lessons Display
Resources
Online anime lessons: https://animeworld.com/howtodraw/faces.html
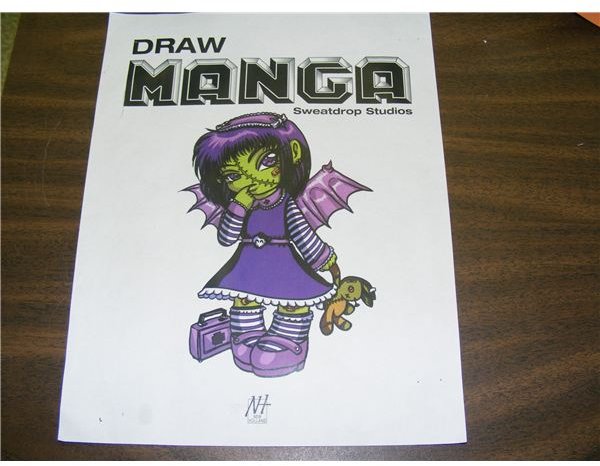
Books: Draw Manga by Sweatdrop Studios
Photo credits: Lila S. Kallstrom