Grow crystals in a manner that is fun and simple for elementary and middle school students. By showing children the process behind this development, teachers are able to teach them more complicated crystal formations.
Growing crystals as a science experiment is simple and can be done by any elementary student, with a parent providing assistance. The most common way to demonstrate the growth of crystals is to use sugar or salt. By mixing the ingredients with water you can allow the mixture to sit and display crystal growth. Younger students enjoy this type of project because the formed crystals can be used as candy or table salt depending on which crystal base is used.
Items Needed
Making crystals requires only a few items from around the house. Make sure that you have an adult present, since the water and crystal bases need to be brought to a boil.
2 Cups of sugar
1 Cup of water
Medium saucepan
Wooden spoon
Candy thermometer
Medium sized jar
Cotton string long enough to suspend in the jar
Galvanized screw to hold the string down in the solution
Pencil to tie the string to
Wax paper
Food coloring (Optional)
Preparation
Place the water into the saucepan and have an adult bring it to a boil. Add the sugar to the boiling water and stir. Continually stir the sugar and water mixture until it becomes clear. This assures you that all of the original sugar mixed thoroughly. An adult will need to pour the sugar water mixture into the jar. If you want to add a couple of drops of food coloring this is the time to mix it into the solution. Tie the string onto the pencil. Make sure that the string is an inch from the bottom of the jar. Dip the string into the jar for a few minutes. Remove the string and place on a sheet of wax paper to dry. You want this string to dry thoroughly and the amount of time can vary. Once the string is dry, you will dip it in the mixture again.
Science Behind Dipping and Drying the String
The crystals will not form on a string that is just dunked in the water and left. The reason behind this is to allow for the growth of small seed crystals. As the string dries out these small crystals will form. This is where the new crystals will begin when the string is again placed in the solution. When you put the string back in the solution make sure that you are careful so you do not break off any of these small crystals. If you are making salt crystals you will need to follow the same process.
Watching the Crystals Develop
When you place the string back into the solution do not disturb it. This will cause the crystals to break off and stop the formation. The best way for you to do this is to determine where you can place the jar where you will not be tempted to touch it. This is particularly difficult for younger students. The crystals will develop in seven to ten days.
Why the Crystals Develop
Heating the mixture of sugar and dissolving it until no more sugar will dissolve is called supersaturation. You created a solution that when the water evaporates the crystals precipitate. This causes them to form on the string and the seed crystals. The catalyst, or process behind the creation of the crystals, is evaporation. As the water evaporates it causes the crystals to form, or precipitate. This process will continue until a balance is reached between the sugar and the water in the original solution.
Variations on this Technique
The same experiment works just as well with salt. In order to do this you simply replace the two cups of sugar with two cups of salt. Mix the solution the same way as you do for the sugar.
You can also add a flavor to your crystals of sugar. Simply add a few small drops of an essential oil of orange, lime, strawberry or vanilla when the sugar has dissolved. This creates a simple but tasty candy.
Safety Issues
This experiment needs to be done with the assistance of an adult. You are working with a hot simple syrup that can cause burns. Young children should not be in an area where the potential for injury is present. If you are pouring the hot liquid have the child step into another room.
Another issue is the jar. When you are pouring the solution into the jar make sure that the jar is able to hold boiling water. If the jar is not rated for boiling water, allow the water to cool for a few minutes. A thermometer can be used to see how cool it becomes. You are looking for a temperature of 125 degrees Fahrenheit, prior to pouring into the jar.
References
Levine, Shar. Johnstone, Leslie. Manders, John. The Incredible Secret Formula Book: Make Your Own Rock Candy, Jelly Snakes, Face Paint, Slimy Putty, and 55 More Awesome Things. Troll Communications, 1999.
Science Project Resources, https://www.science-projects-resources.com/crystal-science-projects.html
Source: author’s own experience
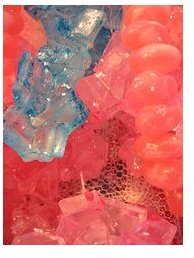
Image: Rock Candy Crystals by Ericskiff CC By 2.0
This post is part of the series: Grade school science projects
Simple items found around the house can turn into science projects for your grade school children. The best part is that they are inexpensive and fun while still being educational.