Preschoolers construct a letter book using various tactile materials to create letters on index cards while having fun! Several cards will be completed each week as mastery of letter recognition occurs. The final product is a book consisting of all 26 letters, upper or lower case, created by kids.
Let’s Get Started
Recognizing letters is the first reading concept for preschoolers to master. Even before they learn the sounds of the letters, they must learn the names of the letters. Providing kinesthetic learning (tactile) activities will help students to learn the way the letters are formed and spatial orientation of the letter.
This activity will also reinforce the learning after the classroom instruction because students can take their tactile alphabet books home for further practice. It’s also a good idea to prepare a few for students to “read” during center time.
Tactile letters can be store bought and are quite expensive. I did a search and they are nearly 15 dollars per set. So, it is certainly not practical to buy a set for each child. So, let’s get started making the books!
Materials Required
- 52- 5" x 8" index cards for each student
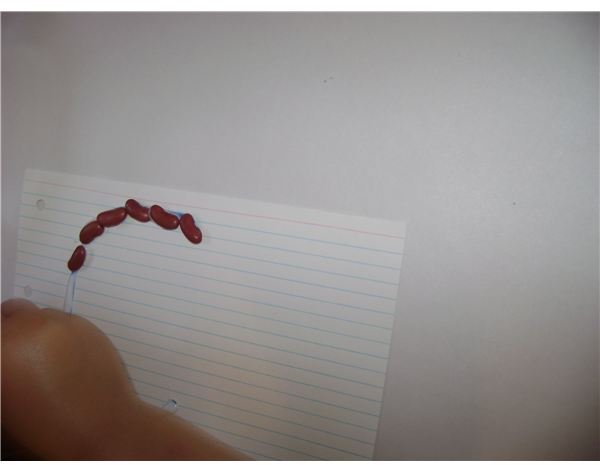
- Various tactile craft materials such as sand, sand paper, yarn, foam, pasta, dried beans, chenille stems, and cloth such as faux fur, suede, velvet, etc.
- Craft glue
- 1 yard of yarn or ribbon for each book binding
- 2 pieces of 6" x 9" cardboard for book cover
- Crayons or markers and craft material to decorate the cover
- Hole punch or awl to put holes into cover and cards
Preparation
For the Cover: From cardboard or heavy cardstock, cut two pieces each measuring six by nine inches. Punch three holes in one six inch side of each cardboard piece; make sure the holes line up. Score the front cover slightly or prefold it so that it will open easily. If desired, on the front cover print the words, “My Letter Book”. Cut the yarn into one yard lengths. The front and back cover of the book are important as the cards will be weighty.
For the Cards: Pre-punch three holes in one five inch side of the index card. Use a marker to print the alphabet letter large and neatly for the children to cover with craft material. If desired, make a second book for lower case letters.
Tip- to make the hole punches line up, punch one card first and then line up the next card underneath it. Put an X on each hole and then punch. In this way the holes will line up from card to card.
This takes the longest time, but is well worth the time investment.
Tactile Book Visuals
Tactile Book Directions
To start, cover the work area with a protective covering.
Then, preschoolers decorate the outside of their books. Start by having the student print his or her name with marker. Assist any student who needs it. The remaining part of the cover can be decorated with the materials of choice.
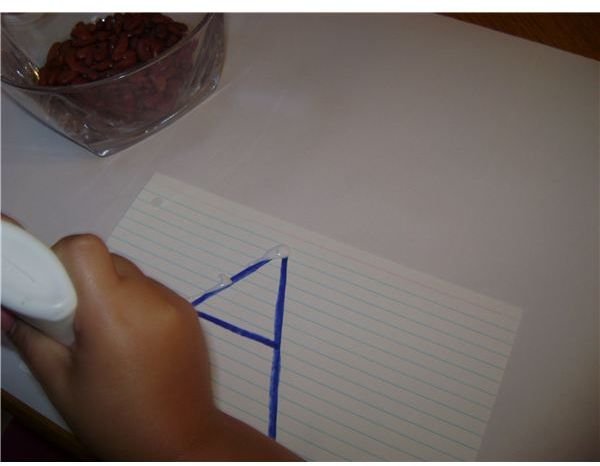
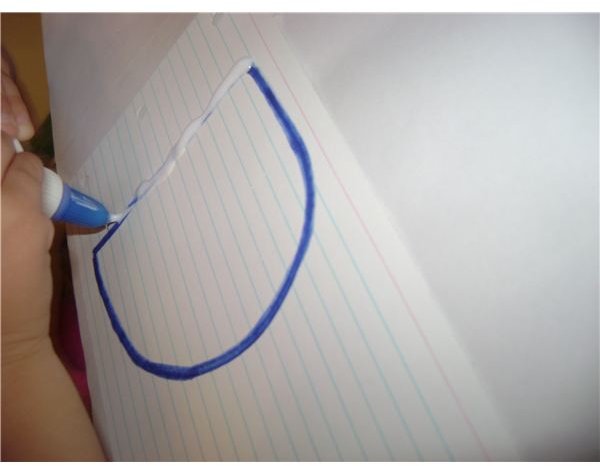
Next, for students who have the fine motor ability let them trace the letter with the glue themselves. Assist those who need it. Focus on the proper formation of the letter. For example, when covering the capital letter A, the student starts at the point and continues down to the left. Next he or she finishes the right side of the letter A (from top to bottom) and finally the middle line (from left to right). Care should be taken not to cover the holes. It is best to glue and cover one section of the later at a time in the same way you would print a letter (see photos).
Last, they should use tactile items to form the title of the book. ABC pasta is a good choice but any sensory item as listed above may be used.
Assembling the Cards
The procedure is the same regardless of the letter being created. It is recommended that you do this project over five days, covering about 6 letters per day.
Assemble the Book
After letter cards have been created, it is time to add them into the book. Put the yarn or ribbon on the table. Place the back cover face up on the work surface. Thread each end of the yarn from the back through the top and bottom holes, skipping the center hole. Place the letter cards in alphabetical order face up and thread each end of the yarn through the cards. Place front cover one top, facing up. Bring yarn up through the front of the front cover. Take both ends on the front and pass both down through the middle hole to the back of the book. Then take each end and bring them up to the front, one end in the first hole and the other end in the third hole. Tie together in a bow on the front. This will allow you to untie the front cover to add more pages.
Repeat the process until all of the letters have been added to the book.
Using the Books to Teach
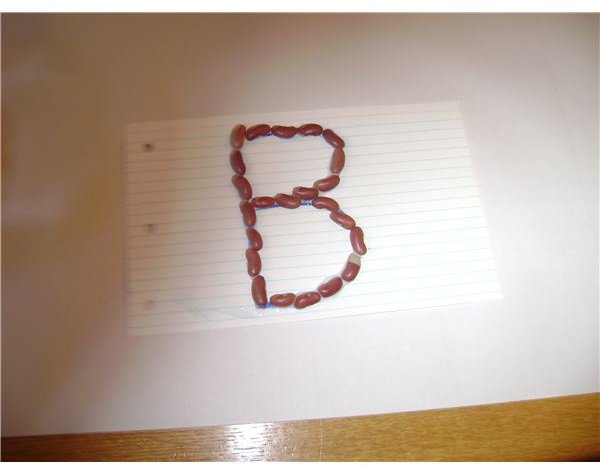
As the tactile letter books are completed, preschoolers practice letter recognition using the cards. While the students are creating the letters, they will begin to notice patterns, such as, the start of a letter B is a letter P. Encourage this.
Children will trace the letters on each card with their finger as they name the letter. When they trace the letter with their finger, have them start tracing at the point where the letter would be started if they were writing on paper. For example, the letter “o” will start at the 12 o’clock position of the letter.
Each child should have individual attention with the teacher to accomplish these teaching points. An informal assessment for possible speech issues should be done while performing the tracing exercise. This book can be used as part of special education to teach the correct way to pronounce and form the letter sounds.
Article is written from Laurie Patsalides’ teaching experience.
Photos by Laurie Patsalides, all rights reserved
This post is part of the series: Preschool ABC Ideas
Preschoolers enjoy learning their ABCs. Here’s a series on how to teach them the alphabet letters by Laurie Patsalides


