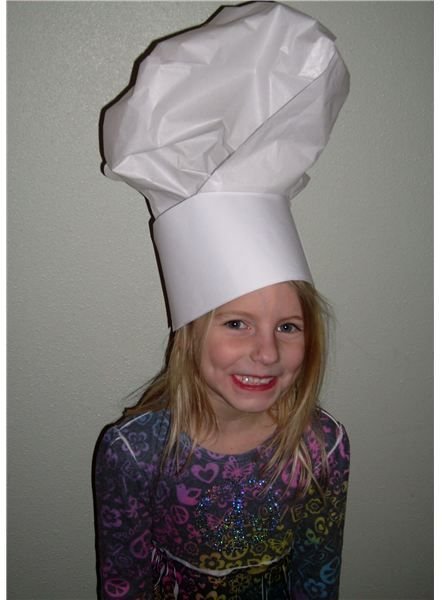
If you’re looking for an activity to coordinate with a cooking theme, try food-related toddler crafts. Chef hat construction, for example, is relatively simple and results in a visually pleasing finished product. Read on to learn how to make one in your classroom.
Kids Love Hats! Kids Love Crafts!
If there’s one thing preschoolers love more than most ideas, it’s toddler crafts. A chef hat creation project, for example, is a fun activity that allows the students to play make-believe with the finished product. This craft can go along with a cooking theme or even a unit on different professions. You can also make up a bunch of hats to put in a dress-up box in the playroom. Use this article as an easy guide to making chef hats with your preschool students.
Materials
- White poster board cut 3 inches wide and at least 26 inches long.
- Three sheets of standard sized tissue paper (20 inches by 30 inches).
- Glue (or tape)
- Paper clip
Step 1: Attaching Tissue Paper
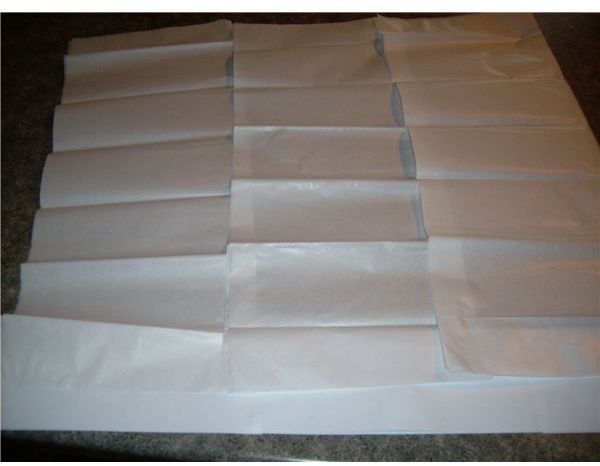
Begin with a strip of the poster board. Of course, you could also use this craft to improve scissor skills. In that case, make strips longer than 26 inches and have the students cut them down to the correct size. Then, fold the tissue paper in half. You’ll end up with three pieces of tall and thin pages, each 10 inches wide. Have the children draw a thin line of glue all around the middle of the poster board strip. Then, lay the tissue paper on the glue, making sure to start on one end and overlap the sheets by about an inch or so. Also, make sure the tissue paper doesn’t hang below the chef hat band.
Step 2: Making the Chef Hat Pouf
Curve the chef hat band so that the taped or glued side is on the outside. Then, turn it upside down to deal with the tissue paper more easily. Paper clip the ends of the poster board together, overlapping slightly. Then, have one partner hold the band while the other partner tightly tapes the tissue paper together in a bundle. Put the tape about 5 inches from the edge of the tissue paper.
Step 3: Finishing Touches
Once you have a bundle of tissue paper, cut off the excess and remove the paper clip. Then, gently turn the band the other way, curving it so the taped side is on the inside of the hat. At this point, you have to fluff the top paper a bit, almost like turning it inside out. Then, use the paper clip to secure the hat bands together and make a perfect fit for each child. This way, one chef hat fits all.
During any of the steps that requiring gluing, you could easily use tape. The glue takes a while to dry and you don’t want the students wearing the hats until they are dry. Toddler crafts like this chef hat usually take some guidance. The children will need your help almost every step of the way, but let them do their own work. If the hat doesn’t look perfect, don’t worry. It’s better for the child to do as much work as possible on the project.


