Quick Take
This lesson teaches how fire burns on a candle. Students will learn how oxygen keeps the fire going, and how the lack of oxygen puts the fire out.
On this page
You will need to gather the following items to perform the candle experiment:
- A candle
- A match
- Fire extinguisher
- Several sized glass jars
- Stop watch
- Notebooks
- Pencils
Follow the instructions below:
- Have all the children gather around an empty long table with nothing except the candle and the glasses you plan on using. This is for protection and fire safety, in case the candle falls over during the experiment. I would advise putting a strip of colored tape on the floor around the table, so that the students do not come too close to the flame.
- Place a fire extinguisher nearby, in case of emergency. It is very unlikely you will need it, but safety precautions are necessary.
- Explain to the students that oxygen is in the air we breathe. Ask them what would happen if there was no oxygen. They should say that we would die because we need to breathe the oxygen in order to stay alive. Tell them that fire is very much the same. Fire also needs oxygen to “live”. If fire needs oxygen to live ask the students what will happen when the oxygen in is gone. Have them write their answers in a notebook. They should label this “My Guess”. Their guess as to what will happen to the fire when the oxygen is important. It is preparation for science in older grades where their guess is labeled a hypothesis.
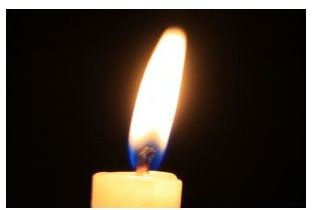
- Light the candle with the match.
- Have a few responsible volunteers to be in charge of the glasses.
- The first volunteer should place the smallest glass jar over the lit candle. Another volunteer should start the stop watch and then stop it when the fire goes out.
- Have the students write “small glass jar” in their notebooks and record how long it took the flame to go out.
- Have the second volunteer place a medium sized jar over the lit candle. Again, time how long it takes for the flame to go out.
- Have the students write “medium glass jar” in their notebooks and record how long it took for the flame to go out.
- Finally, have the third volunteer place a large glass jar over the lit candle. Keep track with the stop watch as to how long it took for the flame to go out.
- Have the students write “large glass jar” in their notebooks and record how long it took for the flame to go out.
- Go over the results with the children. Ask them why they think the larger the jar, the longer it took for the flame to go out. Explain that even though we can’t see the air in the jar, that each jar is filled with air. The larger the jar, the more air that is inside the jar, so the flame stays lit longer.
- Let the students know that the flame was “breathing” in the air and when it had used all the air inside the jar, it had none left and went out.
This science lesson would compliment a fire safety unit.
Photo by Matjaz Ravnjak
Advertisement
This post is part of the series: Kindergarten Science Projects
These projects are fit for Kindergarten children to be able to participate in and learn about science hands on.


