Looking for an engaging design lesson to use in your science, social, math, or art lesson? This creature creation will allow students to design a creature name tag from words they will be exposed to throughout your lesson or your classroom while learning to be creative, have fun and produce art.
Creature creations
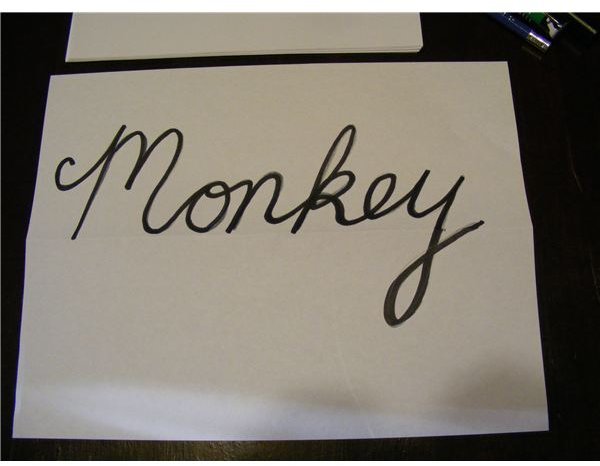
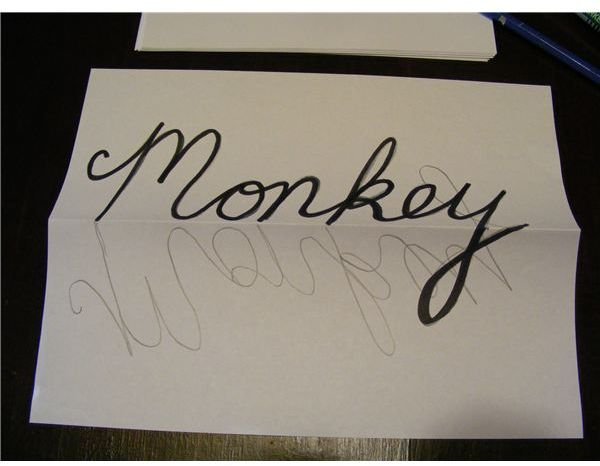
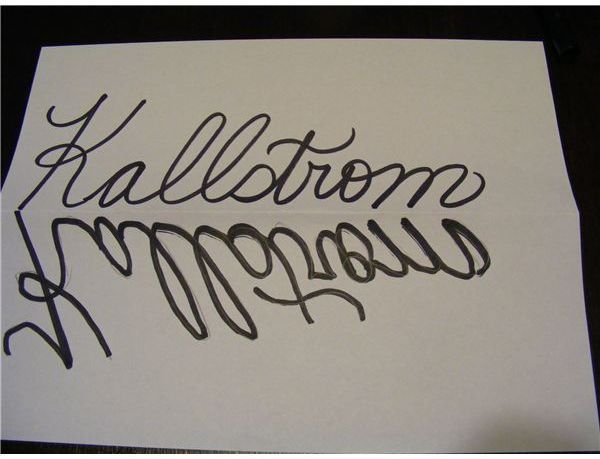
Teacher creatures are words made from the subjects taught in the year, or a specific topic in science such as animals, or even student names. The idea is to design, using tracing and imagination, a handwritten word into a creature such that the person viewing it cannot tell what word or name it was made from. Teachers can draw the original words in their own handwriting using a black marker. The creature is made by tracing a mirror image of the name onto the other side of the paper. By adding lines and color to the mirrored image a creature is formed.
Materials needed:
- 8 1/2 x 11 in white paper
- black Sharpie marker
- pencil
- colored markers
- imagination & creativity
Procedure:
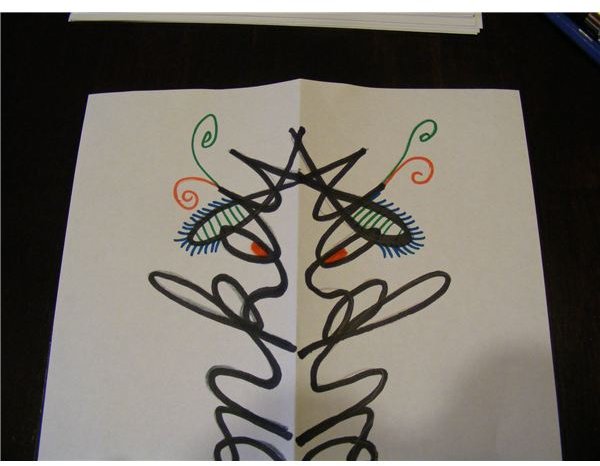
Teachers prepare ahead of time, a list of words involved with their unit such as animals in a science unit. They fold the paper lengthwise and handwrite each word on the fold using a black Sharpie marker. The word is held up against a window and traced onto the other half of the paper, using a pencil. Letters with loops in them such as g, j, p and y, will have only the loop then held against the window, so the loop can be traced with pencil onto the other side of the paper.
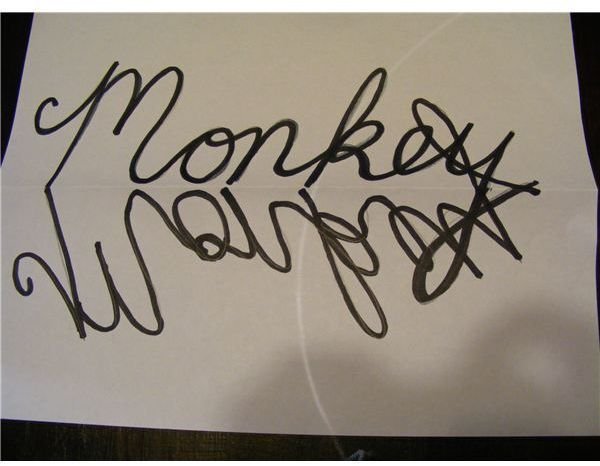
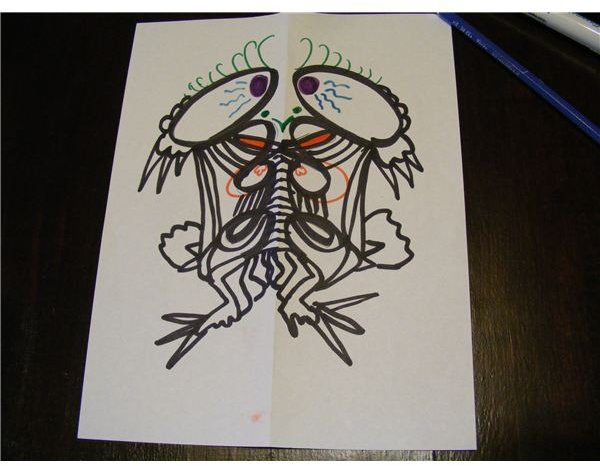
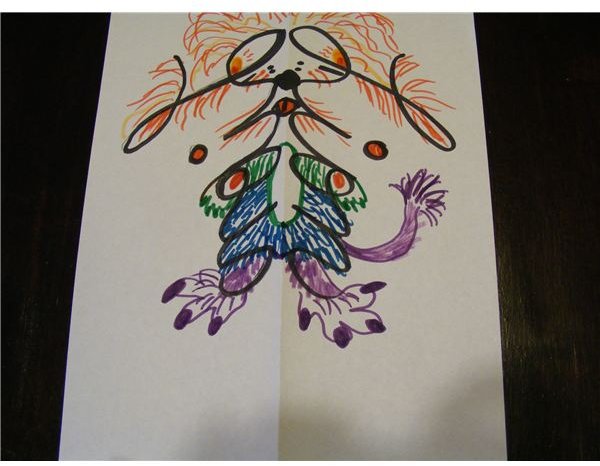
Next, go over the pencil lines with the same black marker to smooth them out. Be as accurate as possible. Now turn the paper vertical and begin coloring in details for a creature. These may include eyes or eye, wings, antennae, arms, legs, tails, etc. Note that although the creature is symmetrical, the additions do not have to be on both sides of the creature.
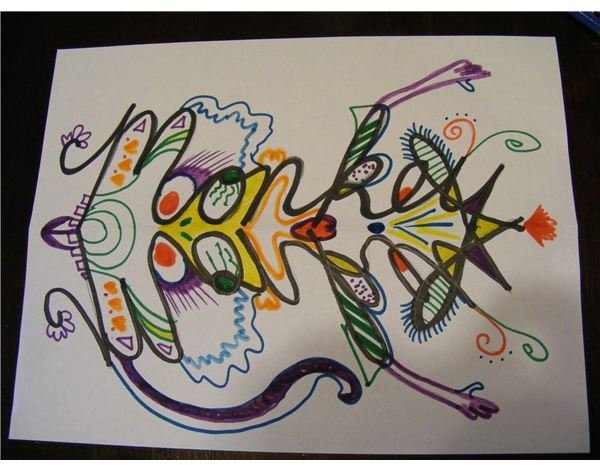
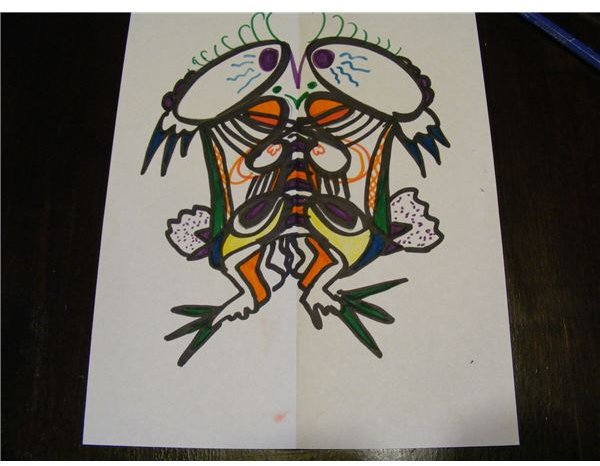
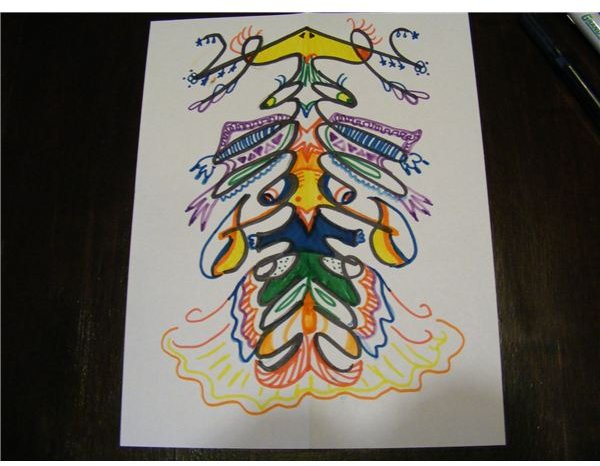
Fill in with many colors, patterns and lines possible to make it look like a creature. You can add clothes or accessories such as fingernails, rings, purses, shoes, flames, whiskers, eyelashes, eye makeup, hats, hair, etc.
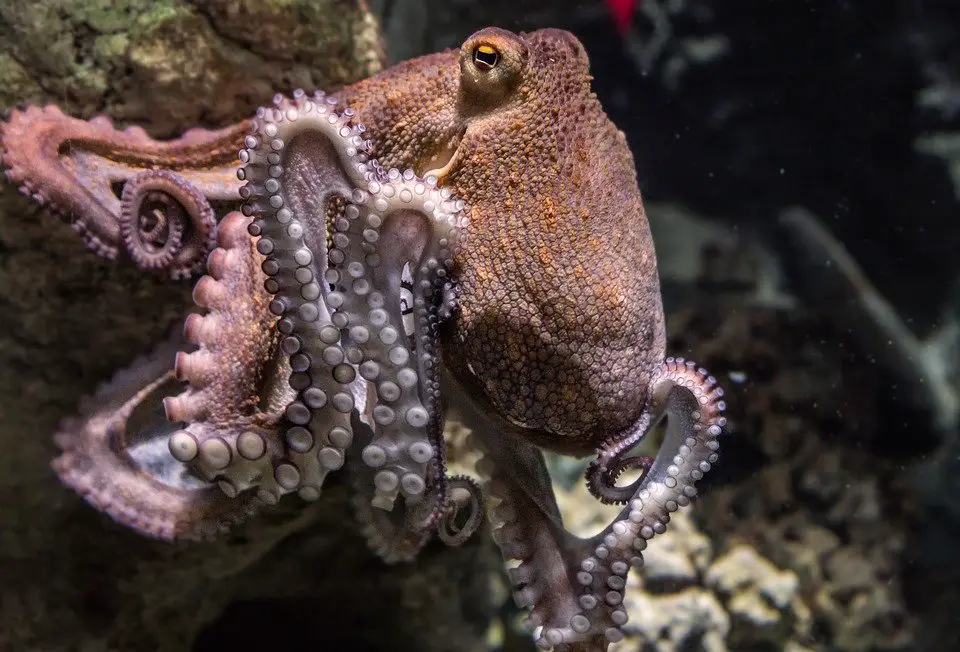
Display the creatures vertically so that it is not easy to distinguish the word in the creature. Use the creature nearby a photo of the original creature, or in its natural habitat.
Images

Hints and Tips
Remember to color outside of the loops and lines created by the word itself. Adding details that are not perfectly symmetrical is what makes the creature unique.
Prepare each step of this lesson ahead of time if teaching the technique to students so that they can understand steps easier. The tracing of an image is done easier if in pencil. Students may or may not know handwriting so it is sometimes difficult to trace a letter backwards and upside down.
Remind students to hold the word vertically with the first letter at the top. If they cannot imagine what kind of details to add, have them turn the paper upside down so that the last letter in the word is at the top. It helps them to discuss with others what they see in the image.
Pre-draw all the words you are using in a lesson so that students can pick out the word they want to use. Make sure there is enough words for each student in the class.
You can use the same word for all students, eg. monkey, and see all of the different kinds of creatures created out of it. Use this to teach that there are many different kinds of monkeys.
If using this lesson for student name tags, handwrite out each student’s name ahead of time to recognize and get to know all the proper spelling from a class list.
Use full circles for dots on the i’s or j’s to create more areas to color in.
Try using only 2 colors to create the creature, as an added challenge.
Teacher Creatures for Teacher Name Tags
Lessons to Teach:
Use these teacher creatures to teach about symmetry in art. What is symmetry and is it the same thing as balance in art?
Use this lesson in science to find out what animals are symmetrical in nature, such as a butterfly. Have students find out how many species of a certain animal there are such as a spider. Ask if any creatures are considered more harmful than others. Incorporate discovery learning by asking students what other things they want to learn about creatures.
Use this lesson to introduce all the teachers’ names in a school. Have each teacher design their own name tag and display them together at in a main bulletin board welcoming the students. Have a contest to guess which creature is which teacher.
Use these creatures to teach about math words. Use the word “addition” and have students add many appendages to their creature. Use “multiply” to have them design multiple groups of items on the creature. Use the word “divide” and divide the creatures parts in half or their limbs into segments. Use the word “subtract” and have the student subtract parts of their creatures by erasing or painting over in white.
Use this lesson to have students create their own name tag for a portfolio. Teacher can draw the original name, but students will enjoy creating a creature out of themselves.
Use this lesson to display subject names in the classroom. Have the student pick out their favorite creature, then let them know which subject this is. It may give them a new perspective about a subject.
Teacher creatures are a student or teacher designed name tag for words and names in a classroom. The steps to creating them are both easy and fun. Each year students can re-design their name tags as they learn ways to be more creative. Teachers can also use the creatures in creative ways throughout their lessons.
References
- Source: Author’s own experince
- Photo credits: Lila Kallstrom