The classic nursery rhyme, “Twinkle, Twinkle Little Star” is the focus of this lesson plan on early reading skills. By repetitive reading, learning new vocabulary, word families and plenty of practice, young readers will be reading this nursery rhyme independently by the end of the week.
A Classic Nursery Rhyme
The gentle tune of “Twinkle, Twinkle, Little Star” brings back nostalgic feelings even for adults. What a great rhyme to teach young students how to read. This rhyme, credited as written by two English sisters, Ann and Jane Taylor, was first published in 1806. It poetically teaches the world of metaphor and imagery by comparing stars in the sky to diamonds.
You have stumbled upon a whole unit of nursery rhymes. Each day of the week is planned for you for each rhyme. See the rest of the lessons and the overview of the unit at the end of this article. Enjoy!
Monday:
Read the nursery rhyme, “Twinkle, Twinkle, Little Star”. Display several forms of the nursery rhyme, for example on a flip chart, books, and on chart paper. Students will likely already know this nursery rhyme and begin to sing it as soon as they see it. It is a good idea to include a self-made poster of the nursery rhyme without pictures to start, so that they learn to touch and read each word without singing it. A word of caution, students may find this to be a bit babyish, so be sure to tell them the purpose of the lesson right away.
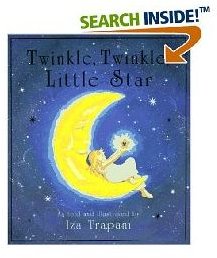
Now that you have collected several versions as possible for students to explore, discuss them. The one by Rosemary Wells (depicted below) is for an older child and has more stanzas than the version children typically know. Discuss the differences in the font, text, and format. Notice the title and illustrations. Create a Venn Diagram about the likes and differences between the texts.
Ask students to define twinkle (to shine with a flickering or sparkling light). Add the vocabulary word “twinkle” and definition of twinkle to the building vocabulary list of new words the students are learning from reading nursery rhymes. Include a brief discussion on how the stars are like diamonds. Brainstorm a list of descriptive words such as, sparkle, twinkle, white, bright, gem, brilliant, and shiny and chart them. Bring some fake diamonds for students to explore in science.
Tuesday:
Reread the nursery rhyme. Circle the rhyming words with a marker or highlight the rhyming words with highlighting tape. Notice that the rhyming words are found at the end of the sentence.
Wednesday:
Reread the nursery rhyme and review the work you have done so far in the week. Today, chart the rhyming words. You can add them to the other rhyming words you have charted from the unit, because tomorrow the students look more closely at the way the words are written. By the end of the unit you will have quite a collection of new words for the students to explore.
Thursday:
Discuss word families. Word families come from the same root word. Chart the -ar words (star, are, far, car, tar, bar and so forth) on one sheet of chart paper. Chart the -y (or-igh) words on another sheet of chart paper (my, sky, try, fly, nigh, sigh and so on). Discuss how the letter “y” sometimes sounds like “i” when it is at the end of a word. This is always exciting for new readers to learn.
Friday:
Set up small groups to reinforce the learning and work more with the rhyme by assigning each group a task. Rotate groups so each student has the opportunity to practice a different skill:
- Print each sentence of the rhyme onto sentence strips. Students put sentence strips back in the correct order.
- Have students illustrate the nursery rhyme the way they see it. By now they have seen many versions, so this is fun for them.
- Have students change the nursery rhyme, but keep the tune. This is a challenge for some students. For example, slippery, slippery little ball, how I wonder where you’ll fall. It helps them to work on descriptive words and work on making rhymes.
- Have students list the rhyming words and word families. Be sure to have the chart you made readily available for young learners.
- Allow students to explore and read all of the versions of the text for themselves and have a book talk.
- Have a group of students create “Twinkle, Twinkle, Little Star” props. For example, a star, the sky, and a child looking up at the sky.
Home-School Connection:
Now that the lessons are done, send the nursery rhyme home in poetry notebooks for the weekend for the student to read with their family, rewrite, or illustrate. The best part about doing this lesson in this order is that the students learn to read and point to each word progressively throughout the week. By week’s end, their parents will be surprised at how they can read it independently.
*Note- this nursery rhyme is available for free download for students to read. See the first article in the series below for the website.
Book Images, Courtesy of Amazon.com


References
- Nursery Book Series, Five Mile Press, 2010 (for the brief history of the rhyme).
- All teaching ideas were created from Laurie Patsalides’ classroom experience.
- Dictionary.com, definition of twinkle http://dictionary.reference.com/browse/twinkle
This post is part of the series: Nursery Rhymes
This is a series that covers several nursery rhymes. Each lesson in the series is a little different, covering history, vocabulary, and word families.
- An Overview for a Week Long Unit Teaching Nursery Rhymes
- Teaching with Nursery Rhymes: Mary Had a Little Lamb
- Teaching with Nursery Rhymes: Twinkle, Twinkle, Little Star
- 5 Days of Humpty Dumpty: Teaching With Nursery Rhymes
- Younger Students Will Enjoy These Fun Rain, Rain Go Away Activities
- Teaching with Nursery Rhymes: Hickory, Dickory, Dock Activities
- Teaching with Nursery Rhymes: Hey, Diddle Diddle


