The face is a fascinating topic for preschoolers to learn and explore. Children will participate in several fun activities before having the opportunity to show off their artisitic abilities as they create a self-portrait.
Faces Are Important From the Beginning…
From the time of birth, children learn to focus on their parents’ faces. They can see the face clearly by the age of 8 weeks. In this lesson, you can take their life-long fascination with faces to a new level–associating the face with shapes that they will eventually learn in math.
Children will identify and recognize the oval shape as well as the parts of the face upon completing the following activities. This lesson
plan could be used with themes such as, “All About Me” or “I Am Special”. It would also be great as a way to build background knowledge before teaching a five senses thematic unit.
Materials:
Body part picture word cards
Feelings Song (music and words by Hap Palmer) and CD player
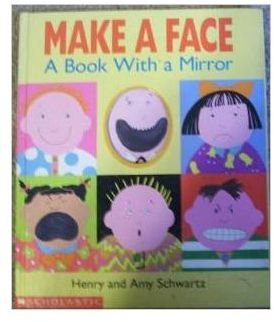
Make A Face A Book With a Mirror by Henry and Amy Schwartz
Mirrors
Oval-shaped objects
Photocopies of mirror template --downloadable from the link.
Scissors
Crayons
Tray with various shapes
Prior Knowledge
To begin, instruct the children to spread out around your class meeting area so they have room to move. Sing the song, Head, Shoulders, Knees and Toes. Next, tell the children they are now going to play a game similar to Simon Says. Explain that they are to point to and name the body part they see when the body part picture cards are held up. As you hold up each body part picture card, say “Simmon Says point to…(blank)”. The children should fill in the blank by stating the body part and pointing to it on themselves at the same time. You may want to include pictures such as: head, eyes, nose, ears, chin, cheeks, fingers, arms, stomach, feet, and legs.
Method
Activity 1: Play Hap Palmer’s song entitled Feelings . After playing the song, ask the children to point to the part of their body that
allows them to show each feeling during the song. (They should point to their face of course.)
Activity 2: Introduce the book, Make A Face: A Book With a Mirror written by Henry and Amy Schwartz. Take a picture walk through the book and ask how each child is feeling by looking at the faces throughout the book. Go back to the beginning and read the story through. After reading the story, take a few minutes to discuss how faces can be alike and/or different.
Activity 3: Model the correct way to handle a mirror. Pass out mirrors for children to observe and explore their own facial features. Ask them to make faces in the mirror to see how they look when feeling: happy, sad, scared, sleepy, and surprised. Using the hand mirror and a pointer finger, have the children point to various facial parts. Have them identify: eyes, nose, cheeks, ears, forehead, lips, mouth, chin, and hair. While looking in the mirror, have children trace around the shape of their face with their finger. Ask the children if they know the shape they just traced. Explain that most faces tend to have an oval shape.
Activity 4: Have several oval-shaped objects available to continue discussion on what an oval looks like. Have children locate ovals throughout the classroom.
Activity 5: Model how to use a real mirror to draw a self-portrait on the mirror template. Discuss the facial features that the children may want to include in their self-portrait. Instruct the children to go to a table to work on this final activity. (HInt: You may want the children to cut out their mirror template first before having them illustrate.) Next, give the children time to use the real mirrors, crayons, and mirror template to create a self-portrait. As the children finish their authentic artwork, you could display them in the classroom with a title like “Mirror, Mirror on the Wall”.
Teacher Tip: Prior to creating the bulletin board display, you may want to photocopy the artwork so you have a work sample in each child’s portfolio to share at conference time.
Assess
Walk around and visit each child as they work. Ask the children to tell you about their self- portrait. Look and listen to find out if they included and correctly identified many face parts. After discussing each child’s artwork, display various shapes on a tray. Ask each child to show you where the oval is on the tray to see if they can correctly identify it.
Extend
The following activities provide preschoolers with further experiences to practice body part identfication and shape recognition skills.
- Place mirrors in the science or discovery learning center of the classroom so children can repeat the activities from this lesson as well as extend their knowledge independently through their own exploration.
- Sing songs such as If You Are Happy And You Know It or play Simmon Says.
- Have the children do body tracings and label various body parts with picture word cards.
- Play shape games such as Shape Bingo or go on a Shape Hunt.
- Hide various shapes in the sand table for children to find and identify.
Resources
Author’s teaching experience
Henry and Amy Schwartz. Make A Face: A Book With a Mirror. Scholastic US. 1994.
Mirror Template taken from A toZ Teacher Stuff


