Halloween is a very exciting time in my classroom. Nothing beats a good Halloween craft to cherish forever! Here are three crafts that are easy for preschoolers to do.
Halloween originated in Ireland. It has roots in the Celtic festival of Samhain, and the Christian holy day of All Saints, but today Halloween is celebrated by almost everyone. Halloween is celebrated in a variety of ways including trick or treating, ghost tours, haunted houses, costume parties, carving pumpkins, and watching scary movies late at night. As an ECE teacher, every October my student never fail to remind me that this is the month for Trick or Treating! They spend the entire month of October counting down the days until they will dress in their costumes and come home with loads of candy. Okay, maybe I help them a little with their excitement! I love Halloween and even more, I love preschool halloween art projects. Here are some of my favorites from around the web.
Plastic Grocery Bag Ghosts
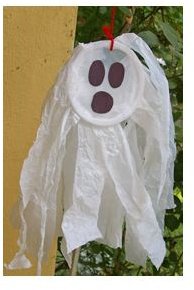
These handmade ghost crafts are fun for my whole class to make together. These halloween ghosts are the best preschool halloween art projects. If the student chooses we hang our ghosts from the ceiling, and we also take them outside to run in the wind while their ghosts are flying behind them. Parents enjoy using the ghosts their children make to hang on their front porch for the trick or treaters to see!
Materials
- Two plastic grocery bags
- One white or clear lid (from an oatmeal container, or a yogurt container-painted white)
- Two white pipe cleaners
- Scissors
- Black construction paper
- Glue
- Stapler
- Tape
- Hole punch
- Yarn
To Begin:
-
Cut off the bag handles on each bag.
-
Cut the plastic bag into 1 or 2 inch thick strips leaving one inch from the top of the bag and one inch from the bottom of the bag.
-
Fold the white pipe cleaner into the seam of one of the plastic bags and secure it there with staples.
-
Bend each pipe cleaner bag into a semi circle and insert into the inside rim of the plastic lid and secure it there with some tape. Repeat this step with the other pipe cleaner and plastic bag, they will overlap a bit which is fine.
-
Cut out ovals using the black construction paper and glue them on as eyes. Punch a hole in the lid and hang a piece of yarn in it.
Advertisement
And their you have it! Handmade ghost crafts! SPOOKY!!
Big Balloon Spider Craft
Another type of preschool Halloween art projects are these spider decorations! These are a great addition to your porch or hanging from your window for Halloween. These scary spiders are made from a balloon and four pipe cleaners. How simple, and no mess! Ahhh, a teacher and parent’s dream!
Materials
- Thick-Black Balloons
- Some yarn, or a twist tie
- 4 black pipe cleaners
- White out (liquid paper) or white tempera paint
-
Blow up your black balloon slightly, so there is still room to twist. Tie the balloon shut.
-
Here is the tricky part: Twist the balloon, creating a larger part (for the spiders body) and a smaller part (for the spiders head). Secure the division with a piece of yarn or the twist tie.
-
Fold each of the four black pipe cleaners in half. Twist the pipe cleaner in the middle and wrap around the twist in the balloon. This makes eight legs. Re-fold and shape each leg to look like a jointed spider leg.
-
Don’t forget to draw the eyes and fangs of the spider using white paint or liquid white-out.
Now you can have fun decorating your home or front porch with these spooky scary spiders!!
Handprint Spider Smiles
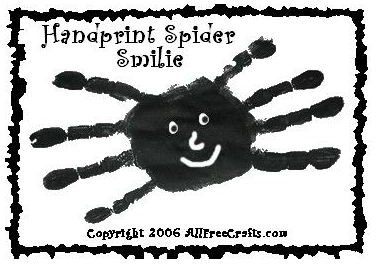
These adorable handprint spider smiles are a very simple project for preschool children to create! These spiders are oh so adorable and are a great way to cherish the size of the childrens’ hands forever!
Materials
- White Paper
- Black paint (washable of course!)
- White paint
- Paint Brush or Cotton Balls
-
Use a paint brush or a cotton ball to apply the black paint to your child or students hands. Make sure to cover every crevise in their palm and only FOUR of their fingers (do not include their thumb)
-
Have the child make the handprint onto the white paper. Press down firmly to ensure proper transfer of the paint and print.
-
Add paint to the child’s hand (again omitting their thumb). Turn the paper around and press down on their hand to create a proper print transfer.
Now the child can add a happy face to their new hand spider. What an awesome treasure!!
References:
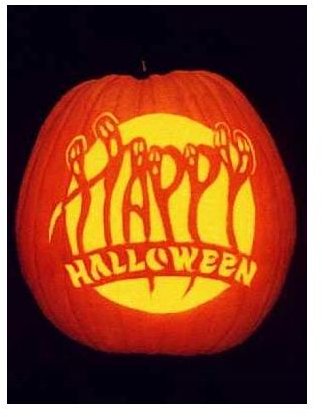
Happy Halloween photo:www.biblehill.ca
Spider Craft:www.enchantedlearning.com
Handprint Spider and Photo_: www.allfreecrafts.com _


