Most preschoolers are familiar with and love ladybugs because these colorful bugs do not bite, sting or look frightening. Take advantage of their fascination with these bugs by using these three ladybug crafts in your classroom or homeschool environment. They are fast, easy and fun.
Are you planning some preschool ladybug art projects? Seize the opportunity and discuss some interesting characteristics of these beautiful bugs with your students.
These projects reflect the fact that ladybugs enjoy eating some types of plants and have a bright, colorful appearance. Stress to your class that ladybugs are helpful insects that eat other harmful bugs like aphids that can destroy crops, trees or other foliage.
Ladybugs and Leaves
This construction paper project can be displayed on a bulletin board with an insect theme. Preschoolers paste ladybug cut-outs onto green leaves in order to represent the insect’s environment and diet.
You will need the following supplies for each student:
- Large green leaf cut-out (one per child)
- Small red circle cut-outs (three or four per child)
- Black crayons (one per child)
- School glue
- Hole punch (for teacher’s use only)
Here’s what you do:
Hand each child a paper leaf, several paper circles (the ladybugs’ “bodies”), a black crayon, and a tube or stick of glue. Instruct the students to glue the red circles onto various parts of the leaf. The design should look like ladybugs that are “scattered” across a leaf surface. Encourage the children to color black dots onto their ladybugs (the students can choose how many dots they wish to add to each bug). Use a hole punch to make several “bites” into each leaf.
This project develops hand-eye coordination and fine motor skills. After the leaves are complete, encourage the children to count how many ladybugs they have on their leaf. One at a time, let them tell the other students how many bugs they counted.
Painted Paperweight
Children can turn any ordinary rock into a pretty ladybug paperweight with some craft paint. Parents will love this cheerful household accessory, and it will serve as a good visual reminder of the lesson for each child.
You will need one large, oval-shaped rock with a smooth surface for each child. If time permits, take a short nature walk prior to this project and let each child search for an appropriately sized rock. Alternatively, you could search for the rocks the day before you plan to do the craft. Depending on the time of year, your class might even spot some ladybugs while they are looking for their stones.
Because the paint needs time to dry during the project, you might want to plan this as a two day project. Paint the first side of the rocks on day one, and then set them aside to dry and work on other lessons or projects. The next day, plan to paint the other side of the rocks early in the day, and let them dry while you teach other subjects. Schedule the art project as late in the day as possible to give the rocks plenty of drying time. Follow the directions below starting with “paint black spots on …”
Project materials:
- Red, black and white craft paint
- Paintbrushes
Here’s what to do if you decide to do this as a one day craft:
- Show the children how to paint the top halves of their rocks with red paint. Allow the paint to dry.
- When the tops of the rocks are dry, instruct the children to paint the underside with red paint. Once the entire rock surface is covered in red paint, allow it to dry completely.
- Invite the students to paint black spots onto the “body” of their ladybugs and to paint a small black “head” at one end of the paperweight. Allow the paint to dry.
- Finish the ladybug paperweights by adding white painted “eyes”.
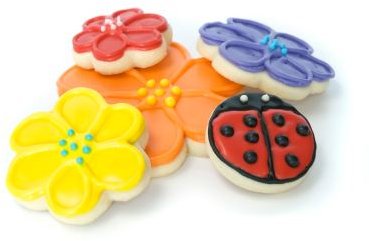
Frosted Ladybug Cookies
Preschoolers will have a lot of fun with this edible craft. These decorated ladybug cookies are almost too cute to eat, but you’ll find that most children will quickly make them disappear. They may even beg for more!
Here’s what you need:
- Unfrosted sugar cookies, one per child
- One tube each of red and black cake frosting
- One plastic spoon per child
- Black licorice sticks, cut into tiny pieces for “eyes”
Teacher’s note: It’s probably a good idea to have extra cookies on hand in case someone drops or breaks a cookie. You’ll also want to double-check each child’s records for any food allergies.
Here are the project steps:
- Give each child one cookies and a plastic spoon.
- Help each one to squirt a small amount of red frosting onto the cookies. This is an excellent time to talk conversationally about how nice it is to share and take turns.
- Instruct the children to spread the frosting evenly with their spoons.
- Let each child decorate his or her cookies with black frosting “spots” and black licorice “eyes”.
A good way to extend the lesson and give the students a richer learning experience is by reading a book about ladybugs to them while they eat their completed ladybug cookies. The Grouchy Ladybug by Eric Carle is a perennial kid’s favorite and age-appropriate for preschoolers.
These educational and creative preschool ladybug art projects are fun additions to springtime classroom units but they can be used as successfully during units about insects or farm life or many other topics. Teachers can easily include one or all of these activities as part of an insect or ladybug lesson plan .
References
The author’s own experience as an educator
Image Credit
Istock photo 6073985 purchased by author and used under license


