This easy watercolor painting lesson will produce a scene with snowflakes or a scene in a snow globe using simple watercolor painting techniques. All elementary grade levels will enjoy this easy winter watercolor project.
Let it Snow!
This lesson will begin with how to create a winter background with snowflake relief. These can be displayed in a snow globe or as a
larger watercolor painting. It is adaptable to the older grades by creating more intricate snowflakes and snow scenes inside the snow globes.
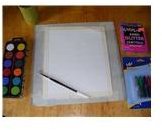
Materials:
- Watercolor paints
- Watercolor paper
- Watercolor brush (#6 )
- Masking tape
- Oil pastels, or wax crayons for resist
- White matte board or manila tag paper for mounting
- White acrylic or tempera paint
- Silver glitter or glitter glue
Procedure:
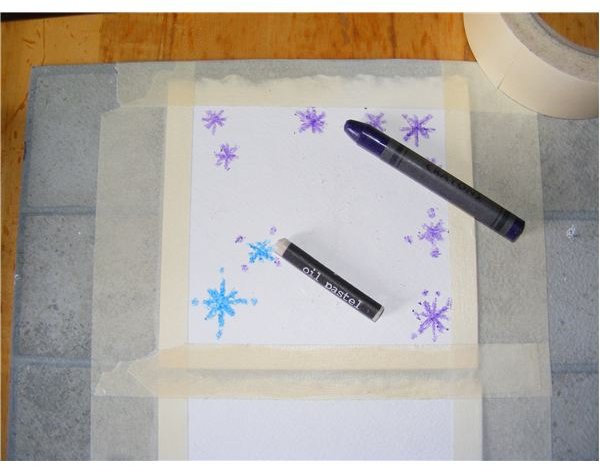
1. Tape the watercolor paper around all four sides to a board or old tile to paint on.
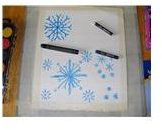
Show students enlarged examples of snowflakes from books, photos and the internet. More details can be shown to older students. Discuss the concept of symmetry and hexagonal shape.
2. Use a pastel (white) or wax crayon (blue) to draw several snowflakes on the paper as water resist. If creating snow globes, draw the snowflakes smaller and simpler in design on smaller paper.
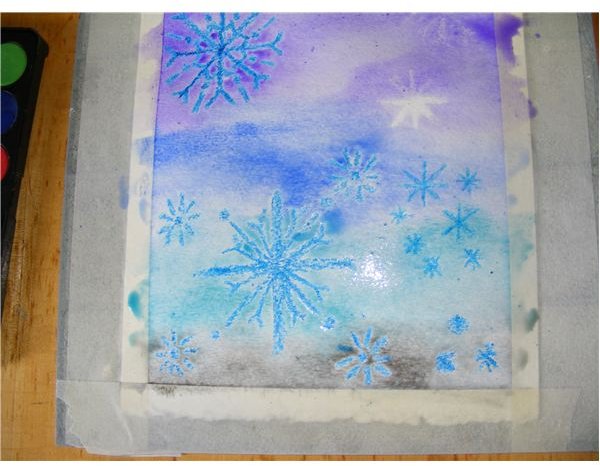
3. Wet the entire paper with water. Paint a cool color such as purple or blue across the top 1/3 of the painting for the background. Add a
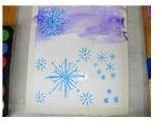
second color touching the first color. Tip the painting to allow the colors to mix. Let the water do the work.
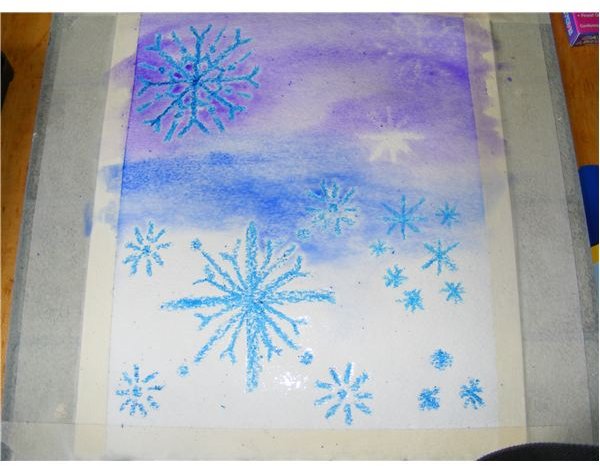
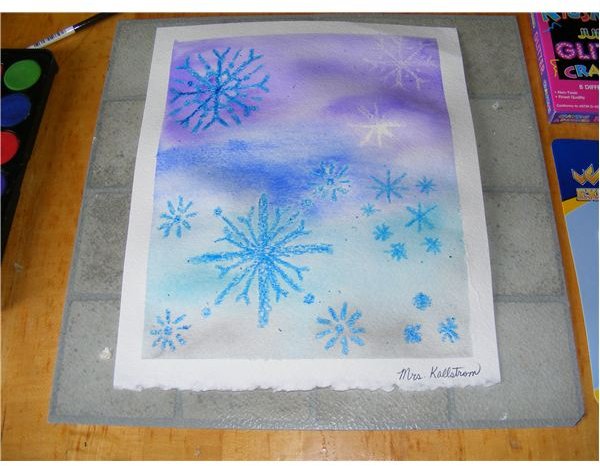
4. Add a third color such as teal or grey filling the entire paper. Remember to paint in between small areas of the snowflakes. Allow painting to dry. Remove the tape and have students sign their art on the white boarder.
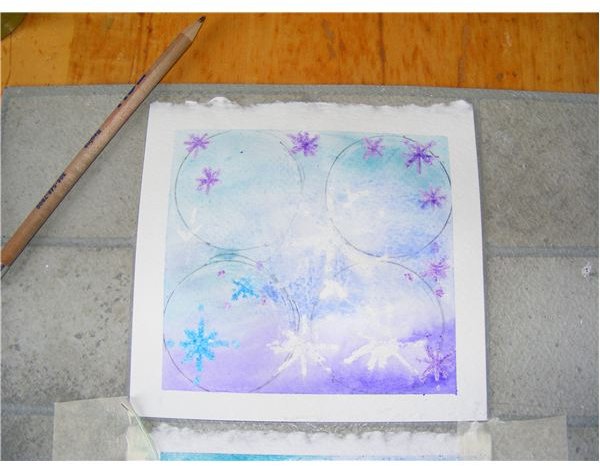
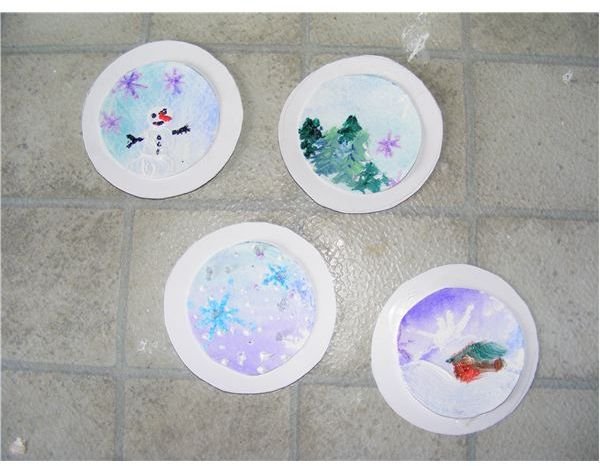
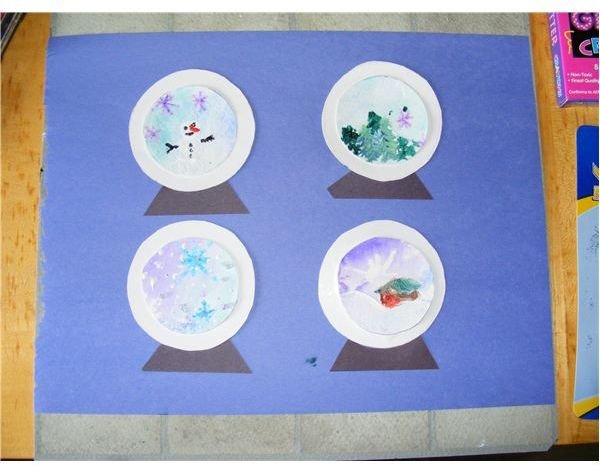
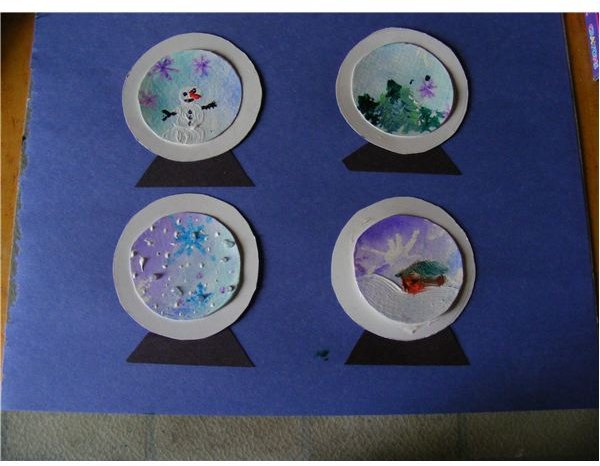
5. To make snow globes, use a lid or a circular object to trace circles in the background. Cut out the circles. Place each circle on a white matt background or manila tag paper that has a larger circle cut out of it.
6. Use white acrylic paint to paint in snowmen, penguins, pine trees or other snow scenes. Apply glitter or white acrylic paint in small dots all over the snow globe. Attach a black piece of paper to look like the base of the snow globe. Attach the snow globes to a blue or grey snowy background bulletin board.
Photographs of the Steps Involved
Hints and Tips for Creation
- Students should be reminded to wet all surfaces before painting. Allow one color of blue or purple to touch another so that the water mixes them rather than trying to brush one color overtop of the other. Let the water do the work.
- Press hard when using a wax crayon to draw on watercolor paper. Students cannot do a very intricate design as the wax crayon is too thick.
- White pastels are very hard to see on white watercolor paper. However they create a very unique relief painting when the paint is painted on.
- Use a small brush or even a toothpick to paint details in snow globes. Paint in a snowman with a face and scarf, spruce trees or a winter cabin for a challenge in older grades. Younger grades can paint a penguin using their thumb print and white paint.
Photos of the Snow Globes in Progress
Techniques Teach
-
Use the lesson to teach about symmetry. Examine real snowflakes in nature if possible. Examine crystals. A good website to see the science behind a snowflake can be found at Paper Snowflakes . There you will find templates, stencils, silhouettes, and the science and history of snowflakes.
-
Use the lesson to teach about handmade items such as snow globes, and watercolor cards. A website with several ideas for cards, including a snow globe card can be found at Impress Rubber Stamps . Handmade cards can be made from stamps applied to the watercolor backgrounds. Snowflake stamps or snowflakes made of glitter can be applied to the winter background created in the watercolor painting lesson.
-
Ideas for creating real snow globes can be found at: Spoonful.com: Snow Globe . These snow globes are made from recycled baby food jars or larger jars. The watercolor painting of snow globes and real snow globes can be displayed together.
-
Special techniques for creating texture for snow can be created with spackle, glue and glitter, or sponging on white acrylic paint. Ice can be created using plastic wrap placed on the watercolor while the painting is still wet. It will look like cracked ice. Glitter can be applied along the lines created by the plastic wrap.
Students will enjoy creating snowflakes, snow globes and pleasing wintry backgrounds. Glitter glue adds sparkle to the finished designs. Older students will enjoy painting a miniature winter scene inside a snow globe speckled with snowflakes.
Photo Credits: Lila Kallstrom
References
- Classroom experience. Photos by the author.
This post is part of the series: Watercolor Painting Lessons With Winter Themes
These articles will display watercolor techniques for creating winter landscapes, frosted windows, polar bears, snowflakes and Valentine’s Day paintings. The watercolor painting lessons are easy to follow and can be adapted for elementary art lessons, grades 1 through 8.


