
These adorable Santa faces are sure to be fun to make and reinforce shape recognition for the preschool student using a heart shape, fine motor skills and colors. The faces make for a festive classroom display around the holidays, too, until it’s time to take them home.
Making Santa Claus Faces
Below are the steps needed to make this preschool Christmas craft.
Gather Materials:
- White construction paper heart (cut out by teacher or drawn for students to cut out, depending on age and ability). If the students are cutting, follow safe scissor-handling practices.
- White tissue paper (cut ahead of time into small squares, approximately 24 squares per student) for Santa’s beard and brim of his hat
- 1- large red pom-pom for Santa’s nose
- 1- large white pom-pom, or cotton ball for Santa’s hat
- Red crayons, brown, tan or peach crayons
- Glue sticks (when using tissue paper, glue sticks are solid adhesive and lighter than white glue, but white glue can be substituted). When using glue or glue sticks with young children, follow safety precautions.
Teach
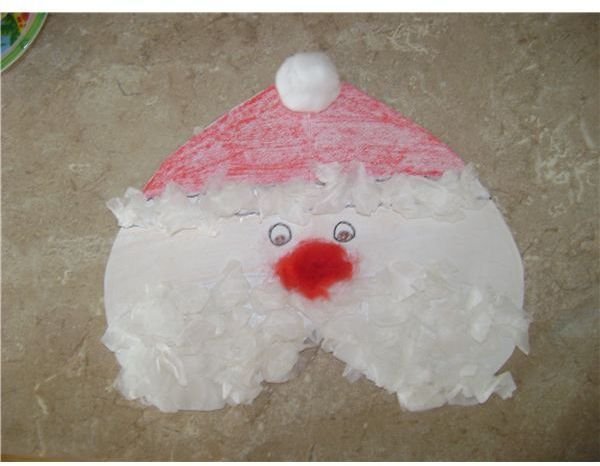
Show students the shape of the heart for shape recognition. Show them how you will start this project with the shape upside down. The tip of the heart will be Santa’s hat. Make a sample ahead of time, as provided below so students can see the finished craft.
Also, let students hold the pom-pom for sense of touch.
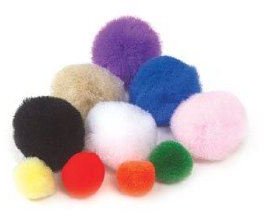
Describe the pom-pom to build their vocabulary (soft, spherical, fuzzy)
Discuss the colors (white and red) needed to create the craft.
Begin the Craft
Print the students’ name (or have them print their names) on the back of the Santa face.
Using a pencil, section off the face to create the beard and hat. Leave a white space for the brim of Santa’s hat. Follow the sample picture to the left. Students of this age may not understand the proportions and as this is a craft and not an art project, it is acceptable to do so.
Have the students color the hat, draw the eyes, and color Santa’s skin (have students choose the color of Santa’s skin-tone based upon the student’s skin tone).
Have students glue the red pom-pom, and the white pom-pom in place. Last, have the students roll or squeeze squares of tissue paper and glue into place for Santa’s beard and brim of his hat. This part of creating the craft will help the students to practice fine-motor skills.
Last, display the completed Santa face crafts in the classroom, or have students hold the Santa faces up over their faces as you sing a Christmas carol together (be sure to have a camera ready with the latter). Consider also making a Santa’s Elf craft with the class.
Decorate a Santa Face Cookie for Snack
Extend the activity to make the same Santa face on cookie cut-outs, too!
You Will Need:
- Heart shaped cookie cutter*
- Sugar cookie dough
- White frosting (canned)
- Red sprinkles
- Marshmallows
- Red gumdrops or spice drops
- Raisins or small chocolates (like Raisinettes)
- Coconut flakes
Directions to Decorate Santa Face Cookies:
- Bake sugar cookies ahead of time; cut them with the cookie cutter into heart shapes.
- Cover Santa’s beard with white icing and sprinkle the top with coconut flakes.
- Use a red gumdrop for Santa’s nose.
- Use 2 raisins or small chocolates for Santa’s eyes
- Use white frosting for Santa’s hat and sprinkle red sparkled sprinkles on top.
- Top Santa’s hat off with a white marshmallow.
*Hint- use a large cookie cutter for a larger heart cookie as this will be easier for young students to manipulate. Allow students to make 2 cookies–one to eat at school and one to bring home.
Last Thoughts on Assessment
Students will love to make this Santa face craft, most especially when followed up with the cookie decorating. Assess the skills of fine motor, spatial reasoning and following directions when doing either of these decorations.
References
- Pom-pom photo courtesy of Amazon.com
- Craft, santa photo and cookie idea are from the author’s experience teaching preschoolers.


