Collect mementos from a day at the beach or a nature hike, then create rice paper with everyday materials for a fun in the sun keepsake. This easy art project is enjoyable for all, and teaches division, multiplication and measurement skills, reinforcing your child’s developing math skills.
Collect Your Fun in the Sun Momentos
This easy art project requires few materials and is perfect for a school break. Better yet, plan ahead to do this on a family vacation when you are staying near the ocean or near hiking trails.
Begin this project by having some fun in the sun on a beach combing adventure or on a nature hike. Let the children collect items such as tiny seashells or small pieces of driftwood on the beach, or leaves, feathers, flowers, or moss along the trails.
You’ll combine these with everyday materials you either have on hand at your home, or brought with you (or purchase) while on vacation. The end result is homemade paper that will display your child’s keepsakes. The paper can be used to create boxes, paper lanterns, mobiles or other decorations.
Gather Your Materials
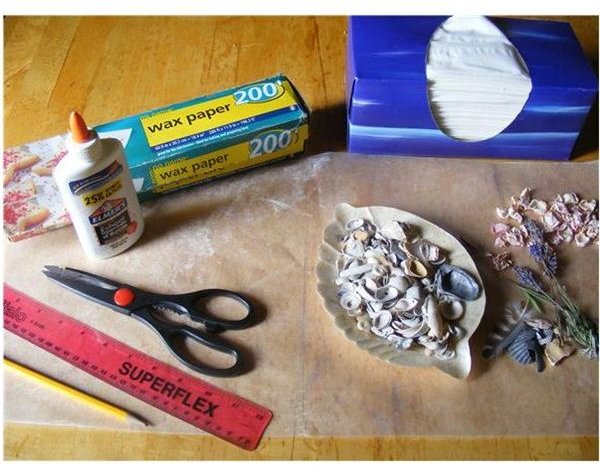
Materials
- wax paper (or if unavailable, plastic wrap)
- white glue
- tissues (or tissue paper), white preferred
- paintbrush
- ruler
- pencil
- scissors
- natural materials such as small tiny seashells, feathers, sand, scales, small flowers, leaves, flower petals, pine cones etc.
- pail or plastic bag
- glitter or sequins (optional)
Project Procedure:
For best results, read through all the steps, read the ‘Hints and Tips’ section, and pre-plan your final product, as there are several options.
Step 1: Have some fun in the sun to collect materials
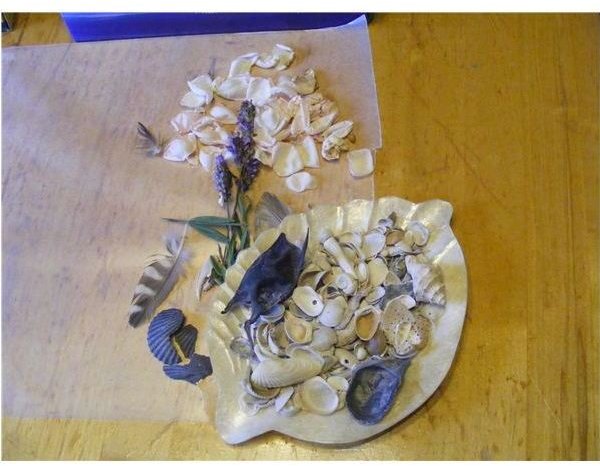
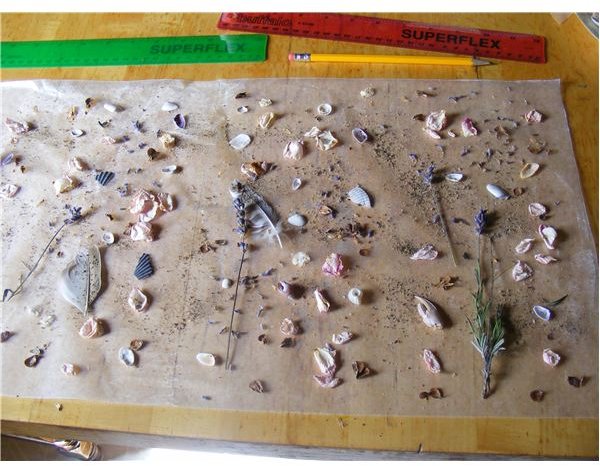
Spend time gathering small tiny spiral seashells, small rocks, fine sand, feathers, pine cones, tiny flowers such as lobelia or other light yet interesting objects as mementos of your vacation or a fun outing near your home. Take your time to examine them. Take all day to collect them. Parents could spend time explaining the names of leaves or flowers. Store in a Ziplock bag, beach pail, or envelope.
Step 2: Prepare wax paper
- Find a work surface such as a wooden table or plastic covered desk.
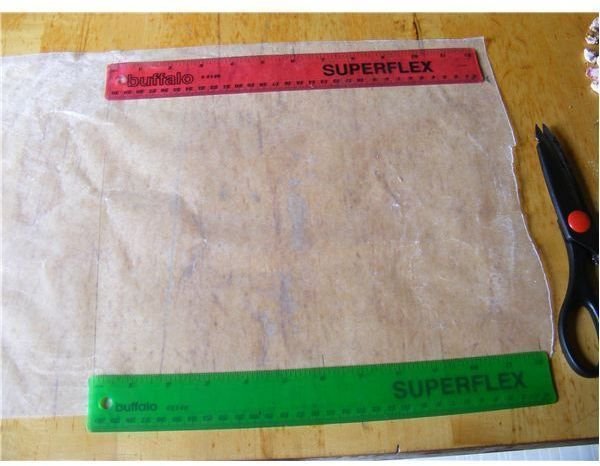
- Cut a long sheet of wax paper, 24 inches long, or whatever size desired. Use the ruler to measure the paper once it is torn from the roll.
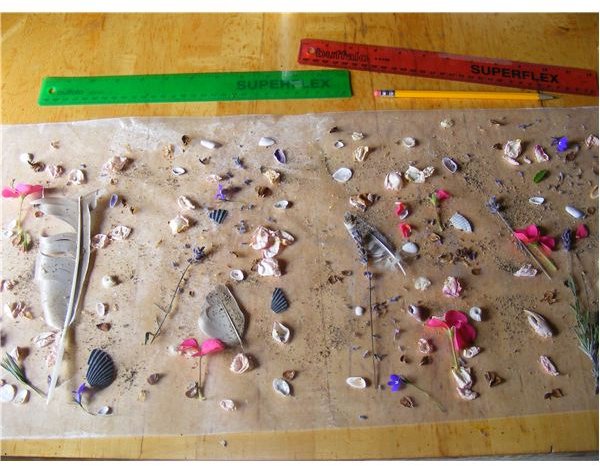
- Measure and mark (on both the left and right sides of the paper) 4 equal sections, 6 inches long, where the paper will later be folded or cut. Draw a light line on the wax paper with the pencil.
- Find other material to add to the rice paper such as glitter, sequins or flat leaves if desired.
- Place all items on wax paper in a random pattern. Try to place equal amounts of materials in each section.
- Math Tip: Have your child divide all collected materials into 4 equal piles. Ask them to multiply an amount by 4 to see if they have enough to cover all sections equally. (See images below.)
Step 3: Cover the materials
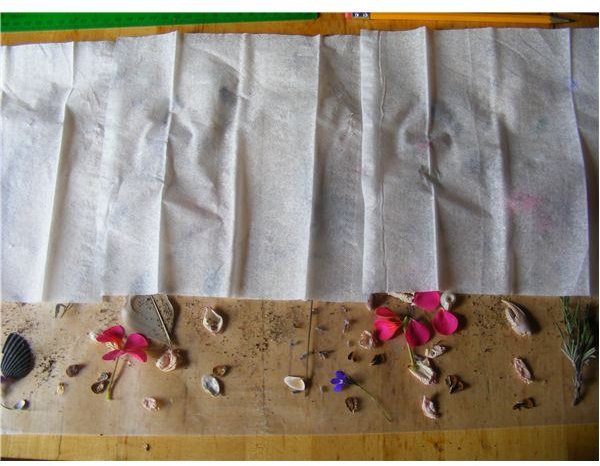
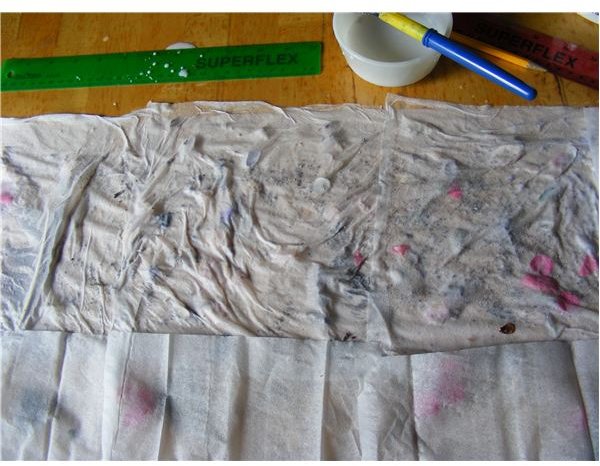
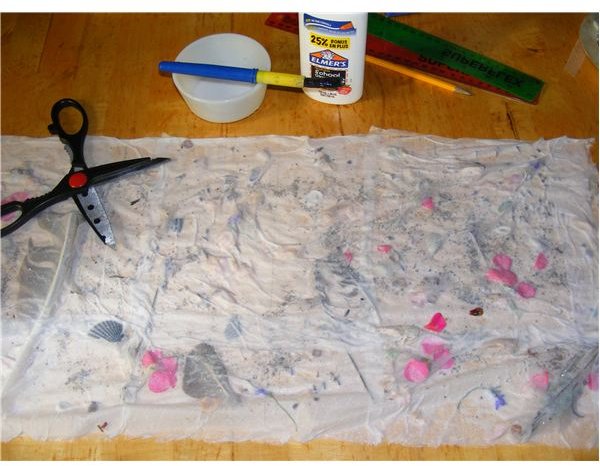
Using 1 ply tissues (you can separate 2 or 3 ply tissues), place them over the top of all the materials. Then using a mixture of 1 part water to 1 part white glue, paint the glue mixture over all of the tissues. Try not to tear the tissue.
Tissues may overlap and go over the edges, but should not overlap by too much. The watery glue should be spread excessively. It will be watery and messy.
Note: This is a fun part of the art project for a child, but help may be needed to make sure all of the tissue is coated. It does not matter if the materials move out of place.
If using plastic wrap, use small pieces of tissue paper to cover all of the objects. Several layers can be used for the art project. Colored tissue paper will not show the items as well as white. The paper will also turn out to be more shiny and glittery with plastic wrap.
Step 4: Drying and Finishing
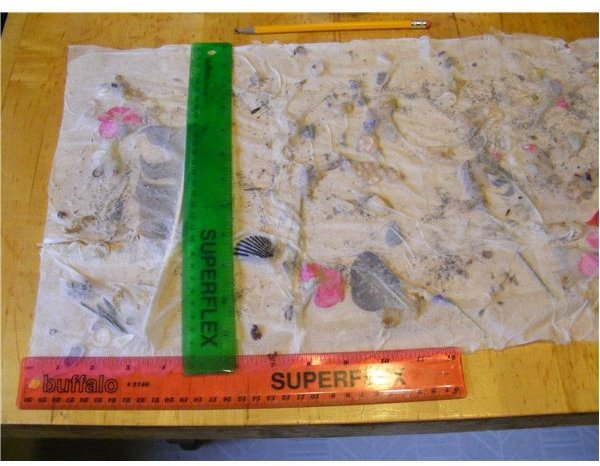
Allow the paper to dry for several hours or overnight. If the work surface is covered in newspaper, the rice paper will stick to it and dry onto it. The edges of tissues can be trimmed while still wet. This will create a jagged edge. When the art project is dry, trim the edges with scissors.
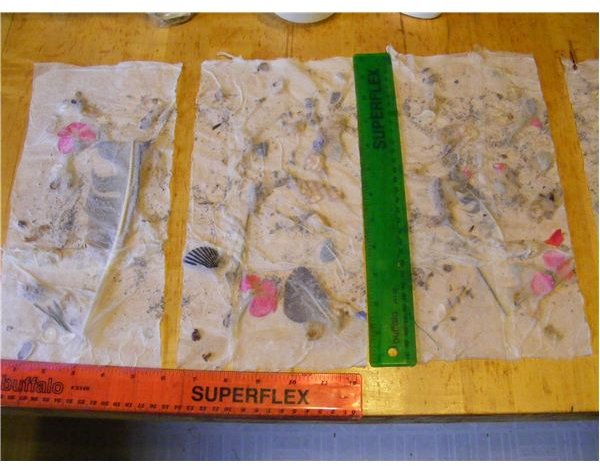
You can fold the paper into fourths or cut it apart into 4 equal 6 inch pieces. Math Tip: The measurement lines will now be covered so your child can remeasure 4 equal sections. Have the child measure the entire length and divide this number in half. Then have them divide the result into halves again. This is one method of division into quarters.
Steps One Through Four
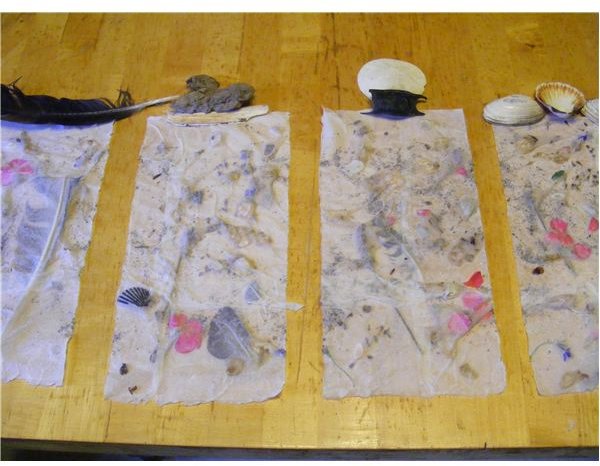
Step 5: Mounting and Measuring
There are many opportunities for your child to practice math in the final stages of the project, no matter which option you choose.
-
You can now tape the 4 sections of 6 inch pieces of rice paper together using clear scotch tape. This will create a stiff rectangular box to use as a paper lantern. Ask your child to estimate the total distance around the lantern. To find the distance around without using a tape measure, they can multiply the width of 1 side by 4 to find the total distance around.
-
You can also tie the rice papers to a stick using strings to create a mobile or 4 separate mobiles. Ask your child where they should create holes in the paper to tie the paper at equal distances from the center of the paper for balance. Ask them to divide the 6 inch paper into 3 equal sections. Have them measure and mark the paper at the 2 and 4 inch mark to show they understand.
-
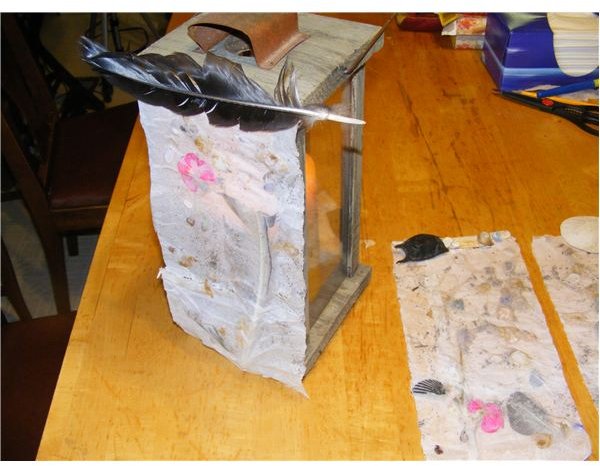
Tape the rice paper sections to 4 outside panels of a glass lantern. Tape or glue the paper around a votive candle holder or jar. If they use a 6 inch section of paper, explain that the distance around the jar, or circumference, has to be 6 inches also.
-
Mount the rice paper in a frame. Have your child measure around the paper to find the exact lengths and widths for a frame. Add all 4 lengths of the sides together to find the perimeter. The paper should be 6 inches by 12 inches so the perimeter would be 36 inches. If you find a 4 by 6 inch frame to use, ask your child how many frames would be needed.
Dividing the Paper
Hints and Tips
Wax paper will show colored objects such as leaves and colored flower petals easily through the paper, but they must be fairly flat. The tissue side will be lumpy when dry.
The rice paper will be very stiff when dry so plan or mark every 6 inches with a pencil so that shells will not be on the fold or cut line. The lines can be measured and marked again once the paper is dry.
Use the paper to tape around a votive or glass jar. When a light is shining through the paper, see what patterns are produced on the wall. Use stamps or scissors to cut interesting shapes out of the rice paper for another effect.
Glue on larger objects such as feathers, shells or sticks across the top and bottom to finish or frame the rice paper.
Use this project in the fall with different leaf shapes and colors. Use this project in the winter with flat pine cone pieces or cedar boughs. Use this project in the spring with seeds, petals and scented flowers such as lavender.
Math Lessons to Use
Use the art project to teach about fractions. Ask your child about how many shells were used. Ask them what one-quarter of this amount is or about how much to use in each of the 4 sections. Divide all the objects into 4 equal groups when sorting them to place on the paper.
Use the activity to teach multiplication. Count how many leaves are in one group and ask your child to multiply this by four. Begin with small amounts (such as 1 feather) and multiply this amount by 4. Then build up to multiplication by larger amounts. Ask how many objects would be needed to make 3, 4 or 5 lanterns to practice multiplying facts.
Use the tissues to teach about division and multiplication together. Ask your child how many 2 ply tissues it would take to cover 12 inches of space, if each 1 ply tissue covered 3 inches. Would you need more or less tissues if the tissues were 3 ply?
Use the wax paper to teach about measurement. Ask your child to divide and mark where one half of the paper would be if the paper is 24 inches long. Help your child to measure and mark each section at the top and bottom of the paper. Remind them that 2 measurement marks are needed because 2 points make a line. Join the measurement marks to create a straight cutting line.
Use the fun in the sun aspect of the project to teach about patterns in math, or patterns found in nature. Discuss the spiral shape you find in seashells. Ask what other patterns are seen in nature (eg. Honeycombs, symmetrical patterns on butterflies, scales patterns on reptiles, palm leaf patterns). Show how to line up objects to form a repeating pattern of shapes or colors on the rice paper.
This rice paper project is a creative and fun way to put together seashells and beach combing items into beautiful lanterns, wall hangings, and mobiles. Parents will find it an opportunity to teach some basic math skills such as division, multiplication, patterning and measurement. Children will enjoy learning while creating paper out of natural objects. This is a fun, simple, and artistic summertime project that can be used any time of the year.
References
-
Photo Credits: Lila Kallstrom
Reference: Author’s own experience