This fun art activity is great for visually impaired children as it combines learning about animals, art activities and night and day activities - all in the one neat lesson! Use ‘Zzz..The book of sleep’ as the basis for this literature and art activity for visually impaired children.
What You Need for This Art Activity
Art activities for visually impaired students need to be well organised, with your prior preparation done ahead of time. Use tactile labels for materials and tools, and ensure there is a structure in place for locating items in the art room. For this art activity you will need:
paper plates
- cardboard
- paper offcuts or material off cuts (these can be of varying tactile surfaces to add interest and promote choice making)
- glue
- stapler
Before You Start This Art Activity for Visually Impaired Children
Talk about concepts such as night and day (remembering that some visually impaired children will be able to tell night and day apart, while others visually cannot).
Link this art task with other night and day activities such as dividing daily activities such as washing hair, getting dressed, putting on pyjamas, sleeping, playing or brushing teeth into night and day categories.
Talk about animals and discuss or do other animal activities such as drawing pictures, feeling real animals or learning vocabulary about animals.
Discuss how some animals are awake at night (nocturnal) while others are awake during the day – have children suggest why this might be, and how these animals might have different features depending on whether they are awake during the night or day.
Talk about activities these animals might do while they are awake at night or during the day – hunting, sleeping, preparing nests, looking after young etc.
Read the story ‘Zzzz-The Book of Sleep ’ and discuss the animals and their activities which are shown during the book.
For visually impaired students, ensure the book is given good coverage from an auditory point of view, and that pictures and colours are discussed.
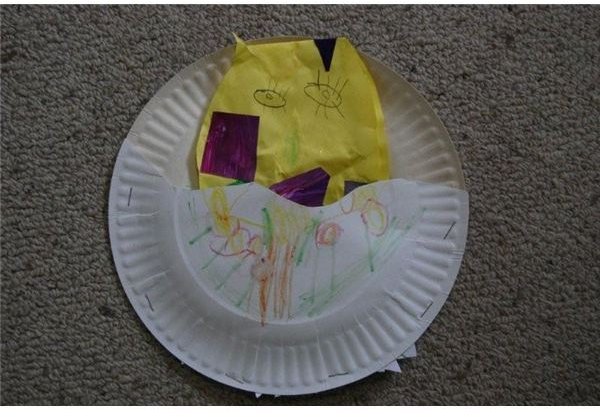
To Make the Owls
To make the owls and their nests, encourage your visually impaired students to make choices about textures, shapes and style for their owl and the nest.
-
 Advertisement
The owls can be pre-cut by the teacher or cut out by students, depending on skill and safety issues.
-
Decorate the owls using chosen materials and stick on a triangle of paper for a beak.
-
Cut a paper plate in half and reverse it over the top of a second, full size plate to create a hollow inside for the nest.
-
Fill the nest with paper strips or newspaper strips or cotton wool or dry leaves - give students a choice of materials for ’nest bedding’.
-
Once the owl is dry, place it inside the paper plate nest and display!