Teach Position Words in Preschool Using Alice Schertle's Book: "All You Need for a Snowman"
In many parts of the world, winter means snow. What an exciting time it is for young children! Whether or not it is snowing where you are, you can read the winter book All You Need for a Snowman, by Alice Schertle, and use it to practice position words with your little ones.
Lesson Objectives:
1. Reinforce the understanding of position words: up, down, in, out, front, back, over, on, under, top, bottom, middle, beside, next to, between
2. Practice listening skills
3. Practice following directions
Read the Book
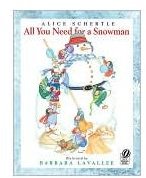
Begin by reading All You Need for a Snowman. The children will enjoy the colorful full-page illustrations and feel the excitement of the characters in the book as the snow begins to fall. Students may even chime in as you come to the word, “Except…”
Practice Position Words
A. Choose nine of your students to sit on the floor in three rows of three students each. This would resemble a tic-tac-toe format. Now ask the rest of the class to answer questions about the group. Below are examples of questions. Substitute the real names of the students in these questions.
1. Who is sitting between Sue and John?
2. Who is sitting in front of John?
3. Can you ask the person beside Sue to put her hand on top of her head?
4. Can you ask the person behind John to stand up?
B. Play “Simon Says” using the position words. Do not demonstrate as you give the commands. See what the children do when they just hear the auditory direction. You may need to add a visual cue if the children are slow to respond.
Build a Snowman
Preparation:
Gather Materials
- Hats—it is important to have big and small hats
- Scarves
- Mittens
- Cut out circles from construction paper to use for buttons, end of nose, rosy cheeks
- Miscellaneous items of your own choosing(colorful beads, broom, etc.)
- White sweatshirts (one for each group)
- Thin width masking tape
Divide children into small groups. Choose one student to be the snowman and ask that student to wear the white sweatshirt. Be mindful of any student who may be sensitive to tape being placed on his or her nose or cheeks. Provide each group with a variety of materials that you have collected and some double-sided tape. The others are instructed to follow your directions to create their snowman. Give directions such as:
1. Place a small hat on the snowman’s head.
2. Put a mitten on one hand only.
3. Put another mitten in front of the snowman
4. Put a broom beside the snowman
5. Using tape put an orange circle on the snowman’s nose.
6. Using tape, place three circles on the snowman’s chest for buttons. Place the circles in a row going up and down.
7. Tie the scarf around the snowman’s middle.
Individual Snowmen
Preparation:
- Crayons
- Paper for drawing
Draw a template of a snowman using two or three circles. Then copy enough for two copies for each student.
Tell the students that you are going to give them directions to decorate their snowmen to help them practice color words and position words. Give each student one copy of a snowman. Then give directions such as:
1. Draw a red hat on top of the snowman.
2. Draw a small snowman beside the big one.
3. Draw three green buttons on the snowman.
4. Draw a belt around the snowman’s middle
5. Draw shoes on the bottom of the snowman.
Use the second paper for each child to create his/her own snowman. You may also choose to have pairs of students give each other directions to create a snowman.
Using books to teach other concepts such as position words is a wonderful cross-curriculum technique.
Image courtesy of BarnesandNoble.com
