3 Preschool Tooth Brushing Crafts That Will Have Students Bristling With Excitement
Many teachers include a dental component to their curriculum, and some even have a dentist who visits their class. Prepare your
students for this special theme with these preschool tooth brushing crafts. Help them learn why it is necessary to brush their teeth, and ways of doing so using these crafts as extensions to your lesson plans on teeth. Before the students begin, demonstrate how they should be completed in a step-by-step manner, which will also give them a model when you are finished to reference throughout their construction time. Due to the differing levels of preschoolers, some crafts may need to be altered according to a student’s skill level.
Open Wide!
Materials Needed:
Red construction paper with a 4x6" oval traced on it (one for each child)
Pre-cut circles from white construction paper (20 are needed for each child)
Glue sticks (enough for the children to share)
Safety scissors (enough for the children to share)
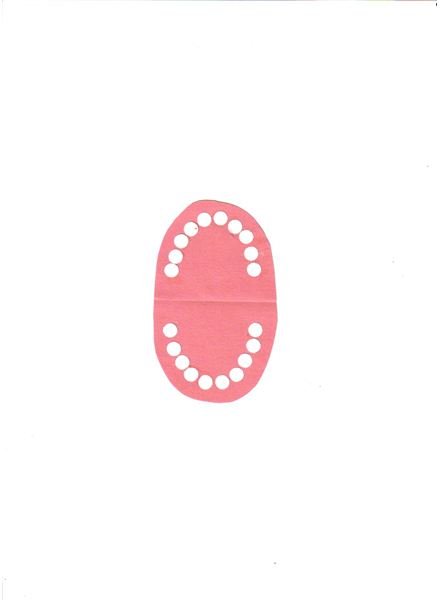
Since it is hard to tell from a mirror, this craft will introduce children to the amount of teeth they have. When finished, they will have a visual display for them to see the layout of their teeth. Begin by handing out the red construction papers to the children and ask them to cut out the oval using their safety scissors. Once completed, have them glue 10 circles (teeth) to the top part of the oval and the other 10 to the bottom. You could also use the circles that form from a hole-punch for easy, pre-cut circles. The ovals will have to be reduced in size to accommodate the smaller “teeth.”
Once the teeth are set and dry, have the children fold the “mouth” in half. This craft is intended to be folded as a mouth would be (for a visual reminder), and then opened for further exploration. You could extend this craft’s teaching scope by sharing which baby teeth will be typically lost first, depending on the age and maturity of your class.
Brush Away the Yuck
Materials Needed:
Wax paper with a large tooth traced on it (one for each child)
Washable markers (enough for the children to share)
Sponges cut in 1x1" squares (one for each child)
Safety scissors (enough for the children to share)
Containers with water (enough for the children to share)
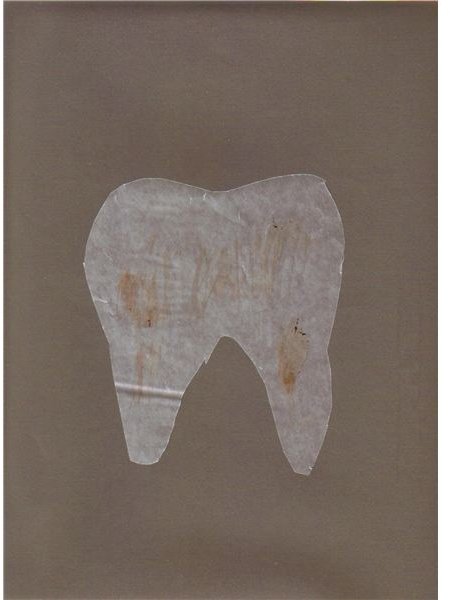
This craft will help teach children that food leaves residue on their teeth, which could cause decay over time. Begin this activity by handing out the wax papers to each child. Have them cut out the tooth using their safety scissors. Once completed, have the children color the teeth using the erasable markers. After their teeth are creatively covered, explain that this is what happens after we eat food and that we use brushes to clean our teeth. Hand out a sponge to each student. Explain that the sponge is like a toothbrush. Show them how to clean their tooth using the sponge. You could demonstrate different types of brush strokes for effective cleaning. Sometimes the sponges will have to be wetted to clean them, just like a toothbrush. This preschool tooth brushing craft is simple, but it is for practicing brush strokes over and over again, fine-tuning teeth cleaning skills.
Tooth and Floss Bag
Materials Needed:
Pre-cut 4x4" squares of any color construction paper (two for each child)
White construction paper with a tooth traced on it sized to fit within the 4x4" square (one for each child)
Safety scissors (enough for the children to share)
Glue sticks (enough for the children to share)
Dental Floss pre-cut in 6" lengths (one for each child)
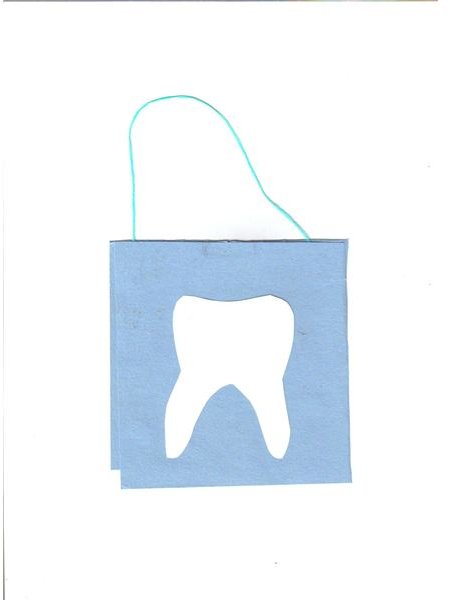
February 28th is deemed Tooth Fairy Day, and the American Dental Association announced that February is National Children’s Dental Health Month, so continue this theme in your classroom with this useful craft. Anyone can buy a tooth fairy pillow, but your children will be delighted to create their very own Tooth and Floss bag. Begin this craft by handing out the pre-cut squares to the children as well as a piece of floss. Demonstrate how they are to use the glue sticks provided and glue the floss onto one of the squares, as you would a strap on a purse. Once completed, have the children glue 3 sides of the square that contains the floss allowing for an opening at the top. Have them place the other square on top. After handing out the white construction paper, have your students cut out the tooth and glue it to one of the squares. If time allows, you could have them decorate their bags using crayons or markers. They will be proud to show off their work to the tooth fairy, by using this bag underneath their pillow when they lose a tooth.
Preschool art activities on teeth are a great motivational tool for dental care. Keeping teeth healthy starts as soon as they sprout up and children can be active participants once they learn how. Help your students get excited about cleaning their teeth and prepare them for that special day when they lose their first one.
Resources
Tooth Fairy Day, Children’s Book Almanac.com
American Dental Association’s Tooth Eruption Charts,mouthhealthy.org
Crafts are created from author’s own experience
Images: provided by author, all rights reserved