An Educational Printable Preschool Craft of a Clock
Telling time is a fundamental life skill that all children have to learn. Teaching kids how to tell time is not only educational, but it raises the child’s self-confidence and makes them feel grown-up.
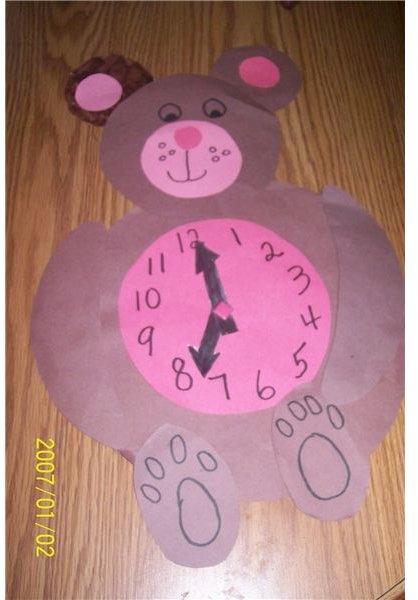
A Cuddly Bear Clock
Find something children can relate to, and turn it into a telling time project, like this cute bear clock craft.
Materials:
Brown, pink, red, and black construction paper
Pink brad
Black marker
Glue
Directions:
The teacher will pre-cut one large, one medium, and two small circles out of brown construction paper. The large circle will be used for the bear’s belly, the medium circle for the head, and two small circles for the ears. Cut smaller pink circles for the inside the ears, and mouth. The teacher will then draw the mouth on the pink circle, and cut a small red circle for the nose. The teacher will draw the eyes on the head. They will then cut a circle out of red construction paper, which will be the clock placed inside the bear’s belly. Write numbers on the red circle for the clock, cut arrows (the clock’s hands) out of black paper and attach with the pink brad. Cut the bear feet and arms out of brown construction paper. Draw an outline of the bear’s paw with a black marker. Have the children glue the bear together. Then have them glue the clock on the bear’s belly. Once this craft is finished, watch your students as they “bear-ly” contain their excitement to learn how to tell time.
You can find the bear and clock printable in the media gallery.
Planetary Grandfather Clock Craft
Explain to the children what a grandfather clock is and show several photographs. Tell the children they will be making a grandfather clock to take home with them. The children can practice telling time while learning about the different planets, as they work on their space clock craft daily.
Materials:
Several large star stickers, or star cut-outs from construction paper
Blue paper plate
Soda can box flat, or shoe box with the lid glued down
Printable of the planets
Toilet paper rolls (2 for each clock)
Blue acrylic paint
Paintbrushes
Containers for blue paint
Yellow paper
Brad
Black permanent marker
Steps:
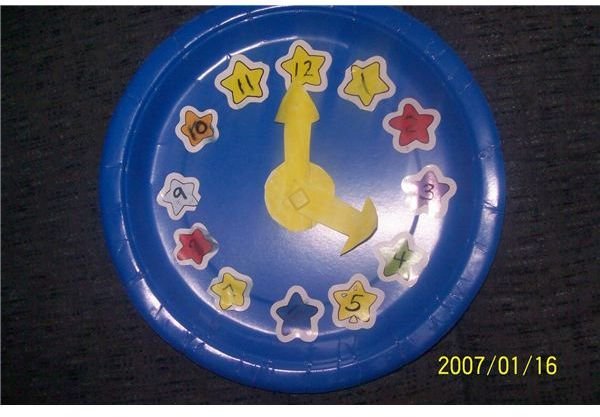
Day 1: The teacher will write the numbers 1-12 on the star stickers with a black marker. Students will place the stickers in the correct position on the blue paper plate. The teacher will make sure everyone is placing their stickers correctly. The teacher will cut the clock hands and a small yellow circle out of yellow construction or cardstock paper. The teacher will attach the hands and circle to the paper plate with a brad.
Day 2: The teacher will cut a large arch in the box and give each student a container with blue paint and a brush. Students will paint the box blue and let it dry.
Day 3: Help children glue the clock on top of the box. The teacher will give each child two toilet paper rolls and help them glue the rolls on the inside of the painted box. The teacher will cut a long strip of cardboard and glue to the back of the box between the toilet paper rolls. This strip will become the clock pendulum.
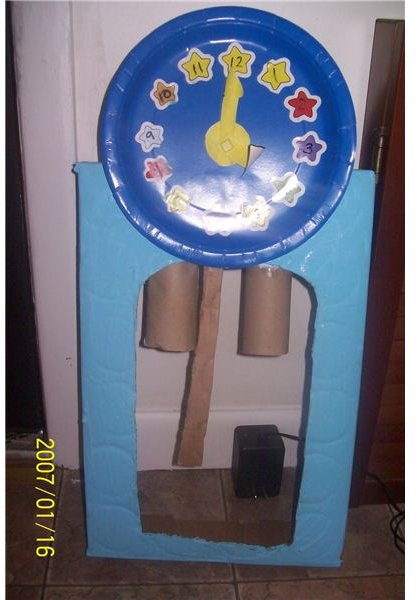
Lay the project over to dry.
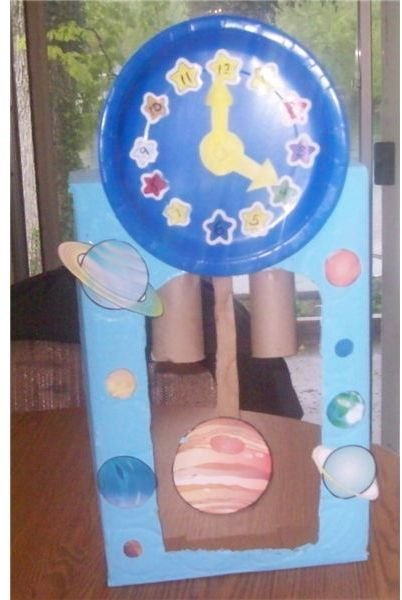
Day 4: The teacher will give each child a sheet of planets and have them cut them out and glue them on their clock. Make sure they glue Jupiter on the middle pendulum. The planet printables can be found in the media gallery.
Wind Students Up
Now it’s time to wind students up with these neat clock crafts that will keep their brains ticking. Learning to tell time may be difficult for some children, but it doesn’t have to be boring.
References
Crafts and Photos by Lisa King, all rights reserved.