Three Preschool Deer Crafts that You Will Love Deer-ly
Using crafts in any lesson plan in preschool helps to create understanding though hands-on-learning. Teachers engaged in lesson plans about the letter “d,” a forest theme or even deer in general will find these preschool deer crafts as a welcome addition. Before the children begin, demonstrate how they should be completed in a step-by-step manner, which will also give them a model when you are finished to reference throughout their construction time.
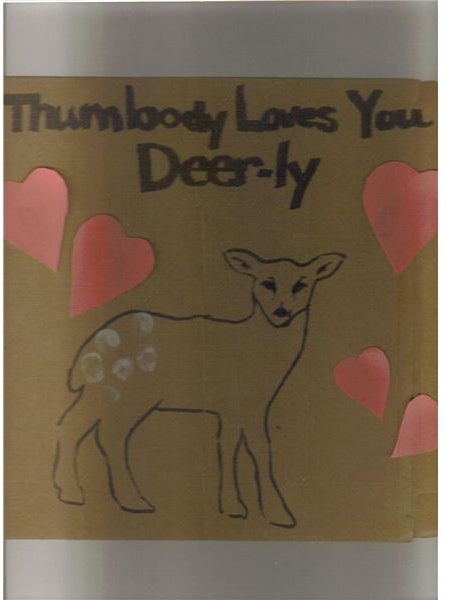
Thumbprint Fawn
_
Materials Needed:
-Brown construction paper containing the image of a deer and titled, “Thumbody Loves You Deer-ly” (one for each child)
-White tempera paint placed in bowls
-Pre-cut red construction paper hearts or heart stickers (at least 4 per child to place around the deer)
-Glue stick
This craft is always welcomed by a child’s caregivers, and fun to make as well! Hand out the piece of brown construction paper to each child. Having the white paint ready in bowls, ask the children to dip their thumbs in the paint and place them on the rear end of the deer. This will create the easily identifiable characteristic of a fawn. Once the paint has dried, have the children use the glue stick to glue the pre-cut hearts around their deer (or place the stickers if that was your medium of choice). You could also substitute the brown construction paper with used brown paper bags, which would work perfectly when teaching a unit on recycling.
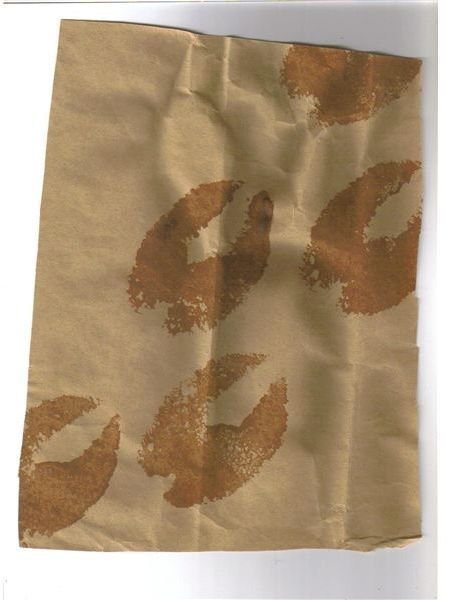
Muddy Tracks
Materials Needed:
-Brown construction paper (one piece per child)
-Pre-cut sponge in the shape of a deer hoof (few per table for the children to share)
-A dark brown tempera paint placed in bowls
Ask the children if any of them has ever seen muddy footprints. Teach them about deer tracks and how to identify them among other animal tracks. When teaching them how to identify a deer’s tracks in mud, this activity will fit right in. Hand out a piece of brown construction paper to each child. In the center of the tables you will already have arranged the dark brown tempera paint in bowls along with the deer “hooves.” Have them make tracks in the “mud” by placing the sponges down in a walking line, such as how a deer would make imprints in mud. This reference model was used using a recycled paper bag. Remind them to keep a look out for deer tracks in their own backyard, or when exploring the forest with their caregivers.
Tail Tie-On’s

Materials Needed:
-White construction paper pre-cut in deer tail form or simple triangles (one for each child)
-Brown tempera paint (placed in bowls with brushes to be shared)
-Hole-punch (one for teacher use)
-String (one for each child, long enough to fit belt-like when tied around a student’s mid-section)
Although there are some variations among deer, this craft will mimic the white-tailed deer. Hand out the pre-cut tails or triangles to each student. Have them paint the characteristic brown section of a deer’s tail onto the white form. Once dried, put a hole-punch through the top of the tail. If easier, this step can be completed prior to hand out. Hand out the strings to the children and ask them to place the string through the hole at the top of the tail. This step is helpful in the area of fine motor skill development as well. Once strung, tie the tail around their midsection if they wish. Now your students can act out being a deer with their friends!
Designed to strengthen understanding of the subject area, these preschool deer crafts will have your little dears having fun while learning some very important things about this beautiful animal!
Resource: Personal Experience
Photo Credits: Author