Fun and Creative Snowman Craft Project Ideas for the Kindergarten Classroom
Page content
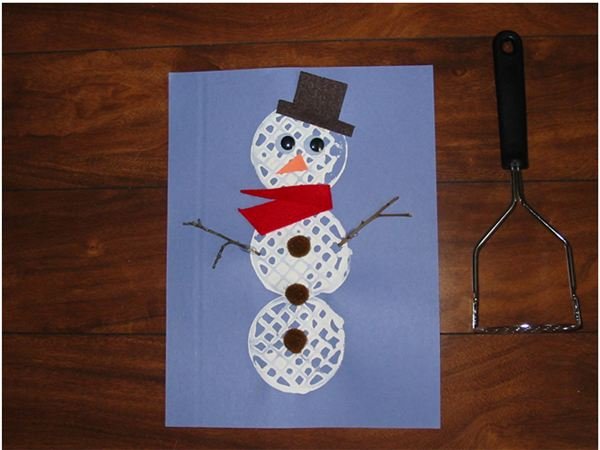
Potato Masher Snowman
This kitchen utensil can do more than just mash potatoes. How about using it as an art tool?
You will need:
- Metal potato masher utensil
- Blue construction paper
- White paint (non-toxic)
- Paper plate
- Enhancements to decorate
- Heavy-duty glue
- Safety scissors
- Small twigs
Directions:
- Put a dab of white paint into a paper plate.
- Dip the potato masher into the paint and proceed to print three round circles on the blue paper. Let this dry thoroughly.
- Find some small twigs outdoors and glue them onto your snowman (middle circle) as his arms.
- Proceed to add facial features. I used googly eyes, orange construction paper (carrot) nose and a black felt top hat.
- Place pom-poms or buttons down the snowman’s body, and then add a red scarf (I used red felt) at the snowman’s neck.
Note: Your students can decorate their snowman as they wish. Provide a variety of materials for the kids to glue on.
Paper Doll Snowmen
Do you remember playing with paper dolls? Take this method and make snowmen friends for your students to decorate.
You will need:
- White construction paper
- Snowman template
- Pencil
- Safety scissors
- Markers in many colors
- Glitter glue in a variety of colors
Directions:
- Cut a strip of paper approximately 4-inches wide and across the 8 ½ x 11 sheet of white paper.
- Create a snowman template (as seen in the photo).
- Accordion fold this paper to fit the snowman template (approximately 3-inches wide).
- Invite the children to trace around the template on the top fold of the paper.
- Carefully cut the snowman out remembering not to cut off the entire fold. Open up the paper to find a group of snowmen attached by their arms.
- Challenge your students to draw clothes and features with the markers.
- Add a little sparkle with glitter glue and let dry thoroughly.
Balloon Print Snowman
A small balloon is a perfect tool to print circles on paper. Vary the sizes to make a cute snowman.
You will need:
- Small balloon
- Blue construction paper
- White non-toxic paint
- Paper plate
- Brown and black marker
- Enhancement materials to decorate
- Glue
- Safety scissors
Directions:
- Blow up the balloon.
- Place a dab of white paint into a paper plate. Dip each balloon into the paint and print a three-circle snowman onto the blue paper. You can vary the sizes by pushing down on the balloon (light to make it small and heavy to make a larger print). Let this dry.
- Decorate the snowman with enhancement materials to complete the face, hat and buttons.
- Draw twig arms and some dry grass along the bottom of the snowman.
Note: There is no right or wrong way to decorate this snowman. Let the children use their own creative ideas on this project.
References
- Snowman Paper Dolls adapted from directions on how to make paper dolls.
- Balloon Print Snowman adapted from http://cookingwithruthie.com/2014/12/04/balloon-printed-snowman/
- Photos by Tania K. Cowling, all rights reserved