Activities for Teaching Geometry: Art and Shapes
Why Art?
Activities for teaching geometry lesson for young students can often be bland. Adding an art component to the plans provides students with a hands-on medium for learning. Classroom teachers may want to coordinate their efforts with the art teacher; however, the following instructions can easily be accomplished without collaboration of the art teacher.
Geometry and art have a history of melding together since the first sketches created on the walls of caves. Circles, triangles and lines are found in the most primitive art discovered by archeologists. In the time of Di Vinci, artists used the Golden Triangle and the Golden Rectangle to create masterpieces that still bring awe to viewers.
Preparation
One of the best parts of using art when teaching math is that the lesson takes little preparation. A teacher only needs access to art supplies.
Materials needed for the following geometry/art activities include:
- large white paper
- crayons
- markers
- pencils
- rulers
- various sizes of circles
- imagination
- various shapes cut from cardboard
- wooden popsicle sticks
Vocabulary
Introduce students to the various shapes and their names before beginning the art activities. This will be especially important for younger students. Start with basic shapes such as circle, square, triangle and rectangle. Once these are mastered, introduce shapes such as oval, pentagon, hexagon, oblong and various types of triangle (equilateral, isosceles, and scalene).
Circles and Triangles and Squares, Oh My!
The first activity is an easy one to teach very young students, yet, it can be enhanced to challenge older students.
The objectives of this activity is to -
- introduce different shapes to students
- have students observe and create patterns
- have students develop the ability to see shapes in the world around them
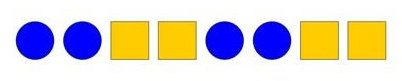
For young students, begin by giving them various cutouts of shapes to trace on their paper. An adult can aid the student in placing the shapes in a pattern such as two squares, two circles, two squares, etc. Once the pattern of shapes is made, students can color in the shapes.
After students have created their pattern, they can practice counting and naming the shapes, stating the colors as well as counting the number of groupings. For example: two groups of blue circles; two groups of yellow squares.
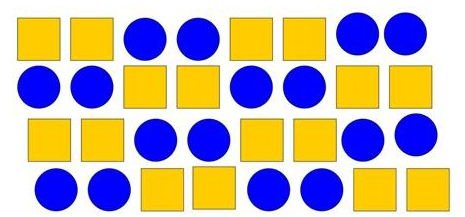
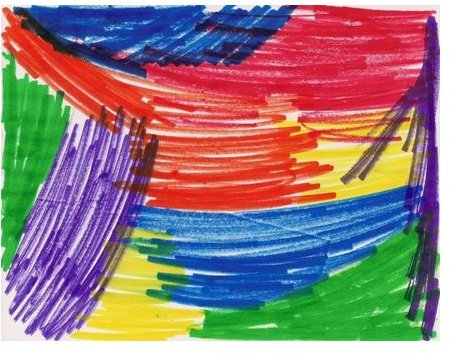
Older students may be given the option to use the cutouts or to draw shapes free hand. They, also, can create patterns; however, their patterns should fill the entire page to create the look of wallpaper.
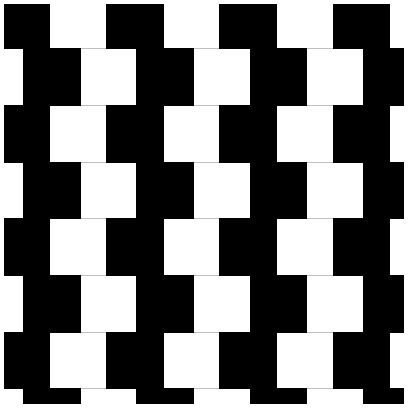
For a real challenge, have students create optical illusions using their shapes. The easiest way to introduce this idea is to create a line drawing of a box. Ask the students which end of the box is facing out. Depending on how they look at the picture, their perspective will change. They can, then, create their own optical illusions using shapes. Here is a simple example of one created with squares:
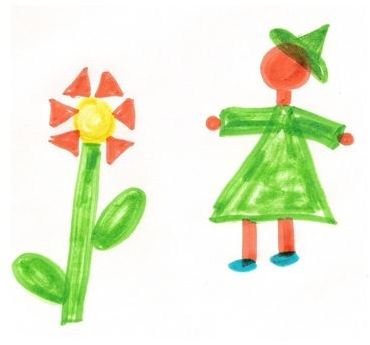
The next activity asks the students to look at natural objects and see geometry in them. They then copy what they see.
In other words, a flower can be made up of a long, thin rectangle, a circle and several triangles or ovals of various sizes. Once the picture is sketched out, students can color or paint it, even adding background for interest. The following will give you an idea of how this looks. (If the classroom has shape manipulatives, then students can make pictures on their desks using the manipulatives, first. Once created, they can then draw what they have formed with the manipulatives.)
Scratch Art and Geometry
The final activity for this unit is what is called scratch art. It is an interesting way to create a picture and can incorporate watercolors and or markers and crayons.
The objectives of this activity is to have students practice drawing shapes on their own, while giving them the opportunity to do so creatively.
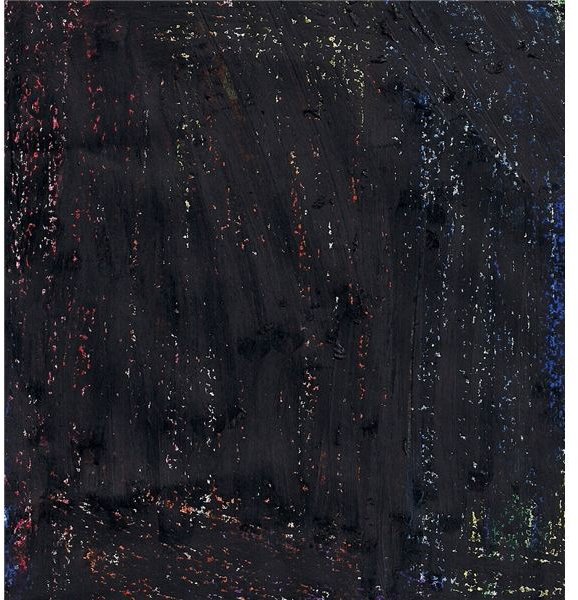
Begin by having the students color their entire paper randomly with either watercolors or markers. The entire sheet should be filled like so:
After the picture is dry, the student uses a black crayon to cover the entire sheet. This works best with the large black primary school crayons because the painting must be complete covered in black crayon.
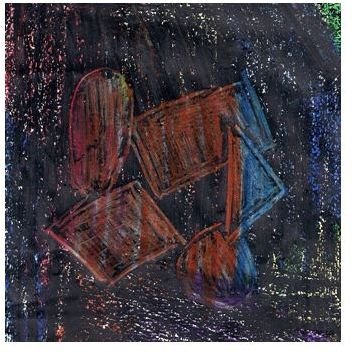
Finally, the students take a popsicle stick, scratching out various shapes to create an interesting modern art drawing. Note: students can scratch out just the outline of the shapes or the complete shape as show in this example.
Coming Full Circle
Activities for teaching geometry lessons that incorporate art are a formula for exciting and interesting creative projects! These math coloring activities not only scaffold into geometry lessons, but also can be used to scaffold patterns, color identification and lessons in modern or abstract art.
References
- Images: All images are from the author with the exception of Optical Illusion by Henohenomoheji under Creative Commons on Wikimedia Commons
- Source: Author’s Own Experience