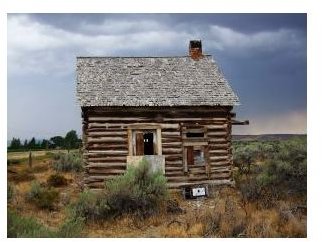
Make Abe Lincoln's Cabin with 1/2 Pint Milk Cartons: Elementary Student Craft
To introduce your students to President’s Day and the United States’ 16th President Abraham Lincoln, read the book, Meet Abraham Lincoln by, Barbara Cary. This book is age appropriate for 4-8 year olds, so it is a good read aloud for pre-school through 4th grade classes. You can purchase the book at Amazon.com for $4.99 or purchase it used for $.30. It is an affordable resource for teachers. You can, of course, check your library first to see if you can borrow it for free, but if you purchase it, then you will have it year after year.
You will need the following items to make your log cabin:
- One half pint milk carton for each student.
- Scissors
- Brown construction paper
- Glue
- “Light” chocolate frosting
- Pretzels
- Chocolate Graham crackers
- Plastic butter knives
- Newspaper
Follow the directions below to create your log cabin:
- Lay a sheet of newspaper across each student’s desk for easy clean up.
- Wash enough half pint milk cartons for each student to have one. When dry, pass them out.
- Pass out a plastic butter knife and some chocolate frosting.
- Pass out six Graham crackers to each student. Have the students spread the chocolate frosting on one section of the Graham cracker at a time. The Graham crackers will be the sides and roof of the log cabin. Set two Graham crackers aside for the roof.
- Have each student lay pretzels, side by side, in a row from the top to the bottom of the “walls”. By snapping the pretzels to fit the side that they are working on, students will use visual estimation. Next, the students press the pretzels into the frosting to create the log cabin look.
- Have them keep laying the pretzels on three Graham crackers or sides of the log cabin.
- When they reach the front they will need to frame out the door and the windows with pretzels.
- Have the students cut out a door and some windows from the construction paper. Press them into the frame.
- Draw a doorknob on the door with a marker. Students can also add detail to their windows with markers.
- Now students need to use graham cracker pieces for the roof. The roof pieces should be larger than the actual roof since it hangs over the edge.
- Using the frosting on the top edges of the “walls”, press the pieces of the roof into place. Students may need more icing at the peak of the roof, where the two sides of the roof meet.
Optional:
Use peanut butter instead of icing.
This post is part of the series: President’s Day Crafts
When teaching about the Presidents, it be will fun for students to create these President’s Day crafts.
- President’s Day Crafts 1: Washington’s Wig
- Make Lincoln’s Log Cabin: A Fun President’s Day Craft
- President’s Day Crafts 3: George Washington and the Cherry Tree
- President’s Day Craft for Preschool: The American Flag
- Make Presidential Puzzles in the Elementary Classroom
