The Life Cycle of a Butterfly for 1st Grade Science
There are many different lesson plans addressing the life cycle of the butterfly for 1st grade. What makes this project different? The hands-on learning which occurs when students create their own models.
Read Aloud
Begin with a read-aloud detailing the life cycle of a caterpillar. For PreK-1st Grade students, a good choice would be “The Very Hungry Caterpillar” by Eric Carle. For older elementary students, the book “From Caterpillar to Butterfly: Following the Life Cycle written by Suzanne Slade” will provide a more detailed look at the metamorphosis from caterpillar to butterfly.
Below you will find a four-part project that will further demonstrate the entire life cycle of a caterpillar, and encourage a deeper level of understanding regardless of age.
Project - Part One (day one)
Materials:
- egg cartons cut into 3-cup sections
- green paint
- black crayon or marker
- pipe cleaner (bent in half)
Give each student a pipe cleaner and 3-cup section of the egg cartons. The egg cartons will be used to represent the caterpillar. Have the students paint the egg cartons green, and use the black crayon or marker to give their caterpillar eyes.
Add the pipe cleaner to the head of the caterpillar by poking it up through the underside to represent the antennae. Allow caterpillars to dry. Once dry, find a spot for all of the caterpillars to “rest.” This could be on a desk, a table, a ledge or even a bulletin board.
Project - Part Two (day two)
Materials:
- Assorted colors of tissue paper sheets, cut into 1"x1" squares
- wax paper
- liquid starch
- paintbrush
- template of a butterfly shape - approximately the size of a regular sheet of paper (enough for each student to have one)
- tape (optional)
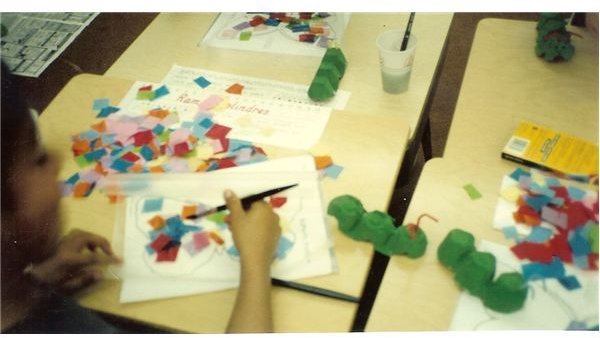
The next project is to make a butterfly. Place the butterfly template on a table or desk. Over the template, lay a piece of wax paper approximately the same size. You may wish to tape this sheet down to the desk, so that it does not slide around.
Using a paintbrush, cover the back of a tissue paper square with liquid starch. Put the square down on the wax paper, inside the template of the butterfly. Continue the process, using various colors of tissue paper, until the entire shape of the butterfly is covered.
Go back over the entire shape very lightly with a small amount of liquid starch, to cover any edges still sticking up. Allow the project to dry, and then carefully cut out the tissue paper butterfly. Save the templates to use again next year! Collect all of the butterflies, and put them away. Do not send them home yet! They will be used in a few weeks for a surprise.
Project - Part Three (day three)
Materials:
- Brown paper lunch bags
- sticks (approximately 12" long)
- Previously made caterpillars
Today, the caterpillars will enter their cocoons. Give each 1st grader a brown paper bag, and instruct them to crunch them up into a ball. They should not rip the bags…we are just trying to make them look more like a cocoon and less like a lunch sack.
Instruct the students to say goodbye to their caterpillar, and then place it inside the paper “cocoon.” Twist the top of the bag together, so that the caterpillar will not fall out. Poke the long stick through the bag, again being careful so that the bag does not rip.
Hang cocoons from the ceiling in the classroom, if at all possible. (Fishing wire with a bent paperclip tied to each end work well for this purpose.) Ask students if they remember how long it takes a caterpillar to go through metamorphosis. Discuss that it depends on the species. Some take as little as two weeks, while others can take months. If students ask what “species” the caterpillars they made are…simply tell them they will have to wait and see.
Project - Part Four (day 17)
Before the students come to class, remove all of the cocoons that have been hanging from the ceiling. In their place, hang the butterflies made on day two. Make sure you put each child’s butterfly in the same exact spot their cocoon was hanging. Oh, how surprised they will be to see that the metamorphosis has occurred, and their green caterpillars have now become lovely butterflies!
With these science activities for elementary students, your classroom will have first-hand knowledge of the life cycle of the butterfly. For 1st grade students - this lesson will surely last a lifetime!