Elementary Class Halloween Art Projects That Are Easy and Economical
Paint Chip Creatures
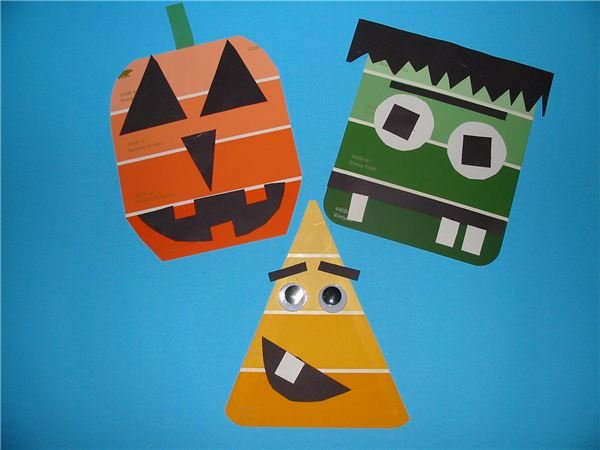
Start with a discussion of the symbols we see during Halloween, such as the infamous jack-o-lantern, monsters, candy corn, ghosts and more. For an art project, take these symbols and create the faces of Halloween on paint chip cards. Many home improvement or paint stores carry the chips that are larger in size (approx. 5” x 6”). These chips are free to the public, but if you ask the manager, they may supply you with enough chips for your class. There are three characters in the photograph; however, the technique is the same – cut and paste.
An orange chip is perfect to make a jack-o-lantern. You need to round off the corners to make it pumpkin-shaped. Cut black construction paper eyes, nose and mouth. The features can be smiling or scary – this is up to the child. Glue these in place and then add a green stem at the top to complete this paper pumpkin.
A green chip is perfect for a monster like Frankenstein. Keep him in the square shape and add a goofy or scary face with bold eyes, square-fringed hairline and toothy grin. Monsters also look good using a purple chip.
Use a variegated yellow chip to make a candy corn. Cut this chip into a triangle and add a happy face. A set of googly eyes can replace construction paper if you wish.
These Halloween characters make colorful wall decorations by themselves or they can be attached to ribbon to create a border.
Paper Plate Spider Web
Stringy webs are synonymous with Halloween. What creates these webs? Spiders, of course! This craft is perfect for children to practice lacing. Punch equally spaced holes around a paper plate. Give each child a length of yarn. To make the end stiff for lacing you can wrap cellophane tape around it to make a needle.
Tape the opposite end on the back of the plate and show the children how to lace in and out of the various holes to make a spider web. You can use one color or add different strands of yarn for a colorful web. Just make sure to securely tape one end of the yarn to the back of the plate while lacing and then secure the yarn when finished. After the web is completed, it is time to make a spider.
For each spider, you will need one pom-pom, a set of small googly eyes and four construction paper strips to make the spider’s eight legs. Glue the items together to make a spider and then attach it to the paper plate with heavy-duty glue or a low-temperature glue gun.
Q-tip Skeleton
Display a jointed skeleton decoration and have the students find the main body parts (arms, legs, chest and so on). Explain that the body has 206 bones. This craft idea is not a replica of the human body, but a cute mini skeleton that is perfect for teaching that humans have a bone formation and that skeletons are also a symbol used during Halloween.
Draw a simple head on white paper and have the children cut out this piece. They can leave it white or color it with crayons or markers. On a sheet of black construction paper, lay out a simple skeleton using cotton swabs. Make sure to have a vertical swab as the spine and extend ribs horizontally. Use additional swabs for the arms and legs. Glue these onto the black paper along with the head piece.