Teaching Your Unit About Spring: Elementary Activities Across the Curriculum
Learning About Spring
The grass gets greener, flowers bloom, butterflies flutter, and, if you use this elementary unit on spring, your students will enjoy
learning.
Objectives
- Students will recognize and use weather words related to spring.
- Students will correctly sequence the steps in the lifecycle of the butterfly.
- Students will name and label parts of the flower.
- Students will identify three stages in the water cycle.
Weather Words
-
Present words related to spring weather to students and discuss what they mean. Use this list or one that includes the words you want students to practice: warm, sunny, rainy, shower, eyebrow, windy, rainbow, raindrop, and cloud.
-
Make bound-book illustrated word dictionaries. Students will write the word at the top of the page, draw a picture to represent it in the middle and write a sentence using the word at the bottom. Depending on the composition skills of the students, this can be a sentence provided by the teacher for copying, one that the class composes together or one written individually.
To make the books themselves, download these instructions.
Water Cycle Pyramid
Introduce a simple version of the water cycle by illustrating it on a pyramid.
- Fold a square of cardstock diagonally (“taco” style) twice to make a small triangle.
- Unfold the paper and cut on one fold to the center point.
- Overlap and glue the two resulting triangles to form a pyramid.
Students draw a pond, lake, ocean, puddle, or other body of water. After coloring it, they cut it out and glue it to one of the inside faces of the pyramid. Then, they repeat the steps for a picture of clouds and a picture of rain.
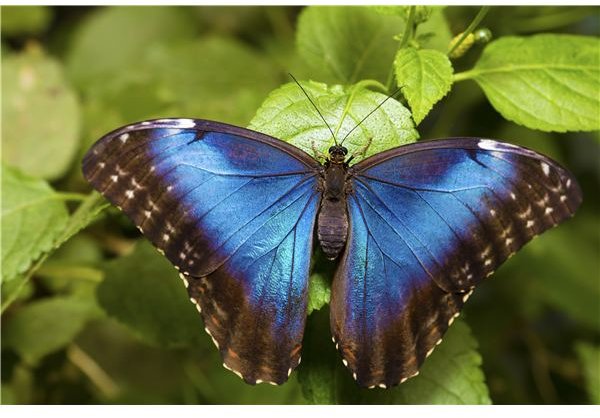
Butterfly Life
Introduce young students to the four stages of a butterfly’s life: eggs, caterpillars, chrysalis and adult.
- After discussing the cycle, allow students to color and cut out pictures of each stage, which you’ve printed on cardstock.
- Students practice sequencing and science skills both by placing the pictures in the correct order. You can make the practice self-correcting by numbering the pictures on the back.
- Next, ask students to describe the stages, prompting them to use transition words like “first,” “next,” “then,” and “last.”
For more fun, allow students to make tri-fold pocket envelopes shaped like butterflies in which to store their pictures.
Extend this lesson by purchasing butterfly eggs or caterpillars and raising them in a class terrarium. You’ll find links at the end of this article for eggs and for information on raising butterflies.
Flower Parts
Teach simple parts of a flower with a fun art project.
- Provide students with a picture of a plant, complete with roots, stem, leaves and flowers.
- Introduce the corresponding terms. Display a transparency of the picture and help students label the parts.
- After they have neatly labeled the picture, allow students to use tissue paper to make a “puff” picture. Click to download instructions.
Springtime Math Fun
Spring symbols offer a great chance to help students practice identifying patterns. Arrange flower pictures in a color pattern for students to duplicate, or simply alternate spring symbols. For more advanced students, use a series of ladybugs on which you vary the number of wing spots, or kites with different numbers of bows on the tails, or nests with different numbers of eggs.
Let students practice both math and writing by creating their own addition and subtraction word problems. Provide a shipping tag for each problem. On one side, students write the problem in words. On the other side, they use stickers, rubber stamps, or their own drawings to illustrate the problem. They also write the equation and solution below the pictures. Store the problem tags on a binder ring and allow students to use them to practice when they finish other assignments early.
Spring Writing
- Brainstorm a list of spring-related nouns, verbs and adjectives.
- Ask students to write descriptive sentences, paragraphs, or poems using the words from the list.
- Publish the writing in picture frame books featuring the writing on one side and an illustration on the other.
Just for Fun
Floral Stationery
What You Need: pressed flowers, waxed paper, facial tissues, glue, water, sponge brushes
- Collect, dry and press spring flowers. Single-layer blooms like pansies or buttercups work best for this project. You may also purchase pressed flowers at craft stores, although they are a little pricey.
- Place the flower face down on a piece of waxed paper.
- Mix white glue and water in equal parts.
- Separate a facial tissue into a single ply.
- Lay a piece of the tissue over the waxed paper.
- With a sponge brush, dab the glue mixture on the layered papers. It will wrinkle the tissue, making it look like parchment when it dries. Don’t worry if the tissue tears; just add another piece to patch it with more glue.
- Continue until the entire surface of the waxed paper is covered. Allow it to dry completely.
- Glue a piece of copy paper on top of the dried tissue.
- Use pinking shears or edging scissors to trim around the papers.
- Fold the sheet to make faux parchment note cards, or use it flat for letter sheets.
Tissue Flowers
What You Will Need: tissue paper, pipe cleaners
- Stack three to five 6-inch tissue squares.
- Fan-fold the stacked papers.
- Fold the stack to find the center. Wrap a pipe cleaner at that point to hold the fan together. Leave one end of the pipe cleaner long for the stem.
- Gently separate the tissue layers to “fluff” the flower into shape.
What You Will Need: 1/8-inch dowels, tissue paper, twine, fabric scraps; paper plates, markers, yarn
- Let students experiment to determine what shape of kite flies best or how the length or weight of the tail affects the flight.
- Make kites by tying the dowels with twine to build the cross or box frame. Glue tissue paper to the frame. Attach a twine and fabric bow tail.
- For younger children, punch holes on opposite sides of a paper plate the student has decorated. Tie the ends of a length of yarn to the holes. The student holds the center of the yarn to fly his kite.
With this elementary unit on spring, your students can have a great time and learn something new along the way.
Resources
[Big Book of Books and Activities](/tools/big book of books and activities), by Dinah Zike
For butterfly eggs and kits:
Free Butterfly Eggs - https://www.freebutterflyeggs.com/
The Butterfly Site - https://www.thebutterflysite.com/rearing.shtml
Educational Science - https://educationalscience.com/butterflyfarmkits.htm